

This dumplings recipe keeps things simple while still giving you the texture most people want from homemade dumplings. The wrappers turn soft and chewy, the filling stays juicy, and the bottoms get crisp and golden in the pan. You do not need special equipment or advanced folding skills to make them work. The method is straightforward once you go through one batch. If you enjoy cooking from scratch or want freezer friendly meals that actually reheat well, these dumplings are worth learning. They work as a full dinner, a side dish, or a weekend cooking project you can spread across a couple of days.
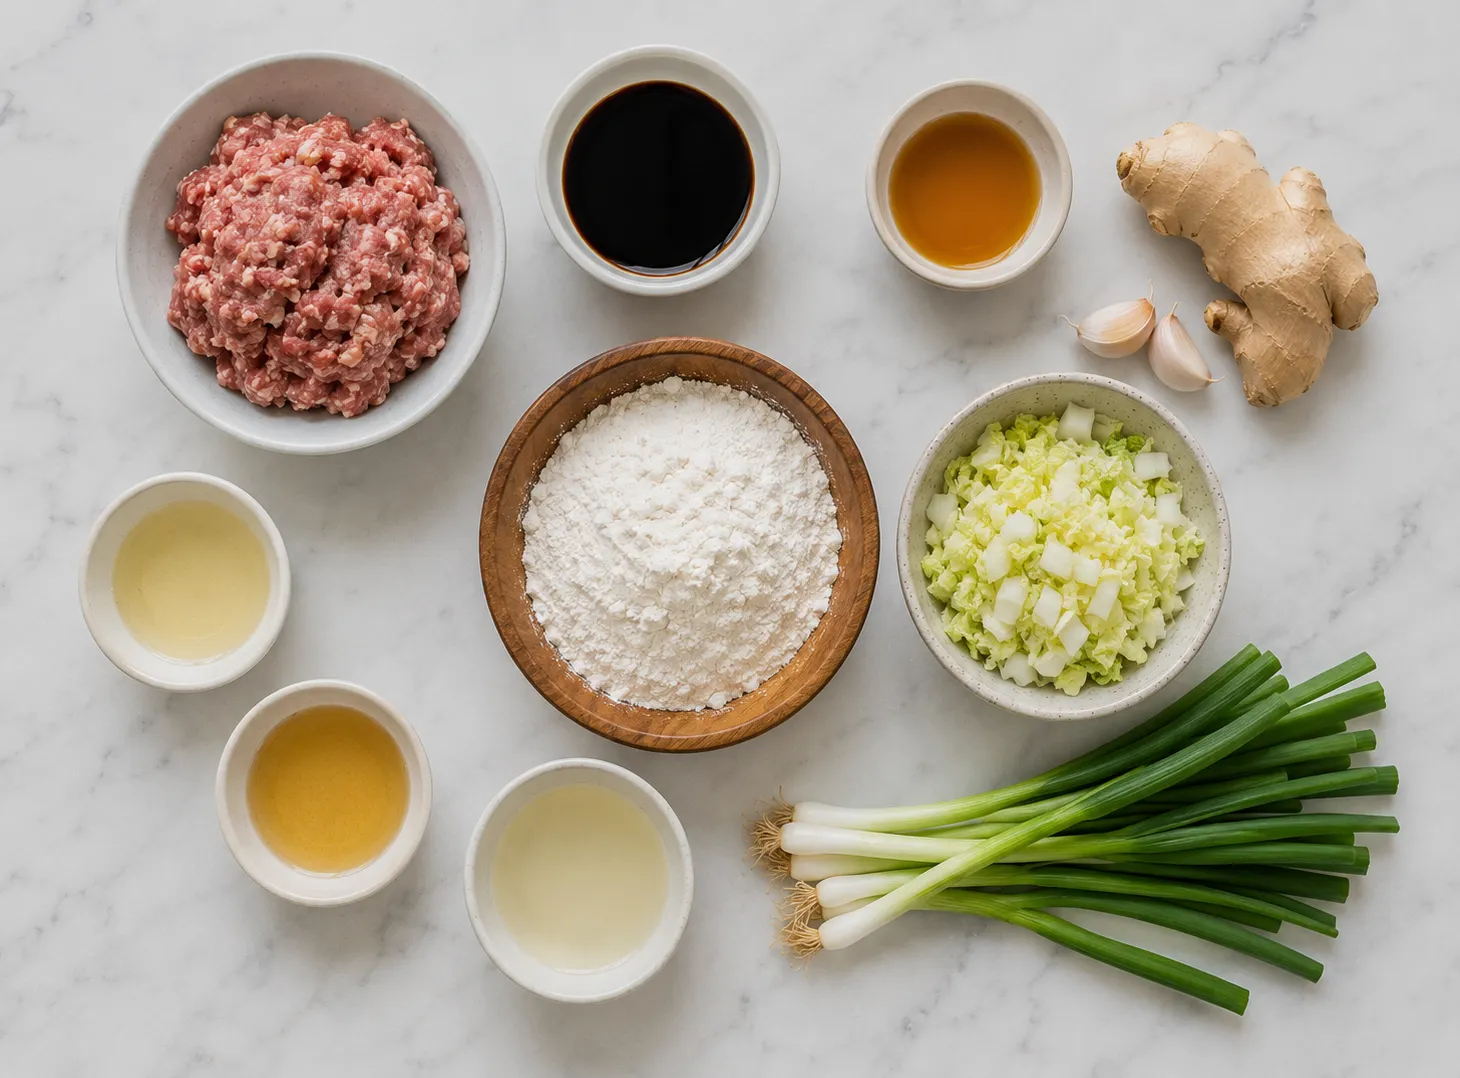
- 2 cups all purpose flour
- 0.8 cup boiling water
- 0.3 cup cold water
- 1/2 teaspoon salt
- 1/2 pound ground pork or chicken
- 1 cup napa cabbage, finely chopped
- 3 green onions, sliced thin
- 1 teaspoon fresh ginger, grated
- 2 garlic cloves, minced
- 2 tablespoons soy sauce
- 1 tablespoon sesame oil
- 1 tablespoon rice wine or dry sherry
- 1/2 teaspoon salt
- 1/3 teaspoon white pepper
- 2 tablespoons neutral oil
- 1/3 cup water for steaming
- 3 tablespoons soy sauce
- 1 tablespoon rice vinegar
- 1 teaspoon chili oil or sesame oil
- Large mixingLarge mixing bowl
- Rolling pin
- Sharp knife or bench scraper
- Measuring cups and spoons
- Non stick skillet with lid
- Wooden spoon or spatula
- Small bowl for dipping sauce
- Cutting board
- Kitchen towel
- Small spoon for filling bowl
- Non-stick skillet with a tight-fitting lid, 10 to 12 inch
- Rolling pin
- Sharp knife or bench scraper
- Small bowl for dipping sauce
- Clean kitchen towel or plastic wrap for covering dough
- Mix and knead the dough, then let it rest.
- Salt the cabbage and squeeze out the liquid.
- Combine the filling ingredients.
- Roll the wrappers and fill the dumplings.
- Pan fry until golden, then steam until cooked through.
- Step 1: Make the Dough
- Add the flour and salt to a large mixing bowl.
- Slowly pour in the boiling water while stirring with a fork or chopsticks. The hot water helps soften the dough and makes the wrappers easier to roll later.
- Add the cold water and continue mixing until the dough starts coming together in rough clumps.
- Transfer the dough onto a clean work surface.
- Knead for about 8 to 10 minutes until smooth. The dough should feel soft with a little resistance when pressed. If it feels sticky, dust lightly with flour. If it feels dry or stiff, wet your hands slightly and continue kneading.
- Cover the dough with a damp towel or plastic wrap and let it rest for 30 minutes.
- Do not skip the resting time. It makes rolling the wrappers much easier and keeps them from shrinking back while you work.
- Step 2: Remove Moisture From the Cabbage
- Place the chopped napa cabbage into a bowl.
- Sprinkle a pinch of salt over it and toss lightly.
- Let it sit for about 10 minutes. The cabbage will release a surprising amount of water during this time.
- Grab small handfuls and squeeze firmly over the sink until most of the liquid is gone.
- This step matters more than it seems. Watery cabbage turns the filling loose and can cause wrappers to tear while folding or cooking.
- Set the cabbage aside once squeezed dry.
- Step 3: Make the Filling
- In a mixing bowl, combine the ground pork or chicken with the cabbage, green onions, ginger, garlic, soy sauce, sesame oil, rice wine, salt, and white pepper.
- Mix everything together in one direction for about 1 to 2 minutes.
- The filling should become slightly sticky and hold together when stirred. That texture helps keep the inside juicy instead of crumbly after cooking.
- Cover and refrigerate while you prepare the wrappers.
- Cold filling is easier to handle and helps the dumplings keep their shape during folding.
- Step 4: Divide the Dough
- Cut the rested dough into 4 equal pieces.
- Roll each piece into a thick rope.
- Slice each rope into 8 to 10 smaller portions.
- Flatten each piece lightly with your palm.
- Keep the unused dough covered while you work so it does not dry out.
- Step 5: Roll the Wrappers
- Using a rolling pin, roll each dough piece into a circle about 3 to 3.5 inches wide.
- Roll from the outer edge toward the center while rotating the dough as you go.
- Try to keep the center slightly thicker than the edges. Thin edges fold better, while a slightly thicker middle supports the filling.
- If the wrappers start sticking, use a light dusting of flour.
- Stack finished wrappers under a towel while you continue.
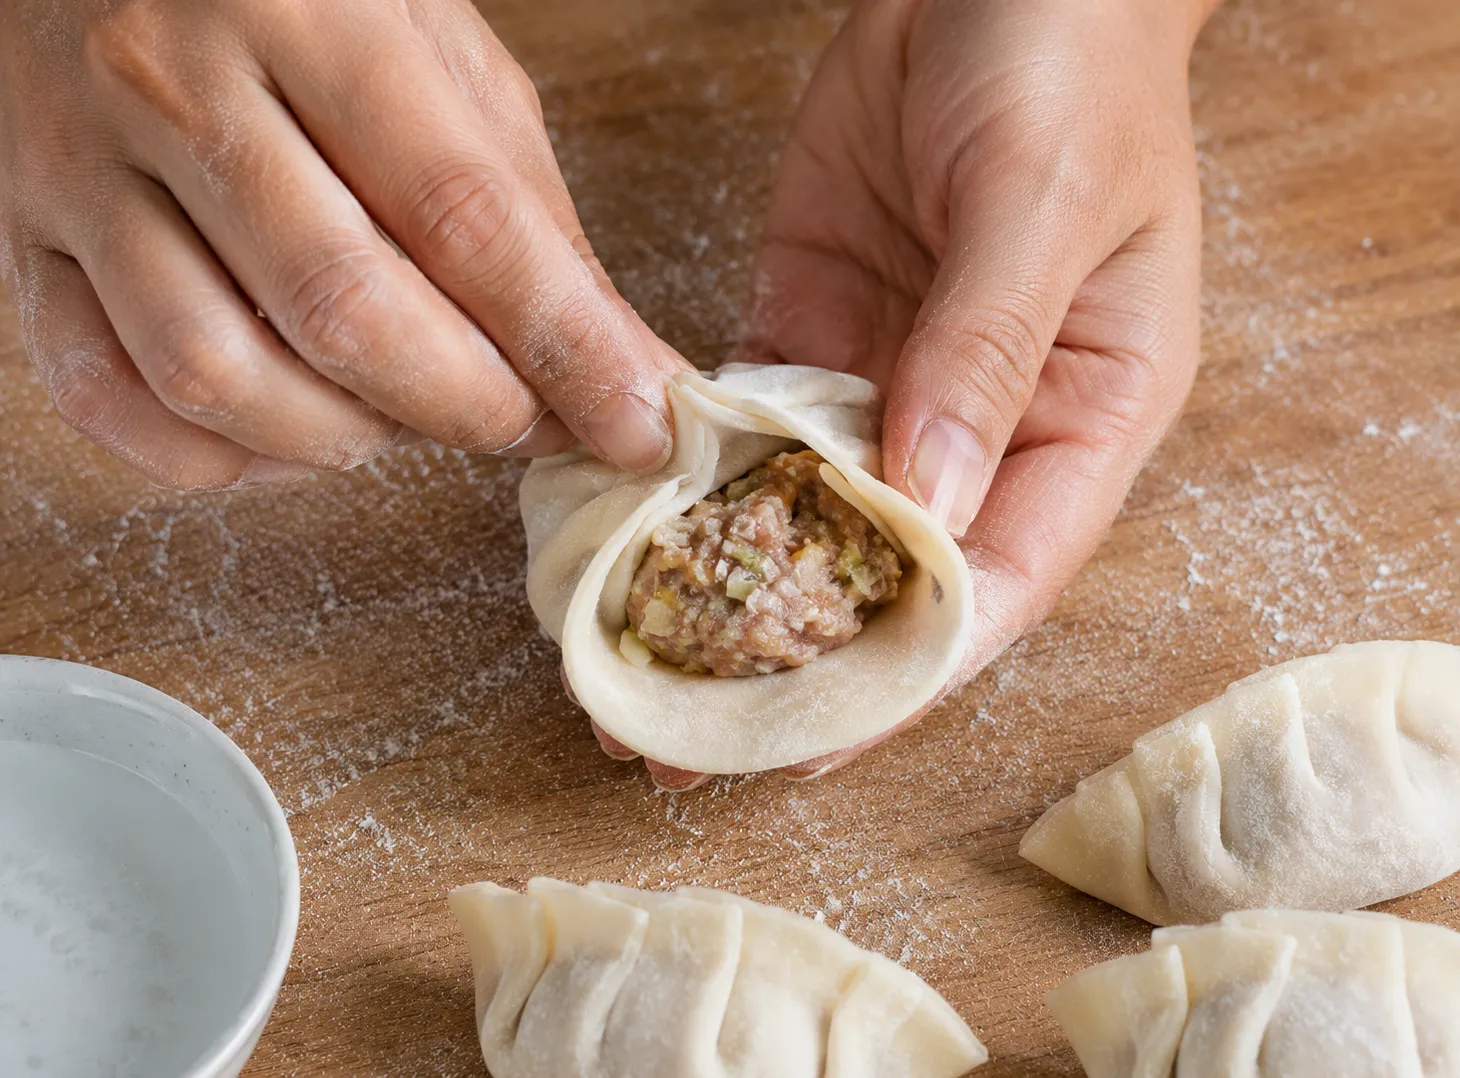
- Step 6: Fill and Seal
- Place about 1 heaping teaspoon of filling in the center of each wrapper.
- Fold the wrapper over the filling to create a half moon shape.
- Pinch the edges together firmly.
- You can leave the edge plain or pleat one side while sealing. Pleating is mostly for appearance, but it can help keep wetter fillings sealed tightly.
- Do not overfill the dumplings. Too much filling makes sealing difficult and increases the chance of tearing.
- Place finished dumplings on a lightly floured tray.
- Keep them covered while you finish the batch.
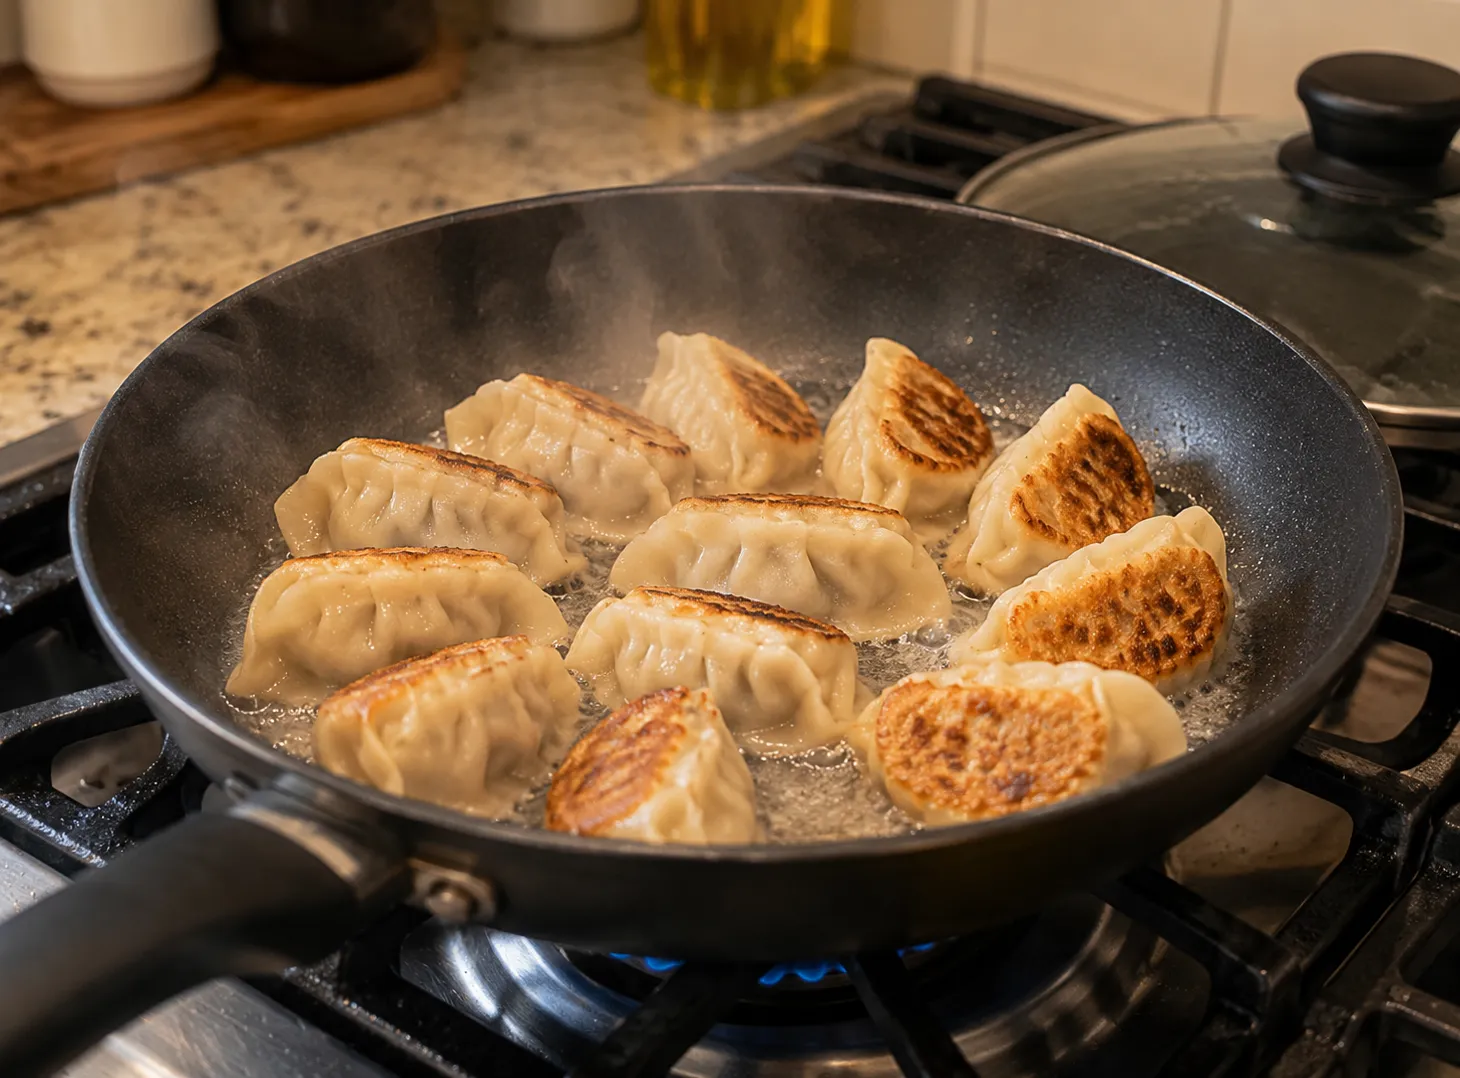
- Step 7: Pan Fry the Dumplings
- Heat neutral oil in a non stick skillet over medium high heat.
- Arrange the dumplings flat side down in the pan.
- Leave a little space between each one.
- Cook undisturbed for 2 to 3 minutes.
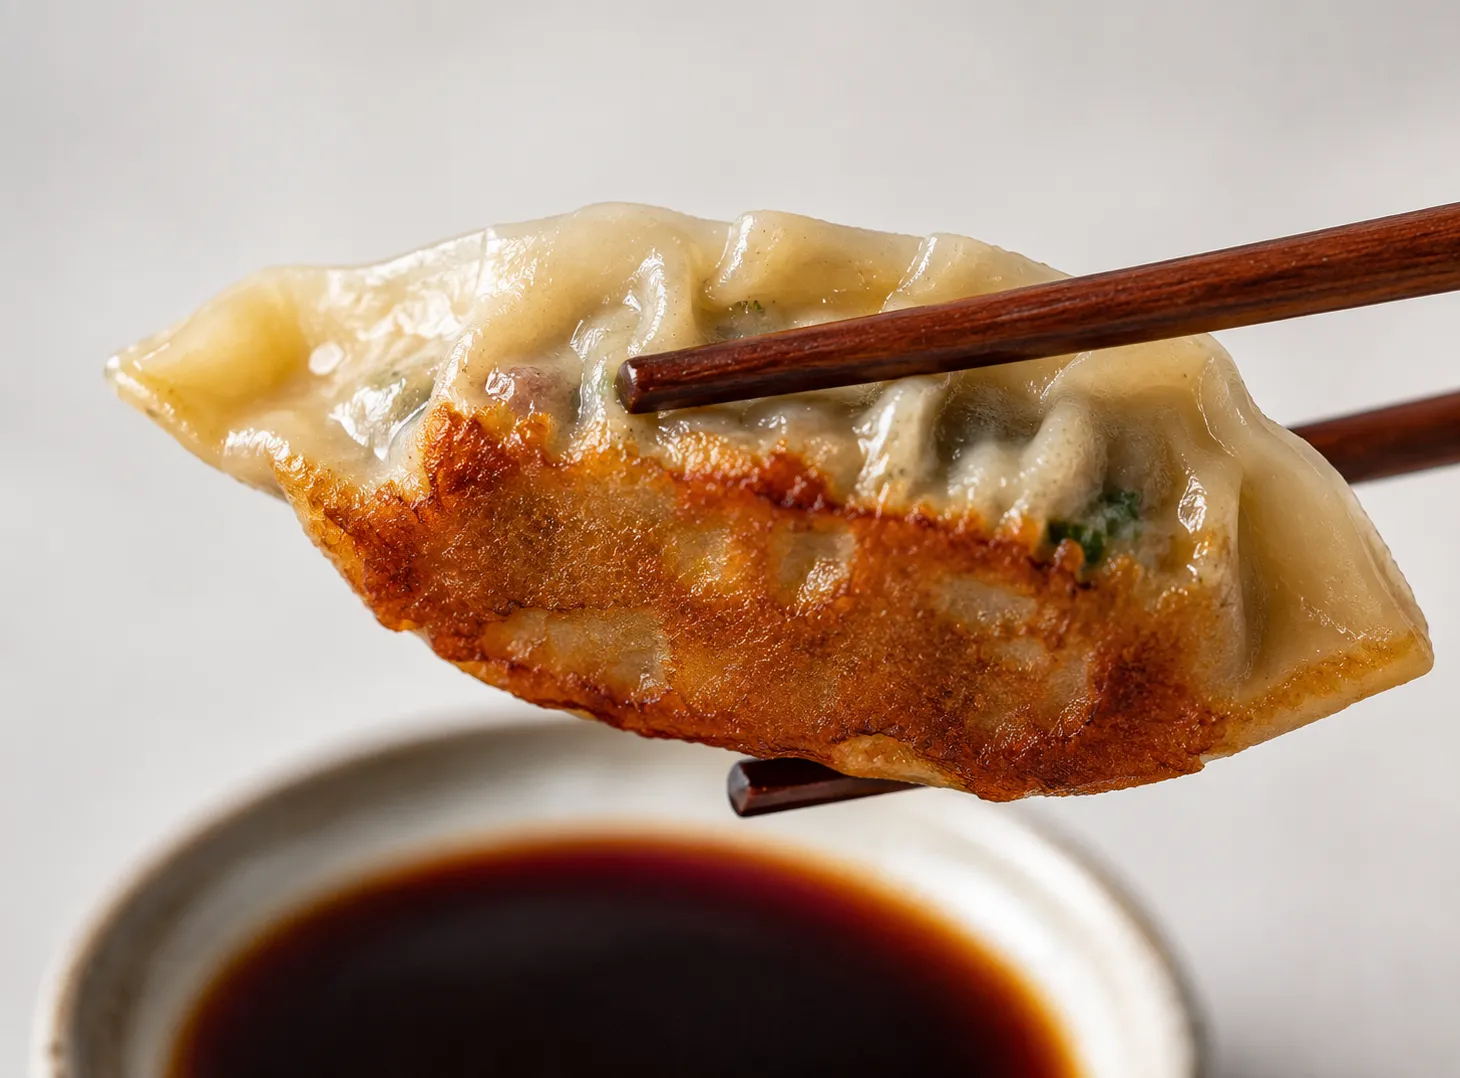
- The bottoms should turn deep golden brown before moving to the next step. Light browning will not give the same crisp texture.
- Avoid moving the dumplings too early. Once the crust forms, they release from the pan more easily.
- Step 8: Steam the Dumplings
- Carefully pour the water into the pan.
- Immediately cover with a lid because the oil will splatter.
- Reduce the heat to medium.
- Steam for 6 to 8 minutes until the water fully evaporates.
- Listen closely. Once the bubbling sound mostly disappears, remove the lid.
- Cook for 1 more minute to crisp the bottoms again.
- The wrappers should look slightly translucent and tender while the bottoms stay crisp.
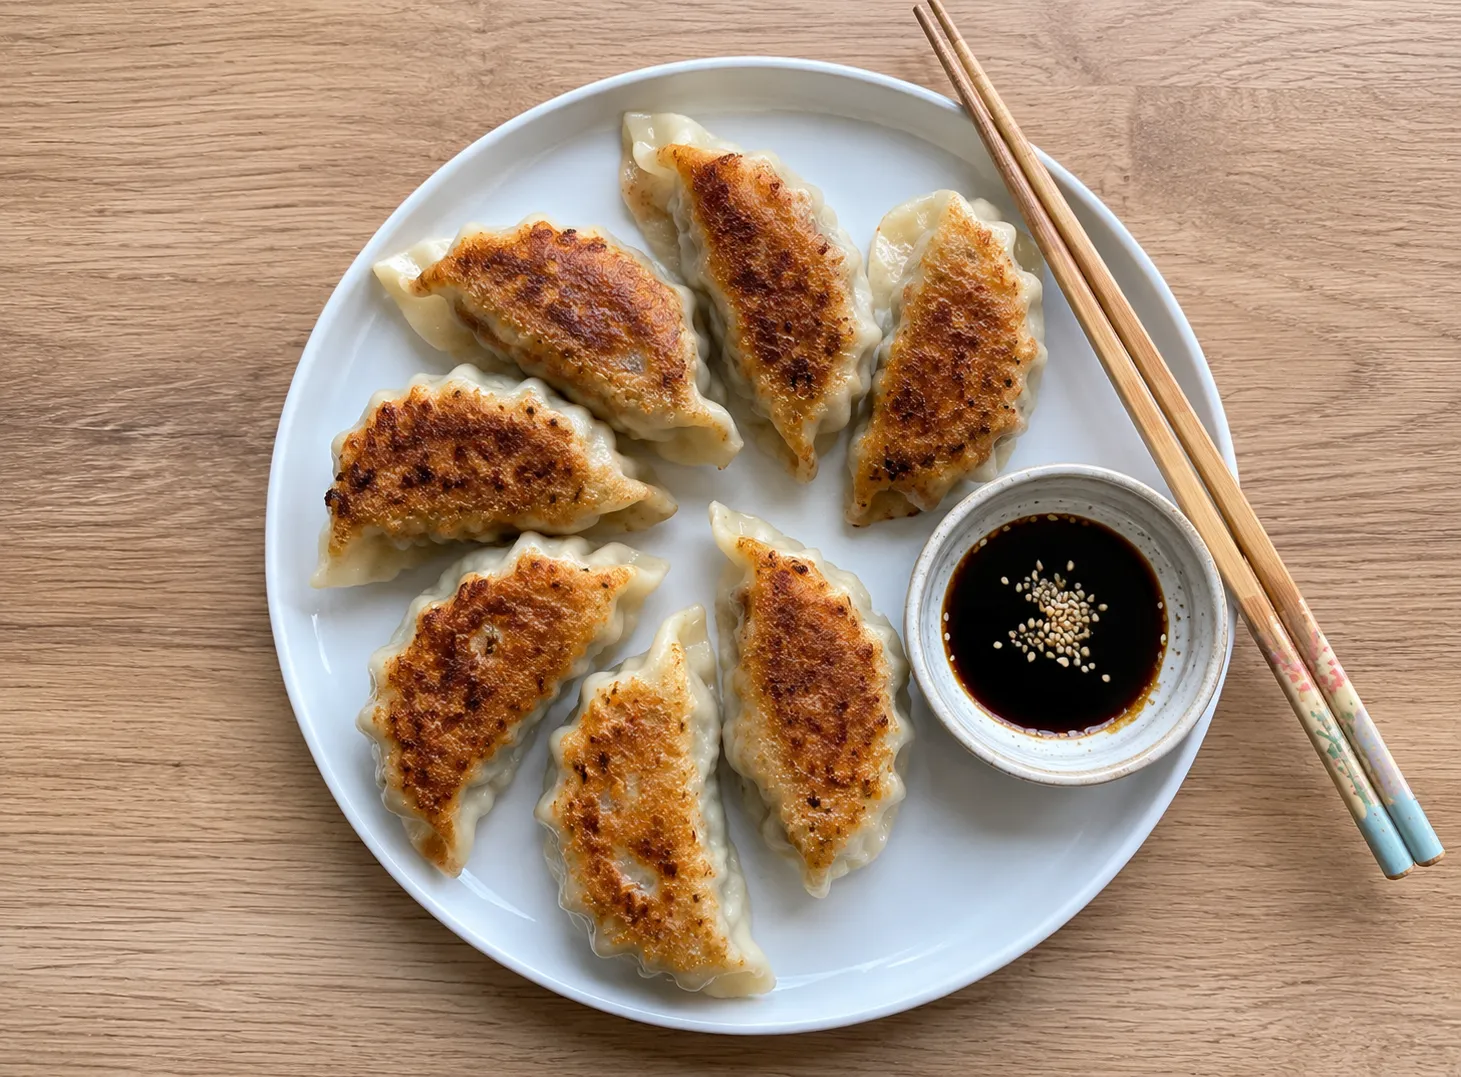
- Step 9: Make the Dipping Sauce
- Combine soy sauce, rice vinegar, and chili oil in a small bowl.
- Taste and adjust if needed.
- Some people like more vinegar for acidity while others prefer extra chili oil for heat.
- Serve the dumplings hot with the dipping sauce on the side.
- Rest the dough fully before rolling wrappers. It becomes much more workable.
- Keep finished wrappers covered with a towel so the edges do not dry out.
- Use medium high heat for frying. Low heat prevents proper browning.
- Squeeze the cabbage very well before mixing the filling.
- Stir the filling in one direction for better texture.
- Roll the wrapper edges thinner than the centers.
- Work in small batches if you are new to folding dumplings.
- If sealing becomes difficult, dab the wrapper edge lightly with water.
- Freeze extra dumplings uncooked so they keep their texture better.
- Use a non stick skillet if possible. It makes pan frying much easier.
- Skipping the dough resting time
- Overfilling the wrappers
- Leaving too much liquid in the cabbage
- Rolling wrappers too thin in the middle
- Frying on heat that is too low
- Adding steaming water before browning the bottoms properly
- Leaving wrappers uncovered while working
- Crowding too many dumplings into one pan
- Removing the lid before the water fully evaporates
- Reheating in the microwave for too long
- Use ground chicken or turkey instead of pork.
- Replace meat with crumbled tofu and mushrooms for a vegetarian version.
- Add chopped shrimp for extra texture.
- Swap napa cabbage with green cabbage if needed.
- Use garlic chives instead of green onions.
- Add chili crisp to the filling for heat.
- Steam the dumplings instead of pan frying if preferred.
- Use store bought wrappers to save time.
- Add finely grated carrots for extra sweetness.
- Serve with black vinegar instead of rice vinegar.
- Chili crisp
- Steamed rice
- Fried rice
- Garlic green beans
- Stir fried bok choy
- Cucumber salad
- Hot and sour soup
- Egg drop soup
- Sesame noodles
- Pickled vegetables
- Store cooked dumplings in an airtight container for up to 3 days.
- Reheat in a skillet with a splash of water and cover briefly.
- Avoid microwaving for too long because the wrappers can turn rubbery.
- Freeze uncooked dumplings on a tray before transferring to freezer bags.
- Frozen dumplings keep well for up to 3 months.
- Cook frozen dumplings directly from the freezer. No thawing needed.
- Add a couple extra minutes during steaming when cooking from frozen.
- Keep dipping sauce separate until serving.
Yes. Round gyoza wrappers work very well and save time if you do not want to make dough from scratch.
The filling was likely too wet or the wrappers dried out before sealing.
No. A simple pressed seal works fine as long as the edges are closed tightly.
Yes. Freeze them uncooked in a single layer first so they do not stick together.
After steaming for 6 to 8 minutes, the meat should no longer look pink inside.
Yes. Steam them for about 8 to 10 minutes until the wrappers turn tender and slightly translucent.
- Homemade wrappers stay softer than store bought ones after cooking.
- A little fat in the pork helps keep the filling juicy.
- Keep your work surface lightly floured, not heavily coated.
- Leftover filling works well in lettuce wraps or fried rice.
- Dumplings cook more evenly when they are all roughly the same size.
- The dough can be made a day ahead and refrigerated.
- If wrappers shrink while rolling, let the dough rest for a few minutes.
- Pan fried dumplings are best eaten fresh from the skillet.
- This recipe doubles well for freezer batches.
- The dipping sauce can be adjusted based on your taste.
Homemade dumplings take a little time, but the process is easier than it first looks. Once you finish one batch, the folding and cooking start feeling much more natural.
The crispy bottoms, soft wrappers, and juicy filling make this dumplings recipe worth keeping around. Freeze extras and you will have quick meals ready whenever you need them.