Snickers Brownie Bites With a Rich Chocolate Center
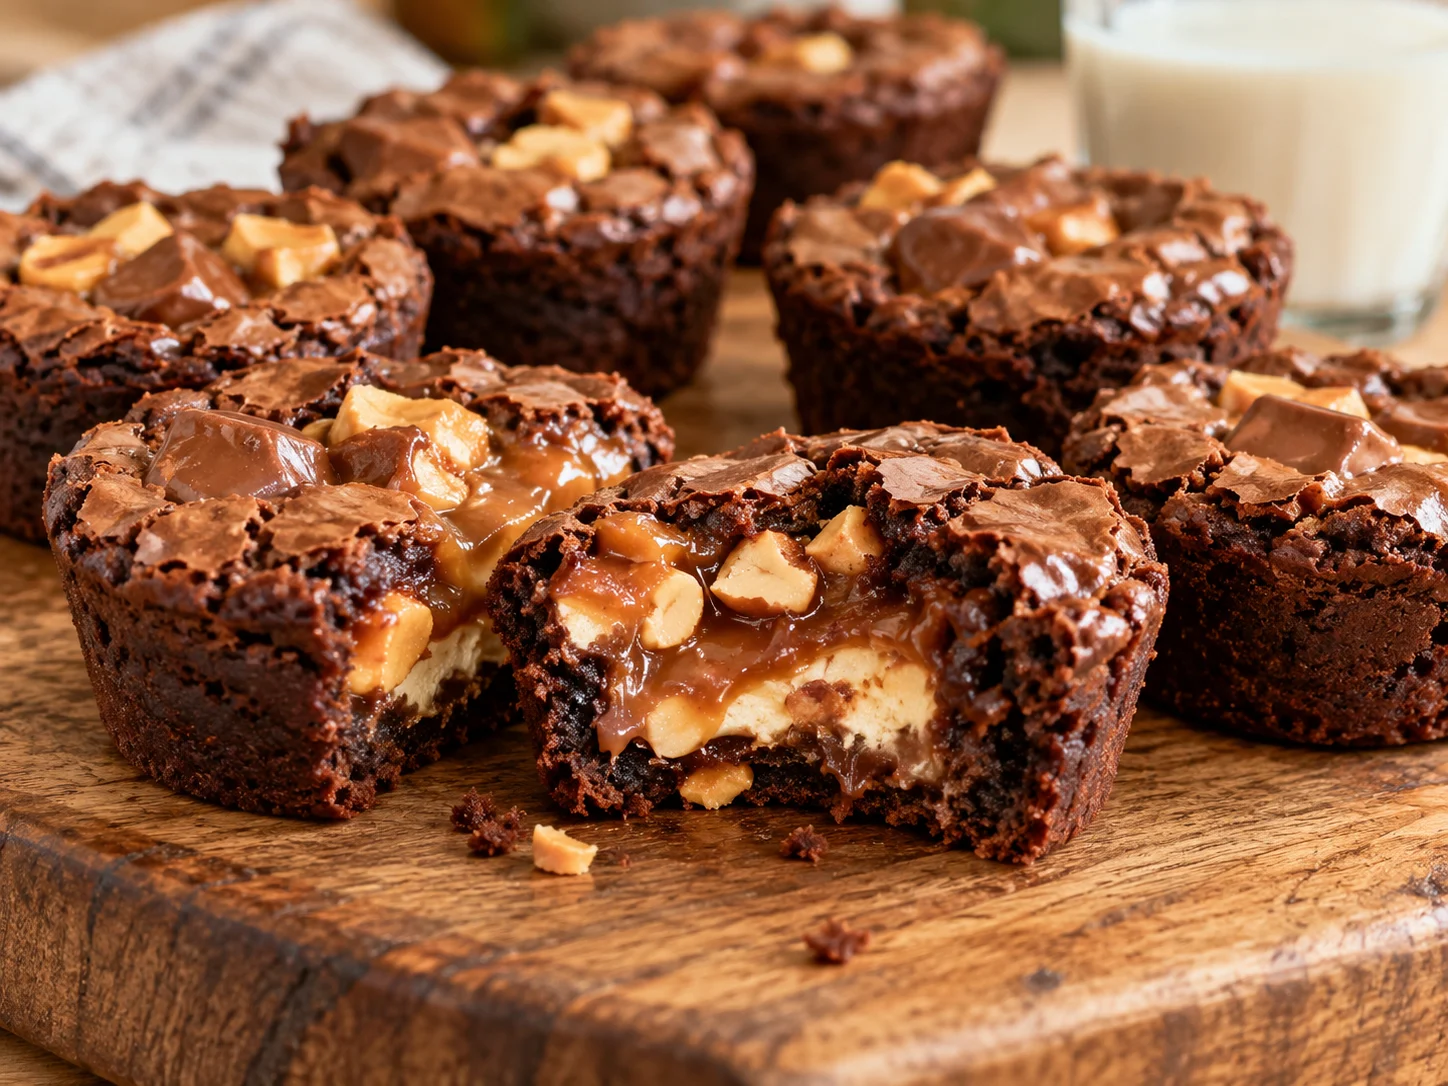
Snickers Brownie Bites turn a fudgy brownie batter into a two-bite treat with a candy bar tucked inside. Each mini muffin cup bakes around a miniature Snickers bar, so you get a crackly-edged brownie on the outside and a soft center of caramel, nougat, and peanuts waiting underneath. The batter comes together in one bowl with melted butter and chopped semisweet chocolate, and the whole batch makes 24 bites that work for parties, lunch boxes, and cookie trays. The method is simple, but a few details matter: how you fill the cups, how long you bake, and when you remove the bites from the pan. This guide walks through each one so the centers stay gooey and the brownies stay fudgy instead of dry.
Recipe timing: Prep: 15 minutes · Cook: 12 minutes · Rest/cooling: 10 minutes · Total elapsed time: 37 minutes.
Why You'll Love This Recipe
These bites give you everything people like about a stuffed brownie without the commitment of a full pan. The portions are small, the cleanup is minimal, and the surprise in the middle makes them feel more special than a standard square of brownie.
- Built-in portion control: Each bite is small enough to enjoy in a couple of mouthfuls, which makes them easy to share and easy to pack.
- One bowl, no mixer: The batter is whisked and folded by hand, so there are no special tools to dig out beyond a mini muffin pan.
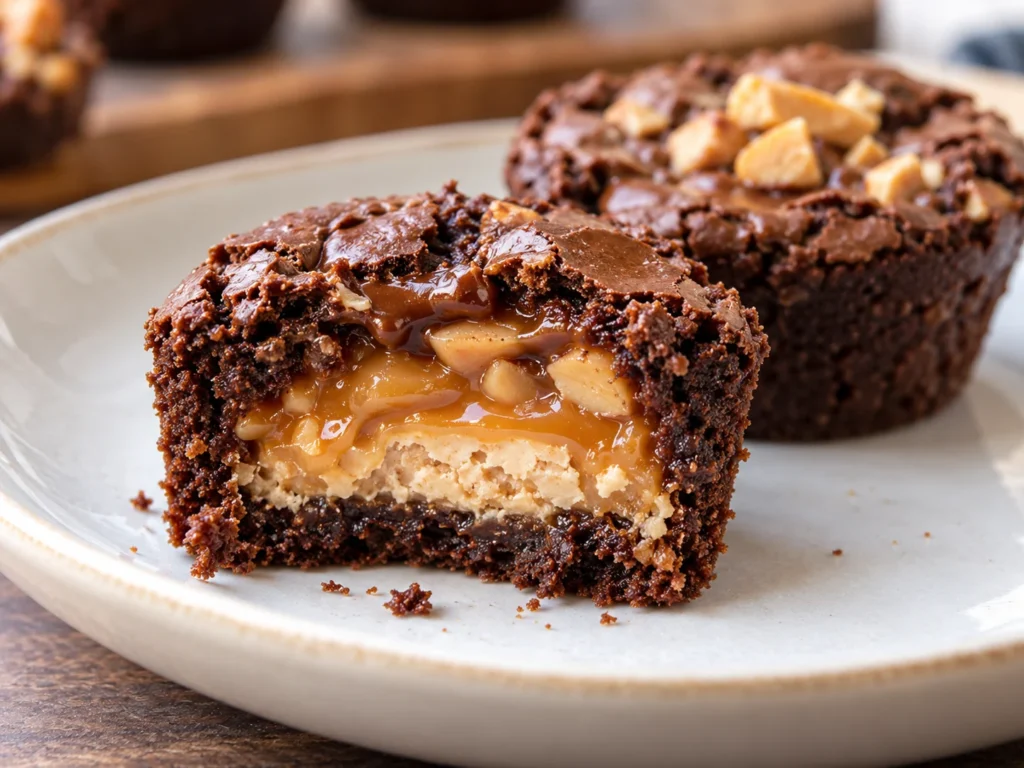
- A gooey center: The miniature Snickers bar softens as it bakes, creating a pocket of caramel, nougat, and peanuts surrounded by chocolate.
- Great for crowds: A batch makes 24 bites, so one pan covers a dessert table, a bake sale tray, or a school event.
- Make-ahead friendly: They hold well at room temperature and freeze neatly, so you can bake them before the day you need them.
Because the candy is baked inside the batter instead of chopped into it, every bite has a defined center rather than scattered pieces. That contrast between dense brownie and soft filling is the whole appeal.
Key Ingredients and Notes
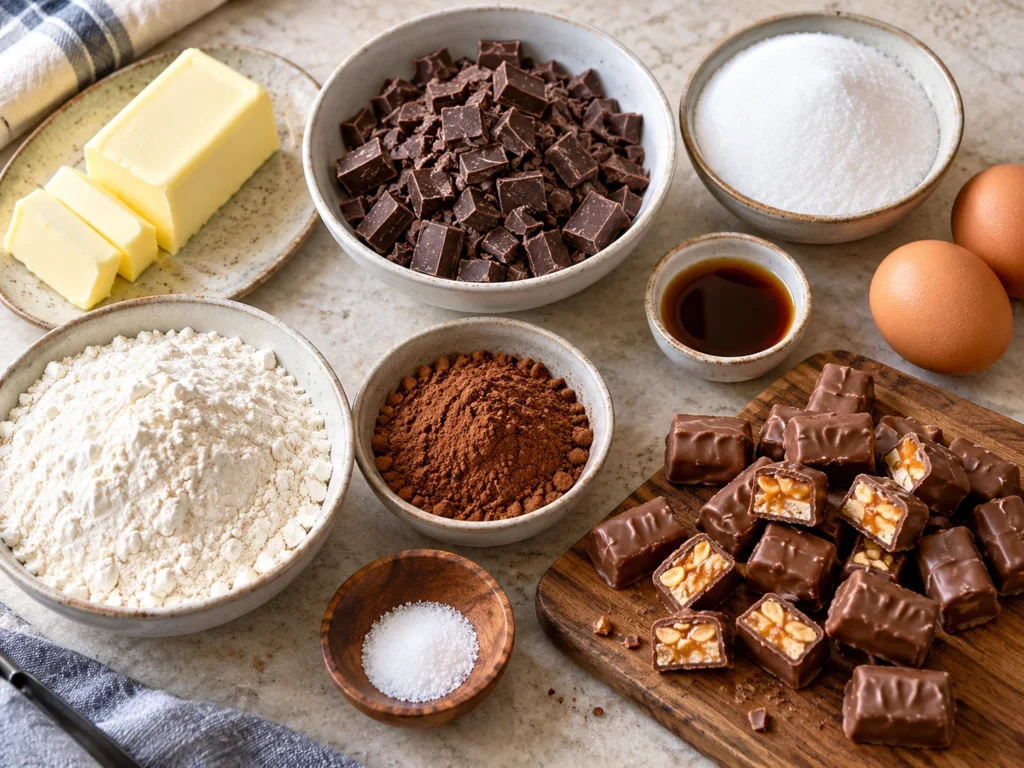
The ingredient list is short, and each item does a specific job. Understanding those jobs helps you troubleshoot if something looks off in the bowl.
- Unsalted butter (1/2 cup): Butter adds richness and keeps the crumb tender. Using unsalted lets you control the seasoning, since the Snickers centers already bring plenty of salt and sweetness.
- Semisweet chocolate (4 ounces, chopped): Real chopped chocolate melts into the butter and gives the batter its fudgy, deep flavor. Semisweet balances the sugar in the candy centers. Use a bar rather than chips if you can, since chips are formulated to hold their shape and can melt less smoothly.
- Granulated sugar (3/4 cup): Sugar sweetens the batter and helps create the thin, shiny, crackly surface on top when whisked well with the eggs.
- Large eggs (2): Eggs bind the batter and contribute to structure. Whisking them in until the batter turns glossy helps build that shiny top.
- Vanilla extract (1 teaspoon): Vanilla rounds out the chocolate flavor and keeps it from tasting flat.
- All-purpose flour (1/2 cup) and unsweetened cocoa powder (1/4 cup): This small amount of flour keeps the bites dense and fudgy, while cocoa deepens the chocolate flavor without adding more fat.
- Salt (1/4 teaspoon): Salt sharpens the chocolate and offsets the sweetness of the caramel.
- Miniature Snickers bars (24): One unwrapped bar per cup creates the center. Miniatures fit a mini muffin cup well, so there is no need to chop anything.
Measure the flour by spooning it into the measuring cup and leveling it off, rather than scooping directly from the bag. Packed flour is the most common reason brownies turn out cakey or dry. For the cocoa powder, either natural or Dutch-process works in this recipe; Dutch-process will taste slightly smoother and darker.
You will also need a 24-cup mini muffin pan, a medium microwave-safe bowl, a whisk, a spatula, and a wire rack. Grease the pan well, even if it is nonstick, because the melted caramel can cling to the metal.
How to Make Snickers Brownie Bites
Plan on 15 minutes of preparation, 12 minutes of baking, and 10 minutes of cooling in the pan, for a total of 37 minutes from start to finish. The cooling time matters here because it lets the filled centers settle before you move the bites.
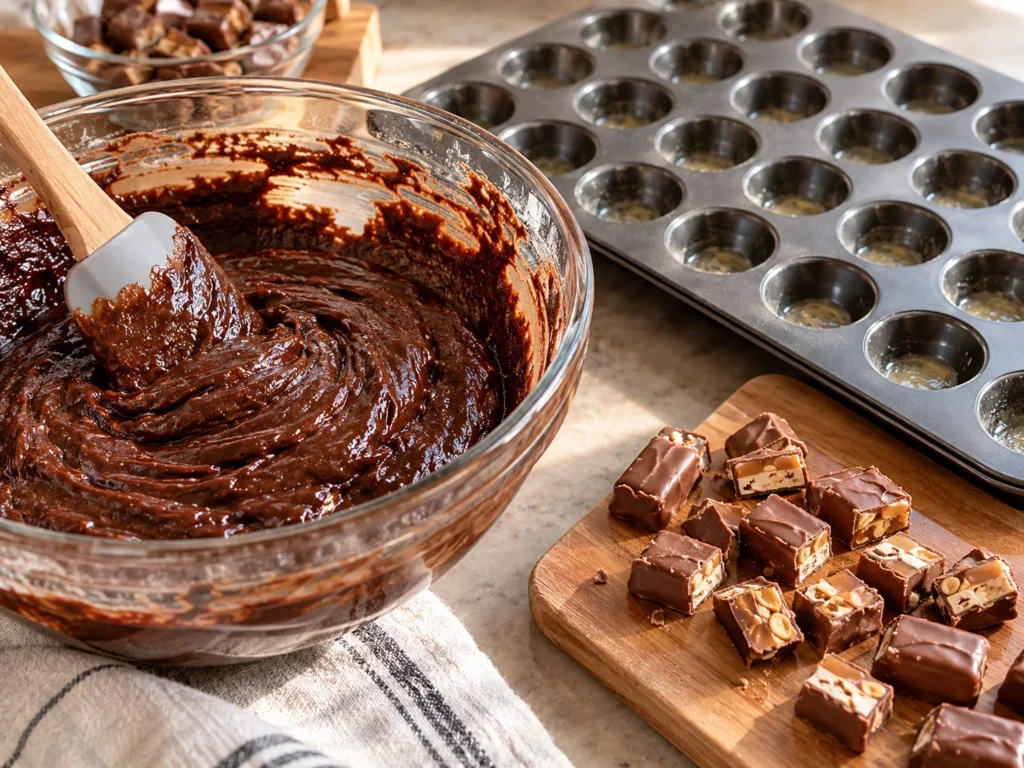
- Position a rack in the center of the oven and heat it to 350°F. Generously grease a 24-cup mini muffin pan with butter or nonstick spray, then unwrap all 24 miniature Snickers bars and set them nearby.
- Combine the butter and chopped semisweet chocolate in a medium microwave-safe bowl. Microwave in 30-second bursts, stirring after each, until the mixture is completely smooth. Let it cool until warm to the touch but no longer hot.
- Whisk the granulated sugar into the warm chocolate mixture until combined. Whisk in the eggs one at a time, then the vanilla, and keep whisking until the batter looks glossy and thick.
- Whisk the flour, cocoa powder, and salt together in a small bowl, then add it to the batter. Fold with a spatula just until no dry streaks remain; stop as soon as the batter is uniform.
- Spoon about half of the batter into the prepared cups, dividing it evenly so each cup is roughly one-third full.
- Press one miniature Snickers bar gently into the center of each cup so it sits in the middle of the batter.
- Divide the remaining batter among the cups, spooning it over and around each candy bar until it is mostly covered. Smooth the tops lightly with the back of the spoon; the cups should be about three-quarters full.
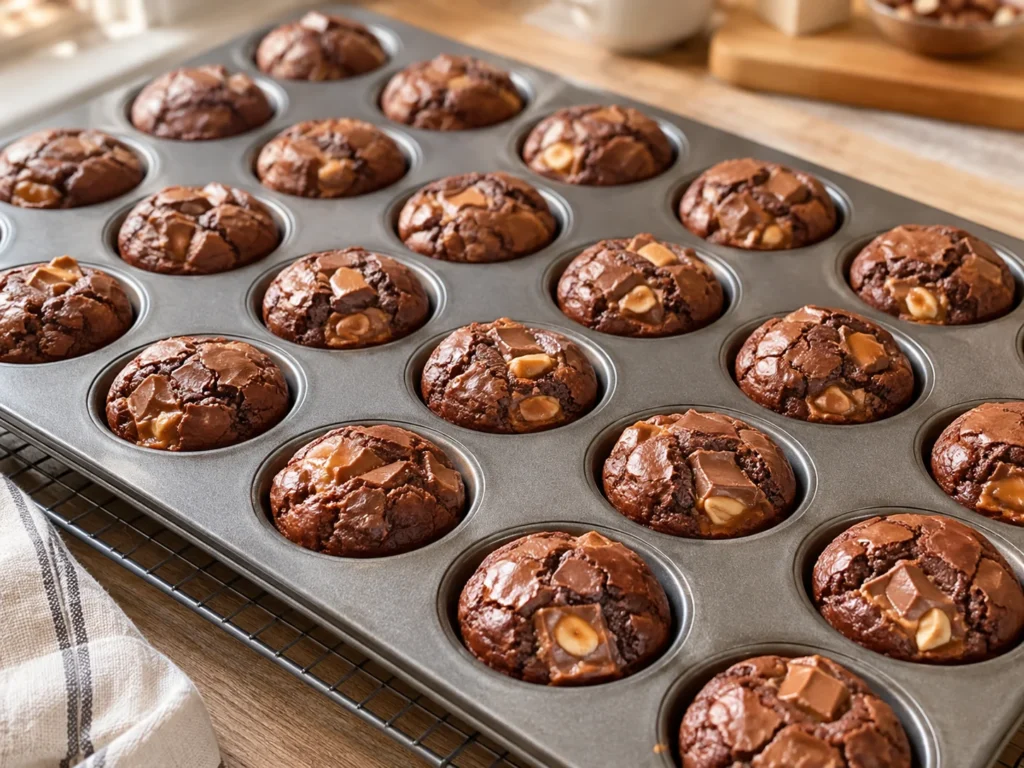
- Bake for 12 minutes, until the edges are set and the tops look matte and slightly crackled while the centers still feel soft. A toothpick will not come out clean because of the candy, so rely on the edges and surface instead of the toothpick.
- Cool the bites in the pan for 10 minutes so the candy centers settle. Run a small knife around each edge, lift the bites onto a wire rack, and let them cool until just warm or room temperature before serving.
Tips for Best Results
Small habits make a noticeable difference in a recipe with only a few ingredients. These are the ones that matter most for brownie bites.
- Grease the pan thoroughly. Caramel from the candy bars can leak slightly and stick. Coat every cup, including the rims, so the bites release cleanly.
- Do not overmix after adding the dry ingredients. Folding just until the streaks disappear keeps the texture fudgy. Extra mixing develops gluten and pushes the bites toward cakey.
- Center the candy. A bar that sits in the middle of the batter stays fully covered and bakes into a true center. A bar pressed against the edge of the cup can break through the surface or stick to the pan.
- Cover the candy mostly, not perfectly. A thin layer of batter over each bar is enough. A bit of candy peeking through is fine and often looks appealing.
- Watch the edges, not the clock alone. Ovens vary, and mini brownies move from fudgy to dry quickly. Check at the 12-minute mark and look for set edges and a matte top.
- Respect the cooling time. The caramel in the center is molten right out of the oven. Cooling in the pan for 10 minutes lets it firm up enough that the bites hold together when lifted.
- Use a knife around the edges. A quick pass with a small knife frees any sticky spots before you lift the bites out.
If you only have one pan and want to bake in batches, let the pan cool and wipe and regrease it before refilling. A hot pan will start melting the candy before the bites go into the oven.
Troubleshooting Common Problems
Even simple recipes can go sideways. Here is how to read the signs and adjust.
The bites are dry or cakey
This usually comes from overbaking, packed flour, or too much mixing. Measure the flour carefully, fold gently, and pull the pan when the edges are set and the centers still feel soft. The bites will continue to firm up as they cool.
The candy leaked or stuck to the pan
A little caramel seepage is normal. Heavy sticking usually means the pan was not greased well or the bites were lifted out too soon. Grease every cup generously and keep to the 10-minute cooling time before running a knife around the edges.
The tops are not shiny or crackly
A glossy top comes from whisking the sugar and eggs into the warm chocolate mixture until the batter looks thick and shiny. If the batter was only stirred briefly, the surface will be duller. It will still taste good, but whisking a little longer next time helps.
The centers are not gooey
If the Snickers bar seems to have vanished into the brownie, it may have been placed too close to the bottom of the cup or the bites were overbaked. Keep the candy in the middle of the batter and bake only until the edges are set.
The batter looks grainy or separated
This often happens when the melted chocolate mixture is too hot when the eggs go in. Let it cool until warm, then whisk in the eggs one at a time. A few vigorous strokes with the whisk usually brings it back together.
Variations and Substitutions
The base recipe is flexible, and a few swaps change the flavor without complicating the method. Keep the batter quantities the same so the bake behaves as written.
- Fun-size Snickers: Cut each fun-size bar in half and press one half into each cup. The goal is a piece roughly the size of a miniature bar so it fits comfortably in the center.
- Other candy bars: Miniature Milky Way, Twix, or peanut butter cup candies can fill the same role. Keep the pieces small enough to sit in the middle of the cup with batter around them.
- Dark chocolate: Swap the semisweet chocolate for bittersweet if you prefer a less sweet brownie that contrasts more with the candy center.
- Extra peanut flavor: Press a few chopped salted peanuts into the tops before baking. Add them right after smoothing the batter so they stick.
- Flaky salt finish: A small pinch of flaky sea salt on the warm bites highlights the caramel and chocolate.
- Gluten-free option: A one-to-one gluten-free all-purpose flour blend can replace the all-purpose flour. Check that the candy bars and other ingredients are labeled gluten-free if that is important for your table.
Skip swaps that add moisture, such as extra syrups or sauces, because they can change the bake and make the bites harder to lift from the pan.
Storage and Freezing
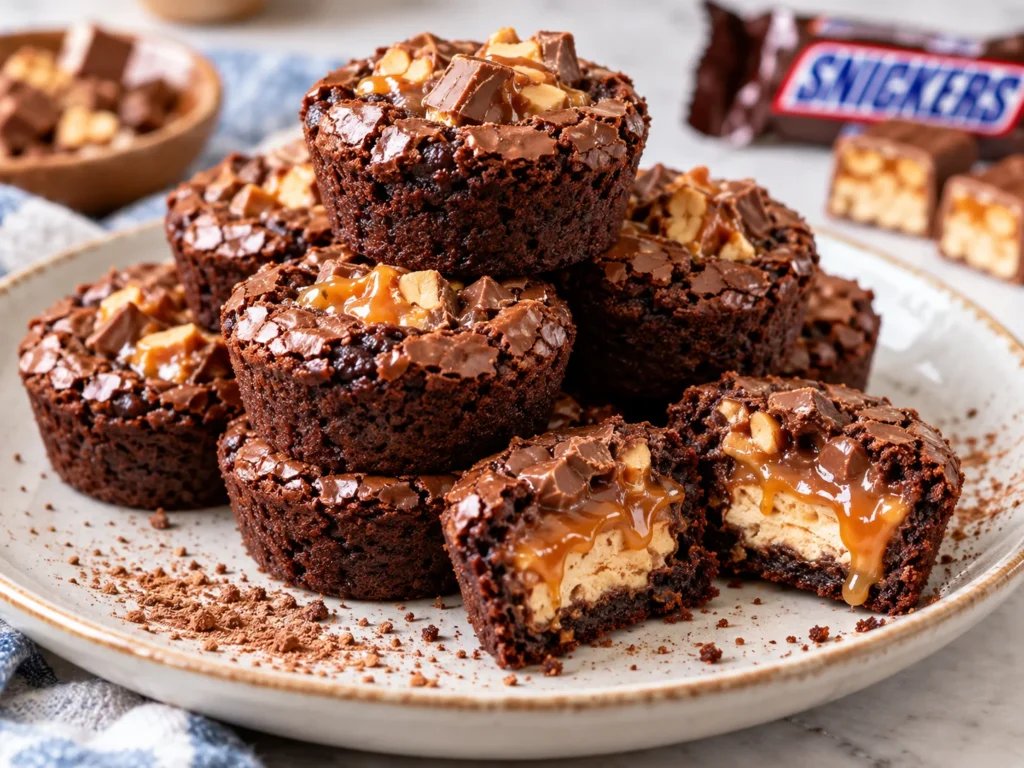
Store the cooled bites in an airtight container at room temperature for up to 4 days. Place a sheet of parchment between layers so the tops stay intact and do not stick together. The caramel centers soften slightly at room temperature, which is part of the appeal.
To freeze, arrange the completely cooled bites in a single layer on a tray until firm, then transfer them to a freezer-safe container or bag. They keep well for up to 2 months. Thaw them at room temperature in the container so condensation does not make the tops sticky.
If you like them warm, a few seconds in the microwave softens the chocolate and the center. Go slowly, because the candy filling can get very hot even when the brownie itself feels only warm.
Serving Ideas
Snickers Brownie Bites are rich, so they pair well with something cold or something bitter. A tall glass of cold milk is the classic partner, while a cup of black coffee or espresso cuts through the sweetness. For a party, serve the bites in paper liners on a platter so guests can grab them easily.
To make them more dessert-like, set a warm bite in a small bowl and add a scoop of vanilla ice cream, then drizzle with a little melted chocolate or caramel sauce. They also work well on a mixed cookie tray next to shortbread or sugar cookies, since the deep chocolate color adds contrast.
These bites stay small and shareable, but the filling gives them a satisfying, candy-bar finish. Bake them once with the cooling steps in mind and you will have a dependable recipe for holidays, gatherings, and last-minute dessert requests.
Frequently Asked Questions
Can I use fun-size Snickers instead of miniatures?
How do I know when Snickers Brownie Bites are done?
Why did my brownie bites stick to the pan?
Can I freeze Snickers Brownie Bites?
Why are my brownie bites dry instead of fudgy?
Snickers Brownie Bites With a Rich Chocolate Center
Fudgy one-bowl brownie batter baked in a mini muffin pan around a miniature Snickers bar, creating 24 bites with a gooey caramel, nougat, and peanut center.
Ingredients
- 1/2 cup (113 g) unsalted butter
- 4 ounces (113 g) semisweet chocolate, chopped
- 3/4 cup (150 g) granulated sugar
- 2 large eggs
- 1 teaspoon vanilla extract
- 1/2 cup (63 g) all-purpose flour
- 1/4 cup (21 g) unsweetened cocoa powder
- 1/4 teaspoon salt
- 24 miniature Snickers bars, unwrapped
- Butter or nonstick spray, for greasing the pan
Instructions
- Position a rack in the center of the oven and heat it to 350°F. Generously grease a 24-cup mini muffin pan with butter or nonstick spray, then unwrap all 24 miniature Snickers bars and set them nearby.
- Combine the butter and chopped semisweet chocolate in a medium microwave-safe bowl. Microwave in 30-second bursts, stirring after each, until the mixture is completely smooth. Let it cool until warm to the touch but no longer hot.
- Whisk the granulated sugar into the warm chocolate mixture until combined. Whisk in the eggs one at a time, then the vanilla, and keep whisking until the batter looks glossy and thick.
- Whisk the flour, cocoa powder, and salt together in a small bowl, then add it to the batter. Fold with a spatula just until no dry streaks remain; stop as soon as the batter is uniform.
- Spoon about half of the batter into the prepared cups, dividing it evenly so each cup is roughly one-third full.
- Press one miniature Snickers bar gently into the center of each cup so it sits in the middle of the batter.
- Divide the remaining batter among the cups, spooning it over and around each candy bar until it is mostly covered. Smooth the tops lightly with the back of the spoon; the cups should be about three-quarters full.
- Bake for 12 minutes, until the edges are set and the tops look matte and slightly crackled while the centers still feel soft. A toothpick will not come out clean because of the candy, so rely on the edges and surface instead of the toothpick.
- Cool the bites in the pan for 10 minutes so the candy centers settle. Run a small knife around each edge, lift the bites onto a wire rack, and let them cool until just warm or room temperature before serving.
Notes
Measure the flour by spooning it into the cup and leveling it off to keep the bites fudgy.
Let the melted chocolate mixture cool until warm before adding the eggs so the batter stays smooth.
For fun-size Snickers, cut each bar in half and use one half per cup.
Grease every cup thoroughly because caramel from the candy can stick to the pan.