


This nachos recipe gets it right where most go wrong. Crispy chips, seasoned beef, two cheeses that actually melt, and cold toppings that go on after the oven. Thirty minutes, one pan, no complicated steps. Good for game nights, last-minute dinners, or any time you need to feed people fast.
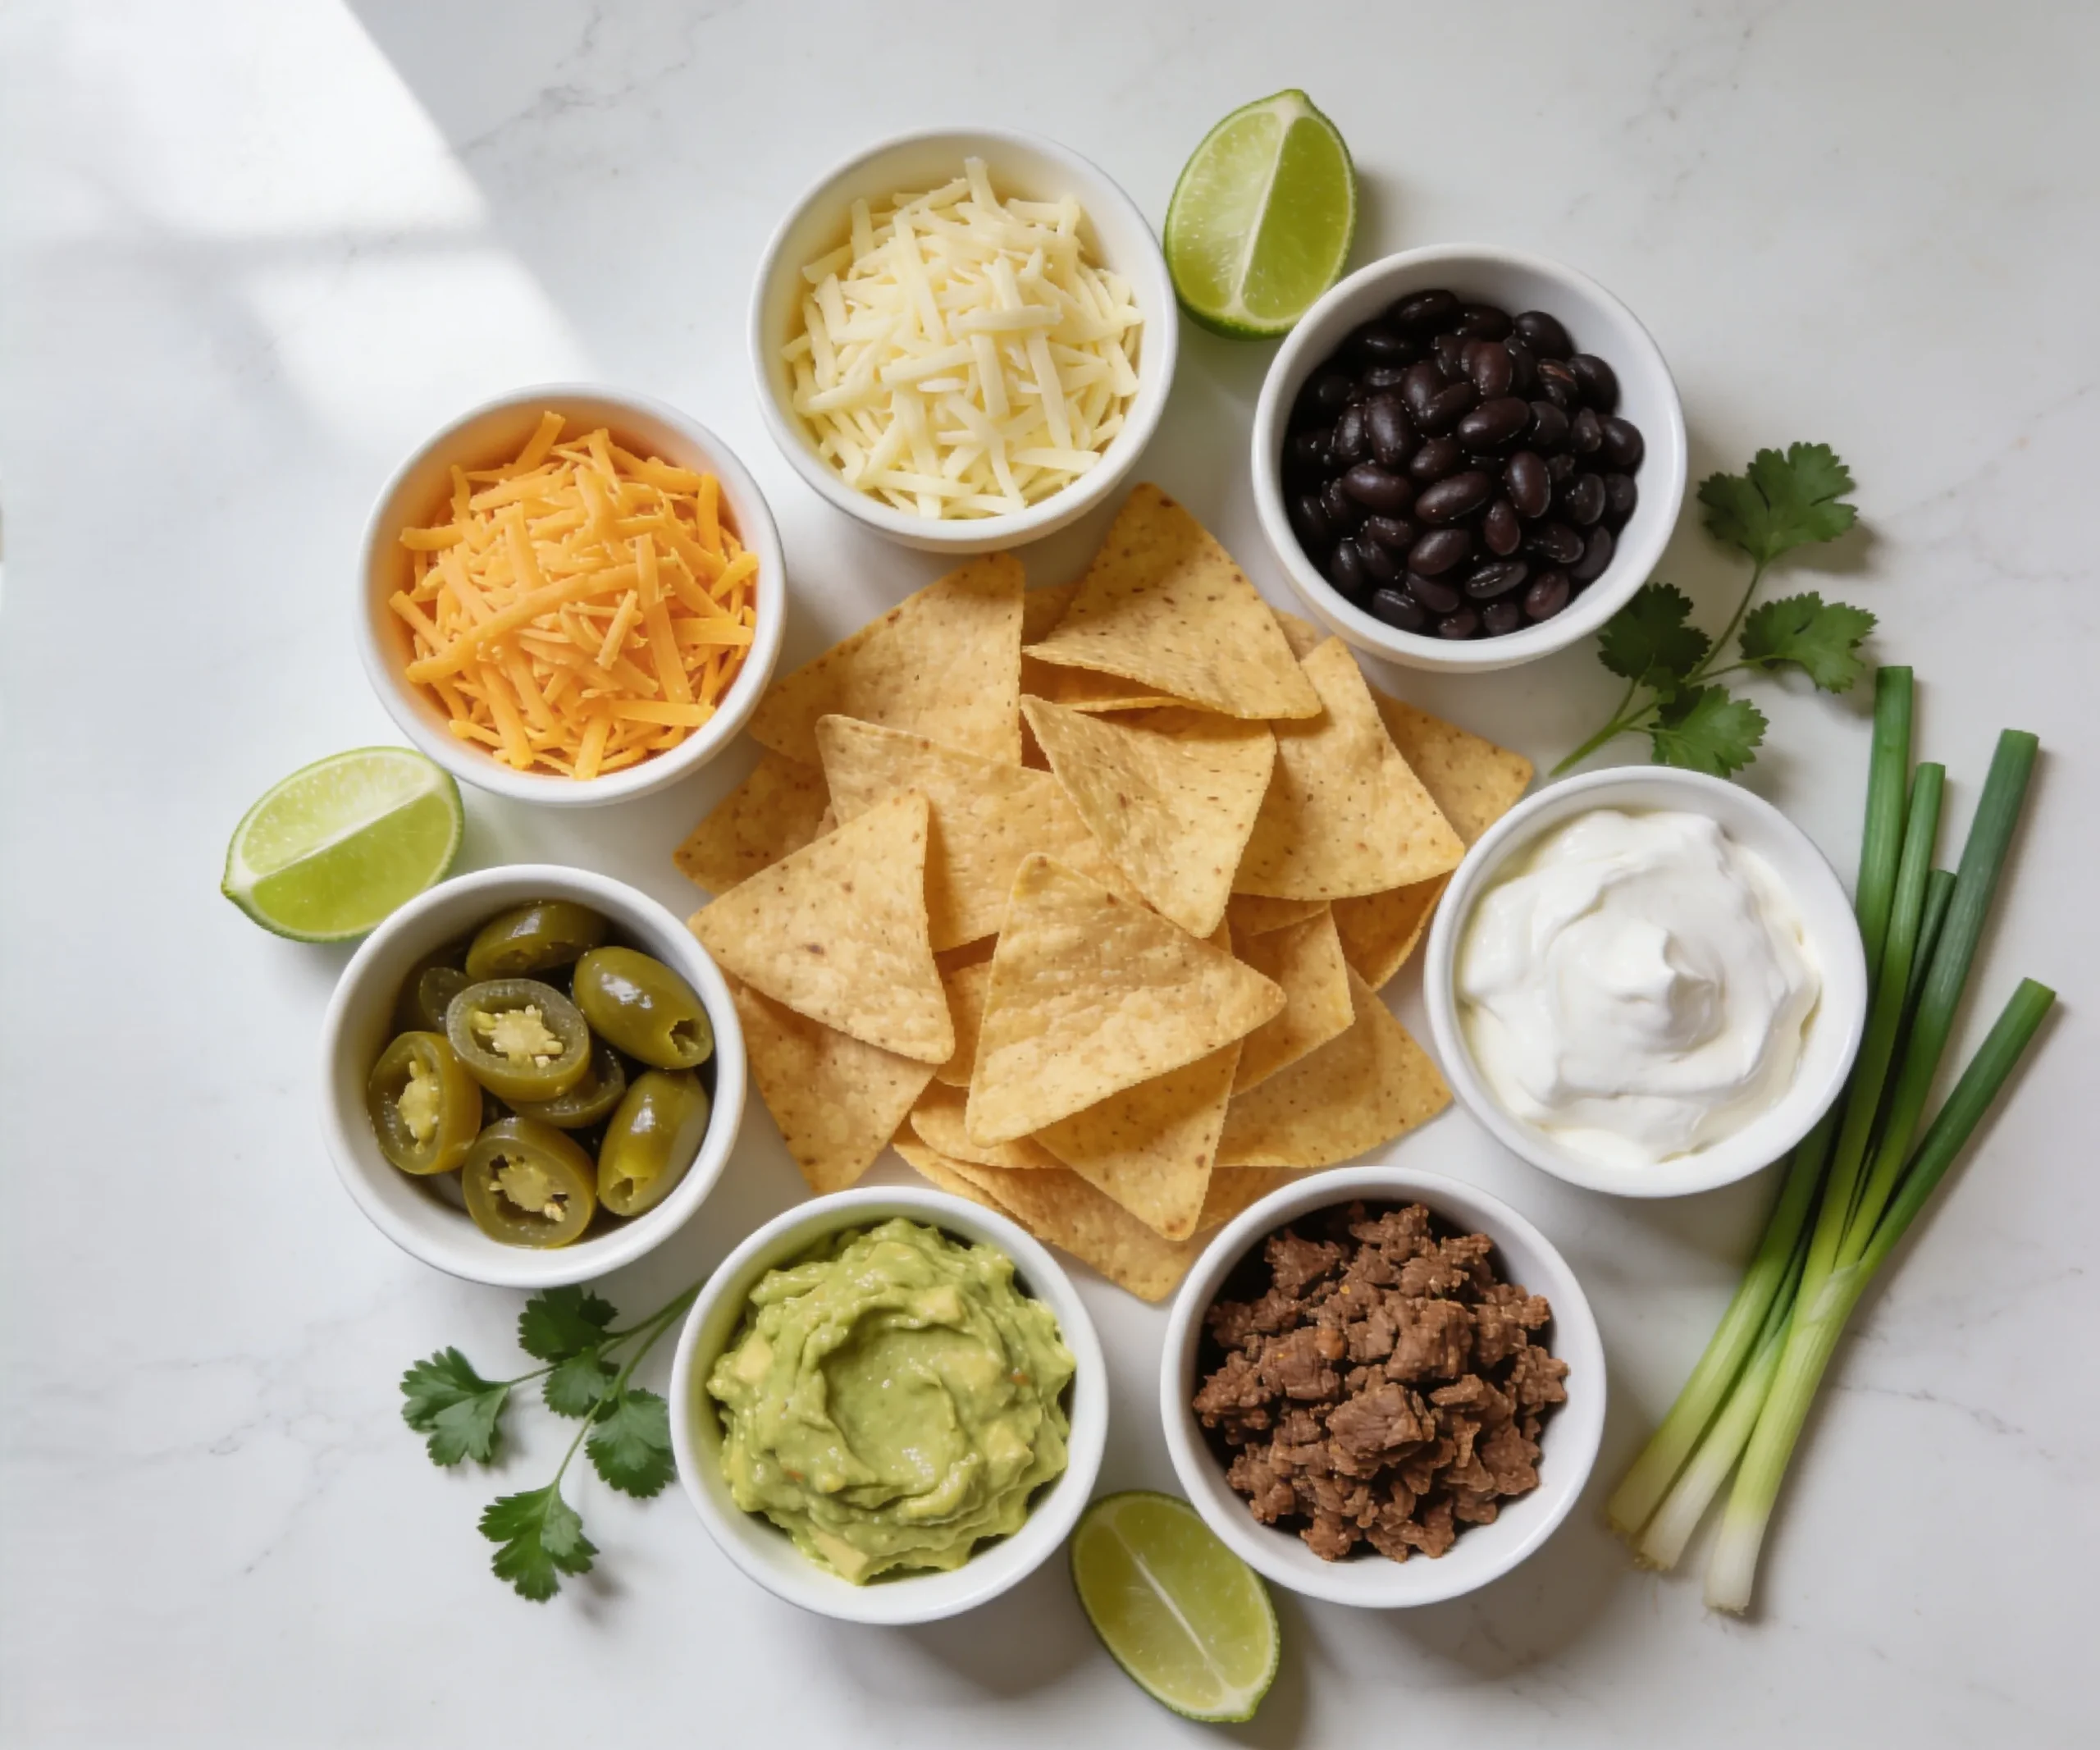
- 400 g tortilla chips
- 2 cups shredded cheddar cheese
- 1 cup shredded Monterey Jack cheese
- 450 g ground beef
- 2 tablespoons taco seasoning
- 1/4 cup water
- 1 cup black beans, drained and rinsed
- 1/2 cup pickled jalapenos
- 1/2 cup sour cream
- 1 cup fresh guacamole
- 3/4 cup pico de gallo or salsa
- 3 green onions, sliced thin
- 1/4 cup fresh cilantro, roughly chopped
- 1 lime, cut into wedges
- Large rimmed baking sheet, half-sheet size is ideal
- Parchment paper or aluminum foil
- Large skillet
- Wooden spoon or wide spatula
- Box grater for shredding cheese from a block
- Cutting board and knife
- Measuring cups and spoons
- Oven mitts
- Brown and season the ground beef.
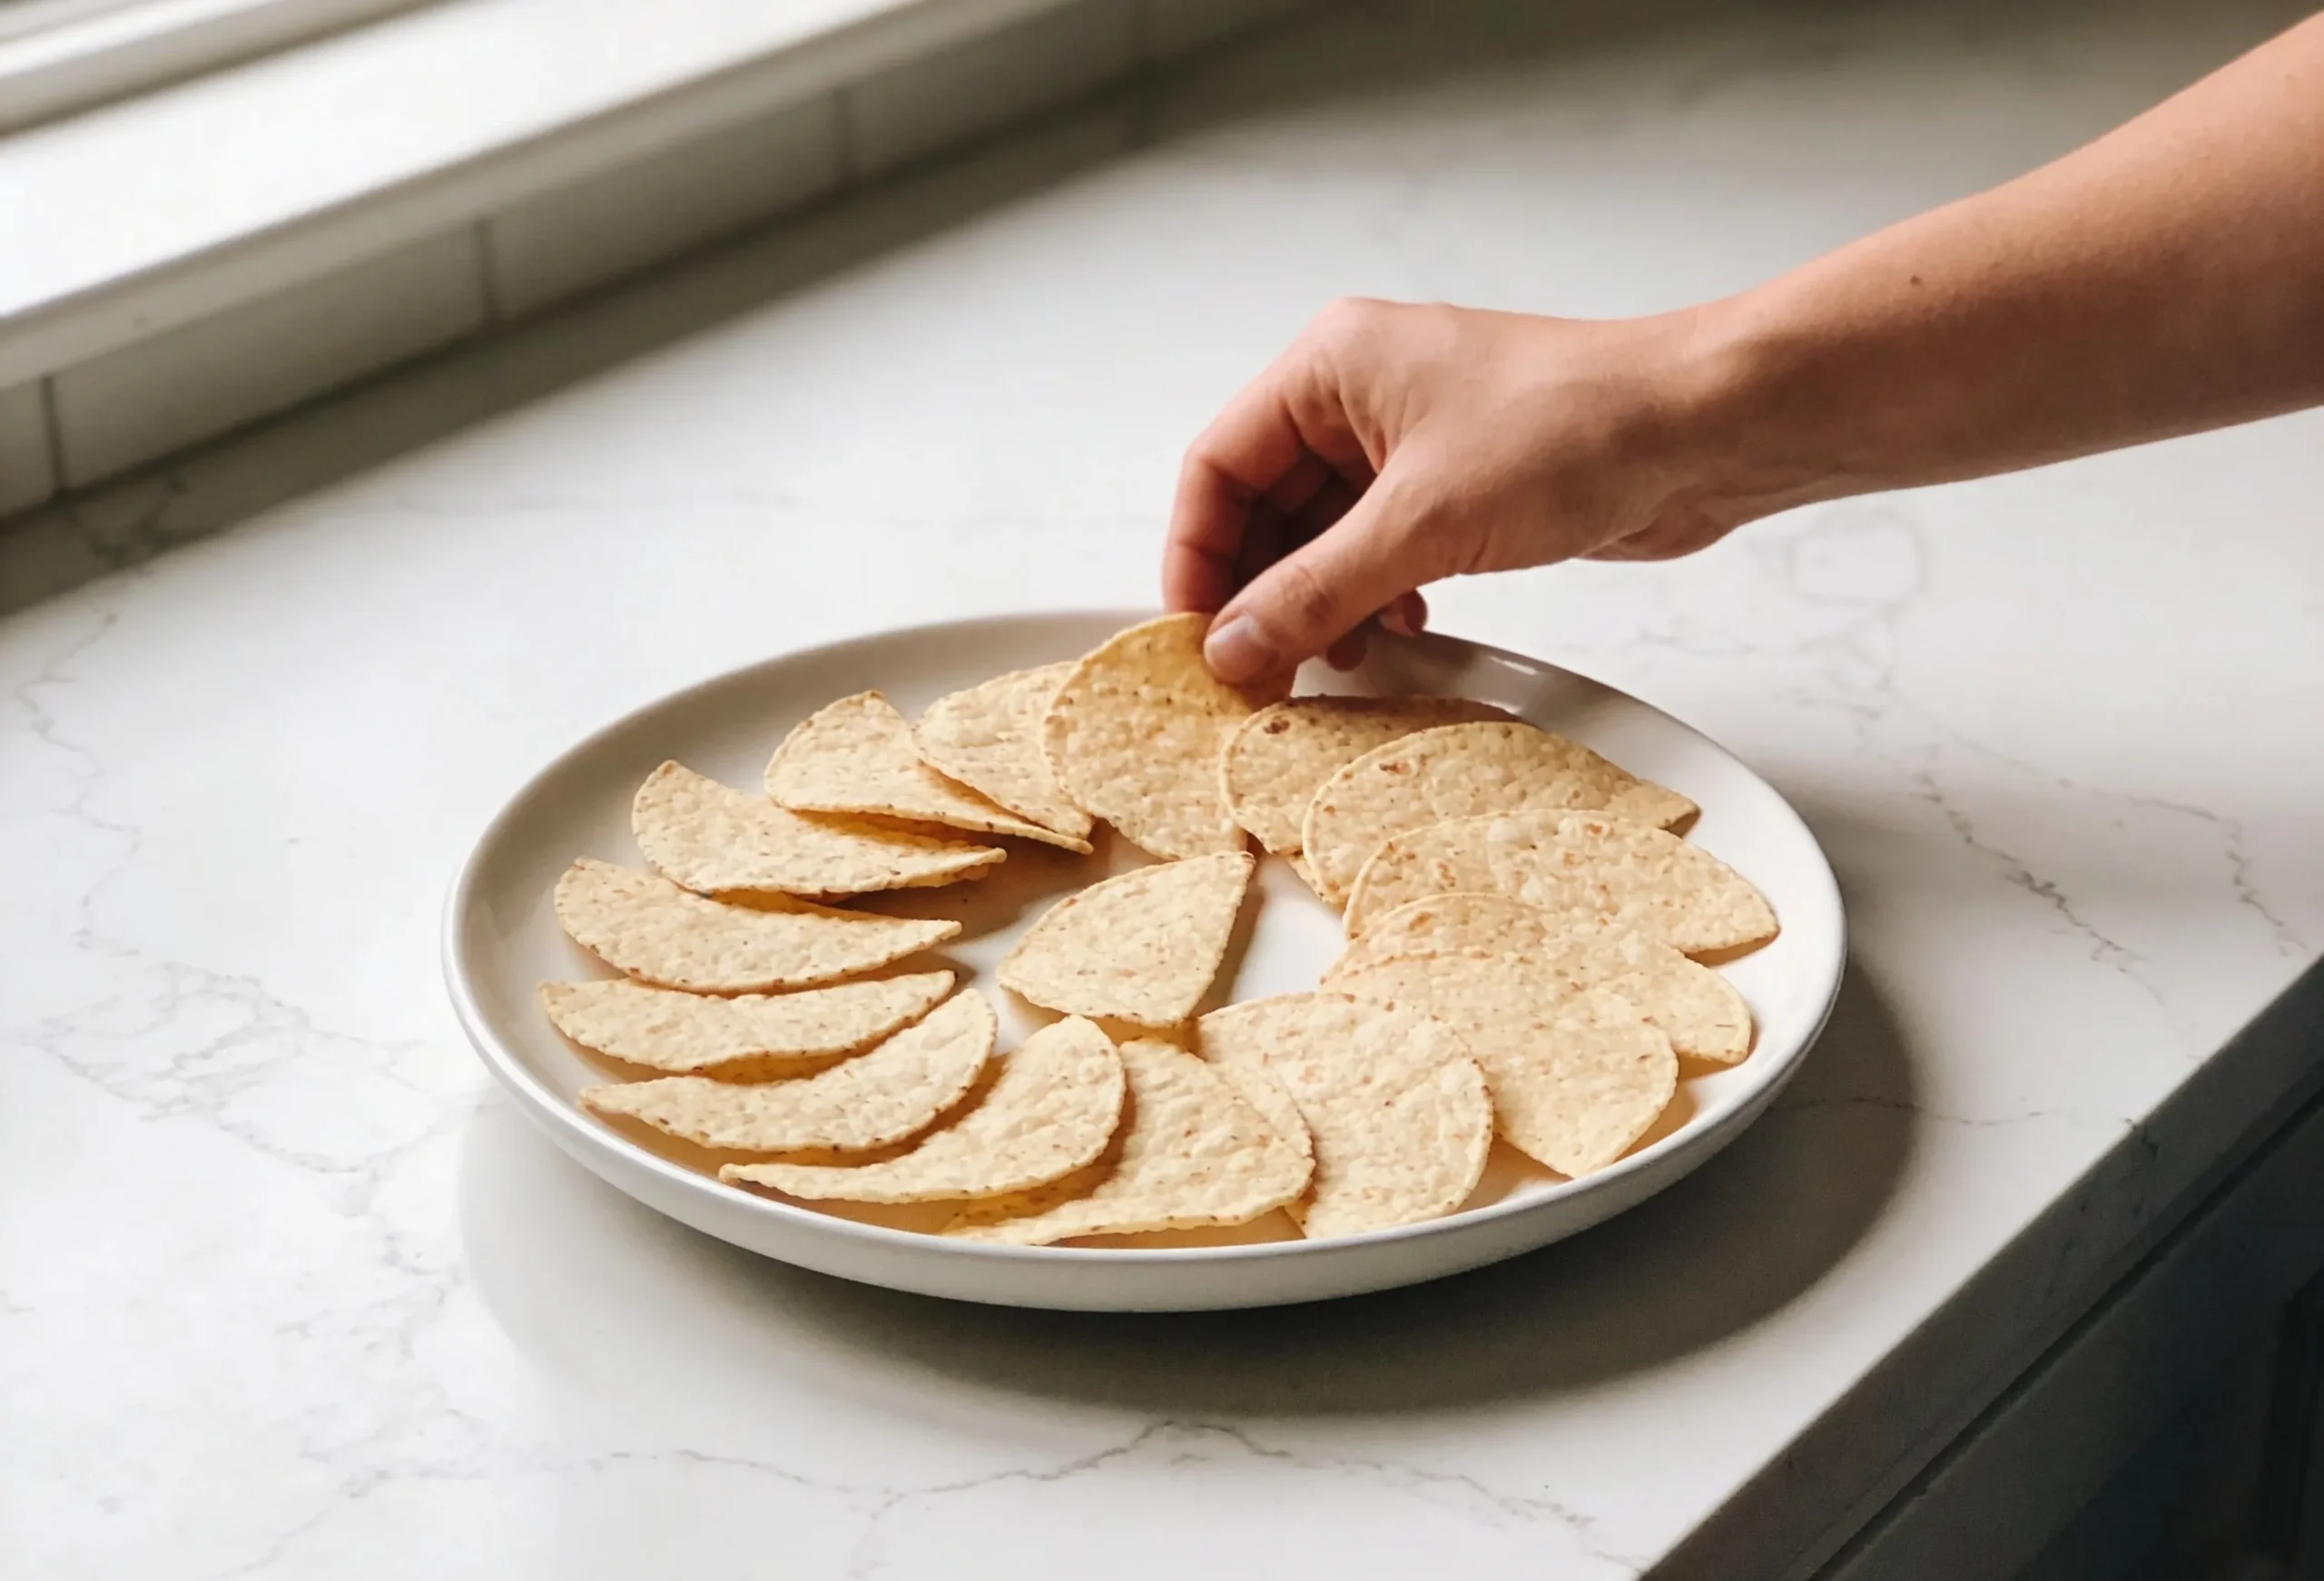
- Spread chips in a single layer on a baking sheet.
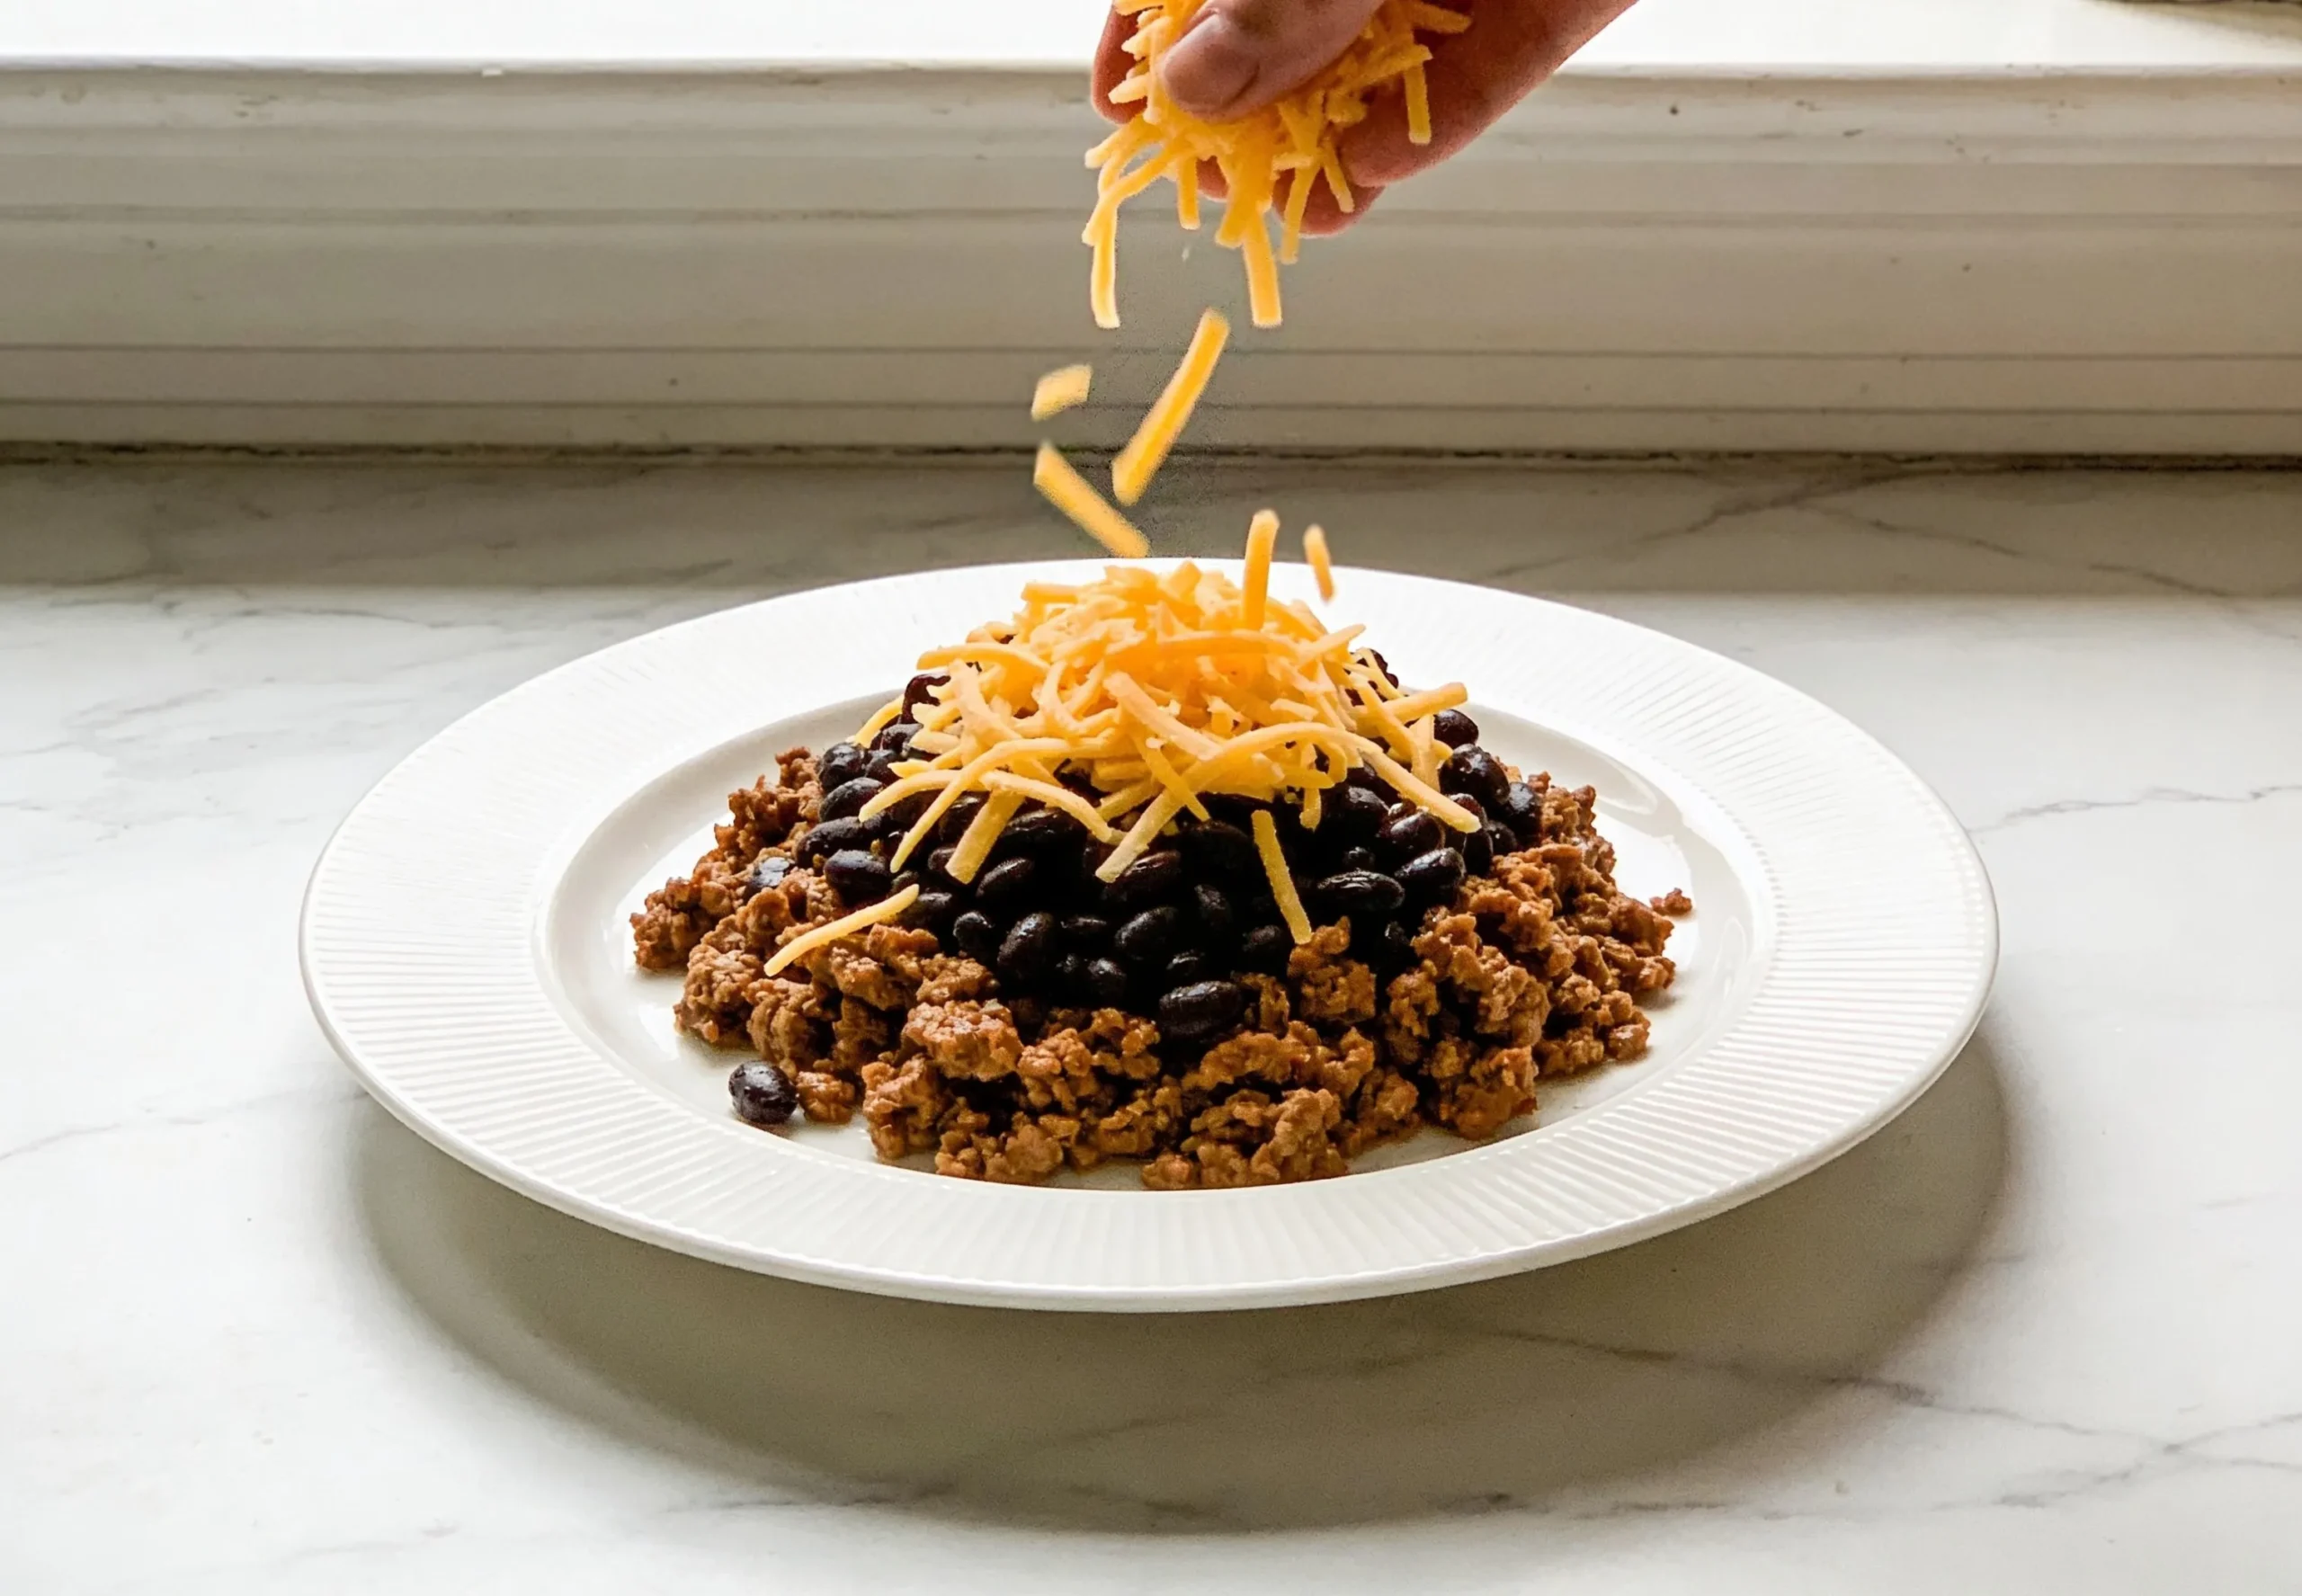
- Top with beef, beans, jalapenos, and both cheeses.
- Bake until the cheese is melted and the edges are just starting to color.
- Add all cold toppings straight out of the oven and serve immediately.
- Preheat the oven to 200C (400F). Line a large rimmed baking sheet with foil or parchment paper.
- Set a skillet over medium-high heat. Add the ground beef and cook for 7 to 8 minutes, breaking it apart as it cooks. Once fully browned, drain off the fat.
- Add taco seasoning and water directly to the pan. Stir and cook for another 2 minutes until the liquid soaks in. Take the pan off the heat.
- Arrange tortilla chips across the baking sheet in a single layer. Give every chip room. Overlapping means some chips will come out bare and soft.
- Spread the beef over the chips evenly. Follow with the black beans and pickled jalapenos.
- Sprinkle cheddar across the top first, then Monterey Jack over that. Cover every section generously.
- Bake for 10 to 12 minutes. The cheese should be fully melted with lightly golden edges. Keep an eye on it toward the end.
- Pull it from the oven and let it rest for 2 to 3 minutes. This keeps the cheese from sliding when you add toppings.
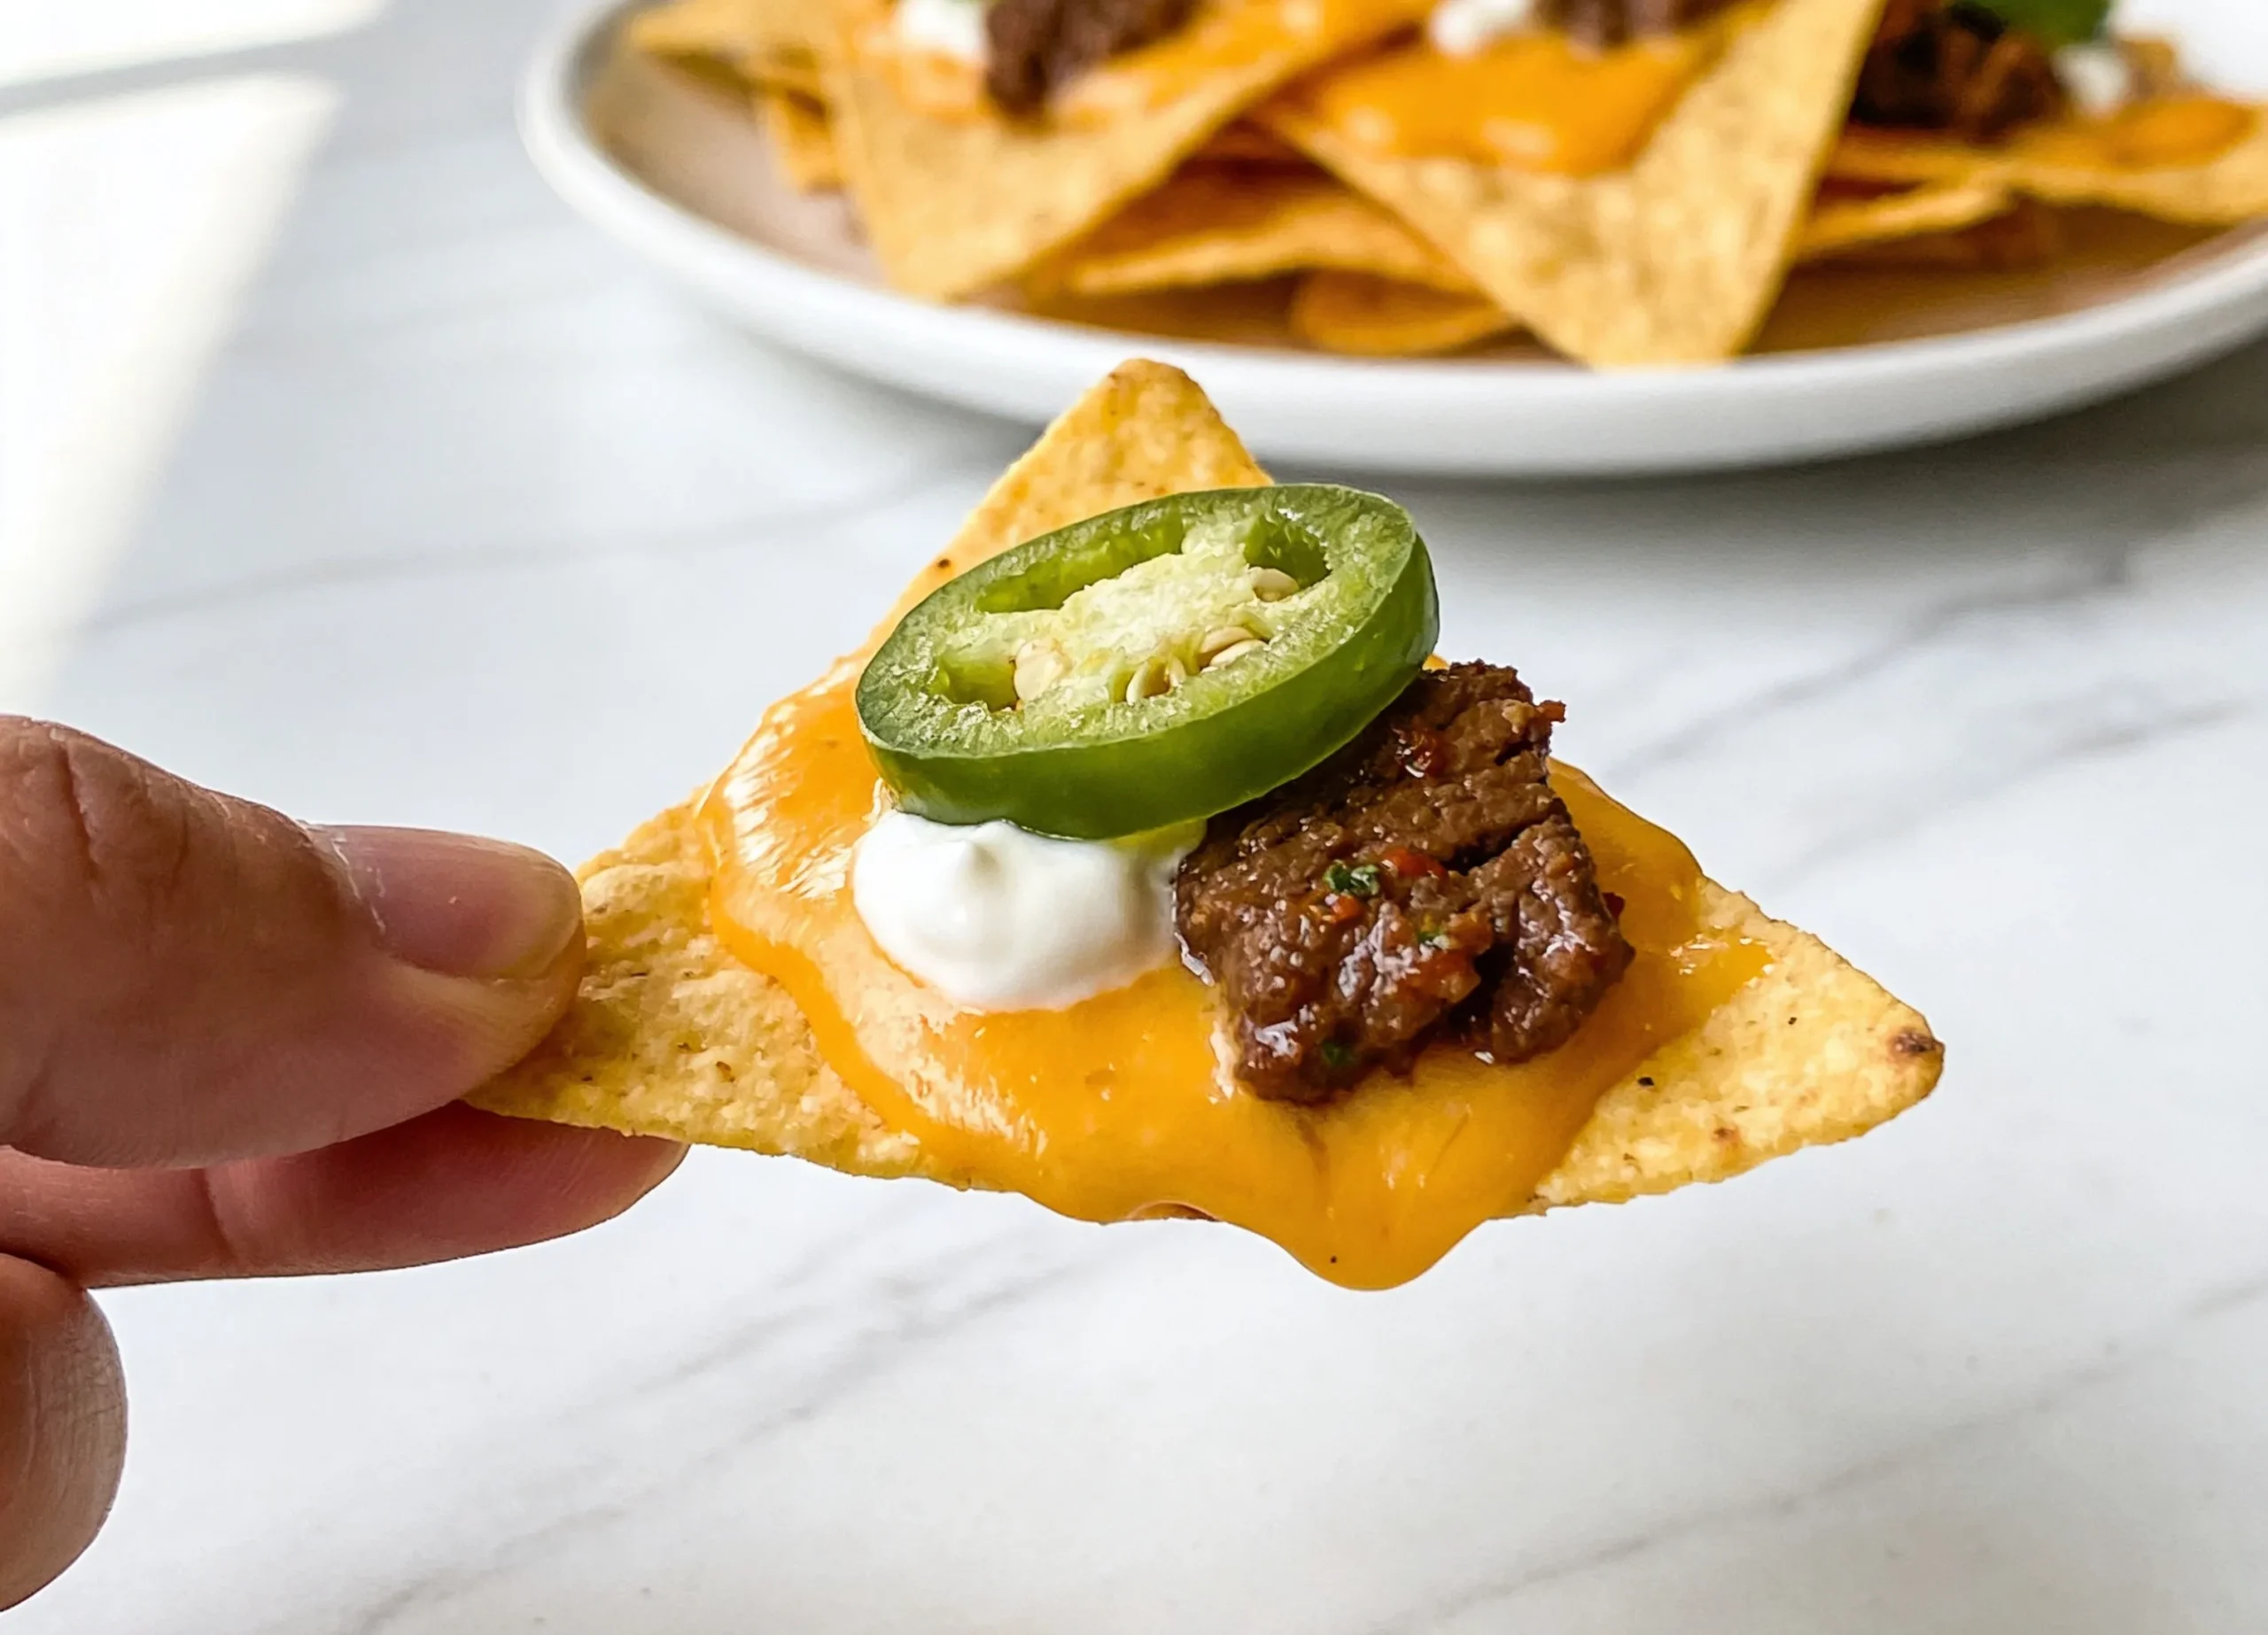
- Spoon sour cream and guacamole across the pan in small dollops. Add the pico de gallo or salsa on top.
- Scatter green onions and cilantro over everything. Squeeze lime juice across the whole pan right before serving. Take it straight to the table.
- Shred cheese from a block rather than buying pre-shredded. Bag cheese has coatings that stop it from melting smoothly.
- Pick a thick, sturdy tortilla chip. Thin chips cannot support the toppings and turn soft fast.
- A single layer is non-negotiable. Chips stacked under other chips never get cheese on them.
- Let the beef sit off the heat for a minute before building the pan. Steam from hot meat softens chips before they reach the oven.
- Cold toppings go on after baking, every time. Sour cream and guacamole break down under heat.
- If you are feeding more than six people, use two sheet pans. One crowded pan cooks unevenly.
- Bake on the middle rack. The bottom rack runs hot and burns the chips before the cheese finishes melting.
- Stacking the chips. Buried chips stay cold, miss the cheese, and go soft. Spread them out.
- Baking with cold toppings already on. Sour cream turns watery and guacamole browns in the oven.
- Going light on the cheese. You need full coverage for nachos to work the way they should.
- Skipping the fat drain after cooking the beef. Excess grease makes everything heavy and greasy.
- Leaving them in the oven past 12 minutes. The chips around the edges burn quickly.
- Waiting too long to serve. Nachos lose their crunch within minutes. Serve them as soon as the toppings go on.
- Spooning watery salsa over the chips before baking. It soaks straight through and softens the chips before they hit the heat.
- No beef: Pulled chicken, ground turkey, or crumbled chorizo all work well here.
- Vegetarian: Leave out the meat and double the black beans. Roasted corn makes a good addition.
- Vegan: Use dairy-free shredded cheese and skip the sour cream. A cashew guacamole works in place of the regular.
- More heat: Layer fresh sliced jalapenos over the pickled ones, or stir hot sauce into the beef while it cooks.
- Less heat: Skip the jalapenos entirely and use a mild salsa. Monterey Jack on its own is a very mild cheese.
- Different protein: Shredded rotisserie chicken is one of the easiest swaps. Refried beans with cotija cheese is another solid option.
- Smaller batch: A cast iron skillet works better than a sheet pan for two to three servings. The bottom layer crisps up nicely.
- Queso instead of shredded cheese: Drizzle homemade or store-bought queso over the chips for a saucier result.
- A bowl of salsa or chunky pico on the side for extra dipping
- More guacamole in a separate bowl
- Mexican street corn as a side if this is the main event
- A plain green salad to balance out the richness
- Cold beer, agua fresca, or a margarita
- Chipotle ranch for dipping
- Refried beans on the side if you are serving this as dinner
- Assembled nachos do not keep well. The chips absorb moisture from the toppings and go soft within an hour.
- The better approach is to store each component separately. Chips go in a sealed bag. Beef goes in a container in the fridge. Toppings stay in their own containers.
- Cooked beef keeps in the fridge for up to 4 days. Guacamole and pico are best used within 1 to 2 days.
- To reheat assembled nachos, spread them on a baking sheet and put them in a 180C (350F) oven for 5 to 7 minutes. They will not be as crisp as fresh, but it is the only method that keeps them edible.
- Do not use the microwave. It turns chips rubbery and makes the cheese separate and greasy.
- The seasoned beef freezes well for up to 2 months. Thaw it overnight in the fridge and reheat in a skillet before using.
Cook and prep all the components in advance, but do not assemble until right before baking. Pre-built nachos go soggy.
Cheddar and Monterey Jack together. Cheddar brings the flavor, Monterey Jack brings the smooth melt. Using both gives you the best result.
Single layer chips, a short bake time, and cold toppings added only after the pan comes out of the oven.
Yes. A decent store-bought version works fine. Fresh tastes better, but it is not worth stressing over.
Thick restaurant-style tortilla chips. Plain salted is the right choice. Flavored chips compete with the other toppings.
Yes. Double the black beans, add roasted corn if you have it, and skip the beef. It is a complete vegetarian version with no adjustments needed to the rest of the recipe.
- This makes 6 appetizer portions or 3 to 4 dinner-sized servings.
- Store-bought taco seasoning works fine. If you make your own, you can control the salt and heat level more precisely.
- Want a crispier bottom layer? Broil the chips alone for 2 minutes before adding any toppings. Watch them closely.
- Always rinse canned beans before using. It cuts down on sodium and keeps the texture from turning mushy.
- If your baking sheet has high sides that might trap steam, tent a piece of foil loosely over the pan for the first half of baking.
- Do not skip the lime at the end. It pulls everything together and cuts through the richness.
The reason this nachos recipe works is that it respects a few basic rules and does not try to do too much. Good chips, proper cheese, seasoned meat, and toppings handled the right way. Once you have made it once, you will know exactly what to adjust for next time whether that is more heat, a different protein, or whatever you have in the fridge.