
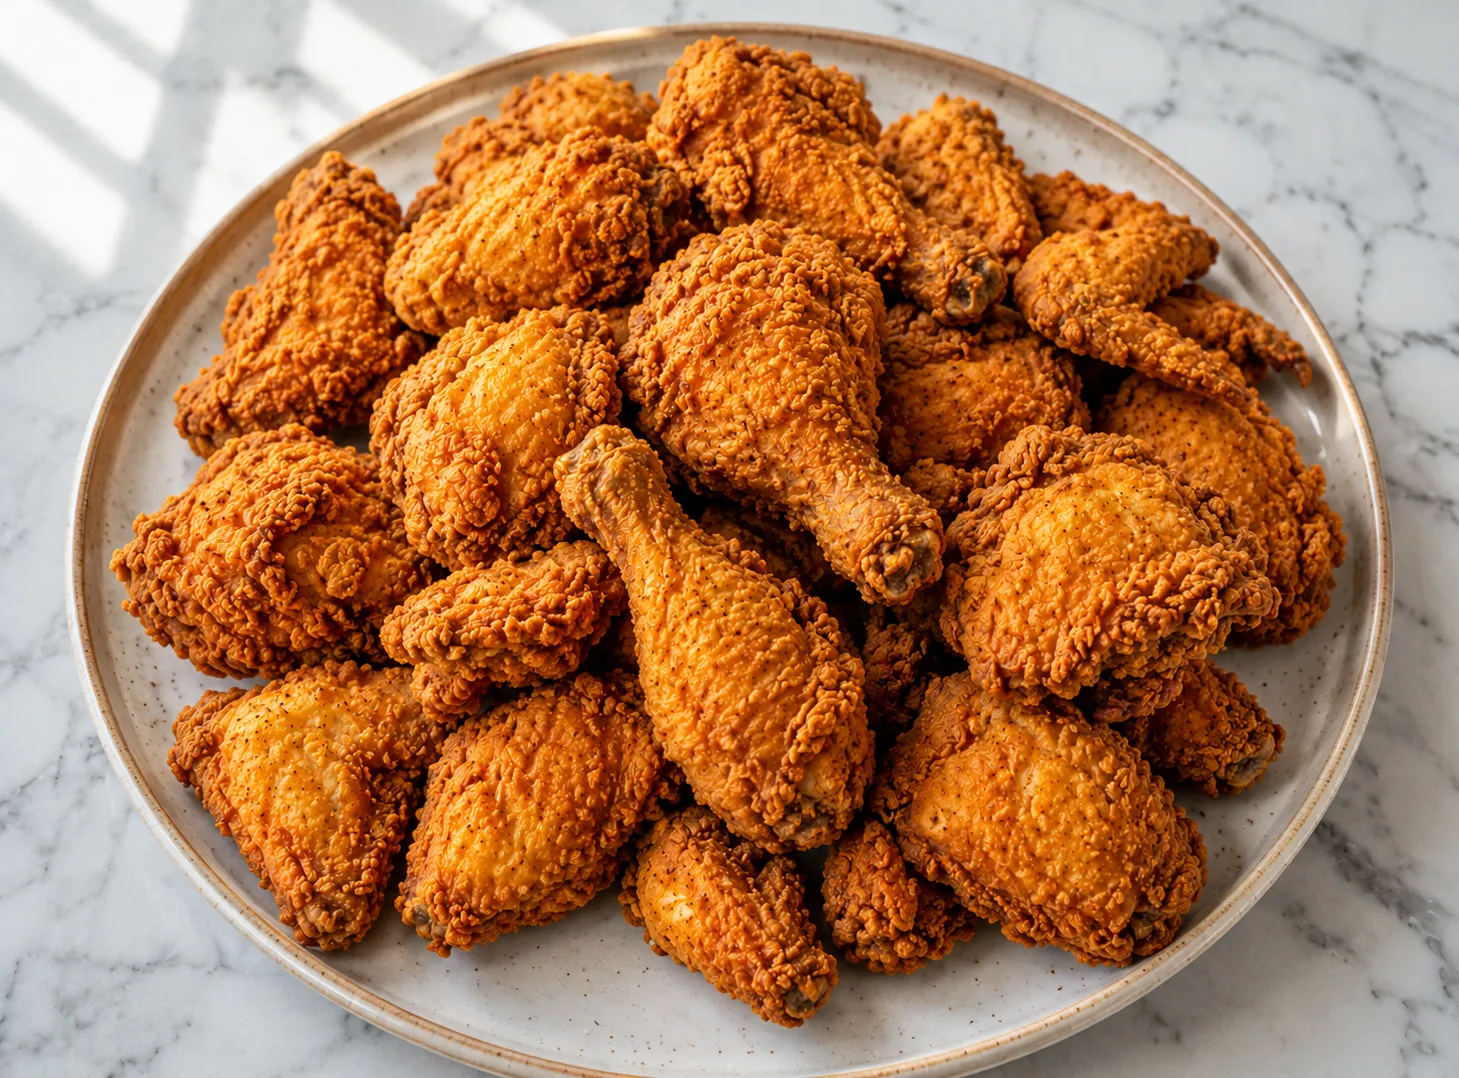
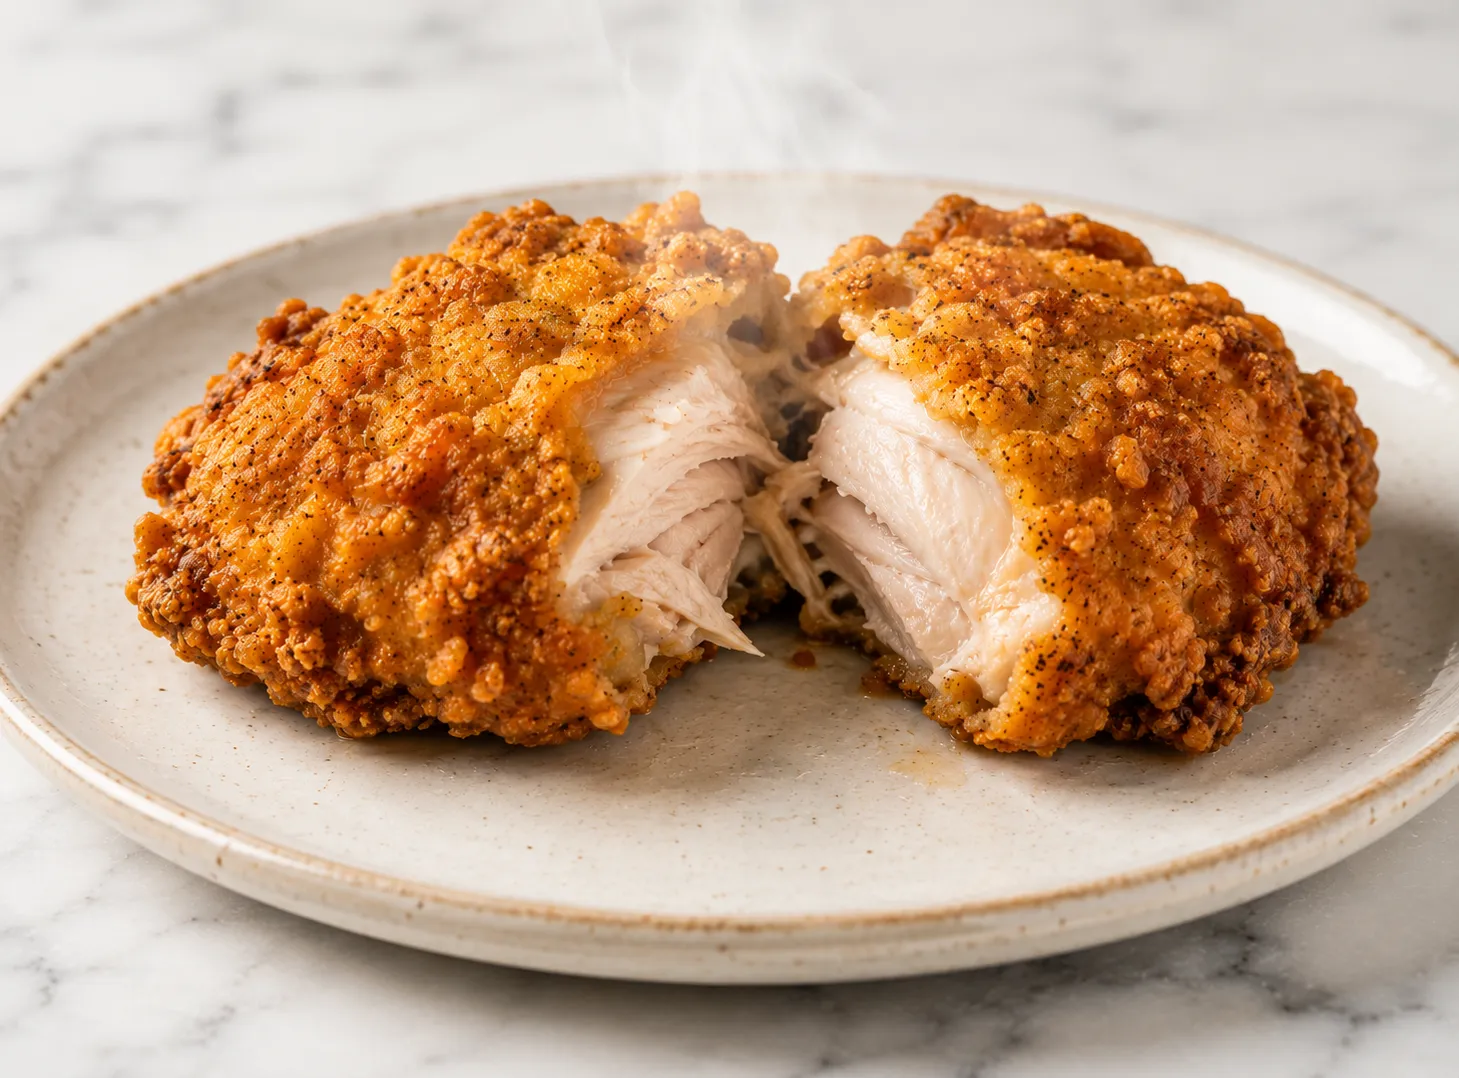
Most fried chicken recipes fail at one of two things: the crust burns before the inside cooks, or the coating turns soft within minutes. This Southern fried chicken recipe solves both problems. A buttermilk brine keeps the meat tender all the way through. A cornstarch-boosted seasoned dredge builds a crust that stays crunchy even after it cools. No deep fryer required. No complicated technique. Just a heavy pot, a thermometer, and two steps that actually matter. This is the fried chicken recipe that earns a permanent spot in your rotation.
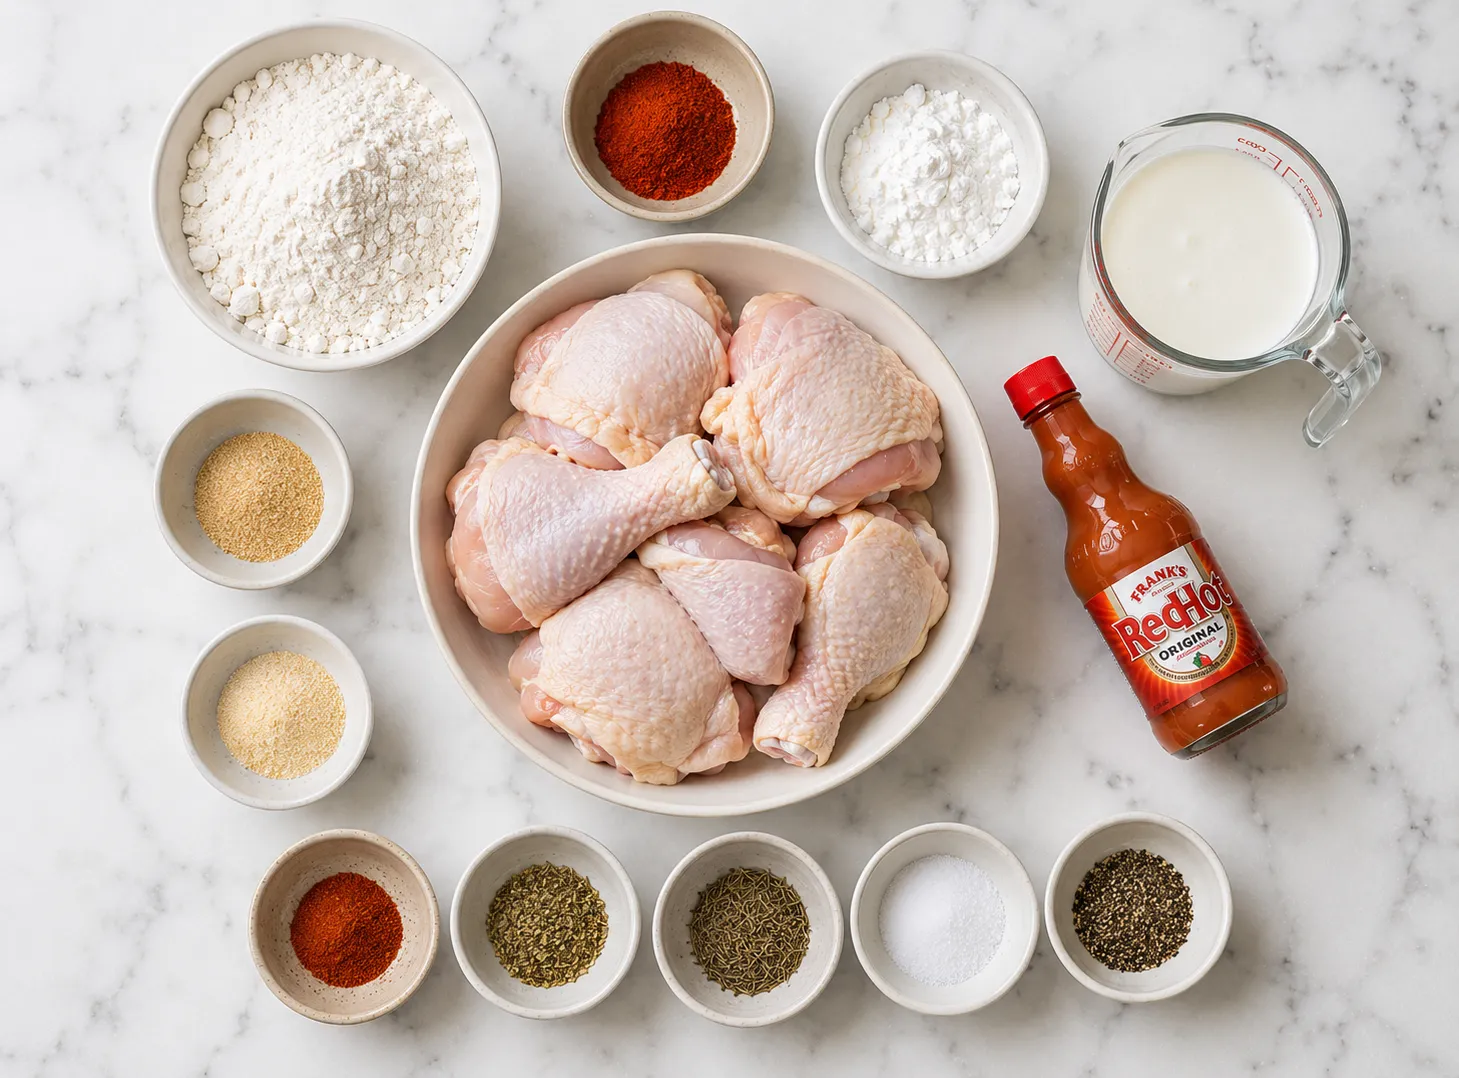
- 3 lb bone-in skin-on chicken pieces (legs, thighs, breasts, wings) , Keep the skin on. It crisps up during frying and holds moisture in the meat.
- 2 cups buttermilk , Full-fat buttermilk gives the best result. See variations for a substitute.
- 1 tablespoon hot sauce , Does not make the chicken spicy. Adds depth. Frank's RedHot or Tabasco both work.
- 1 teaspoon salt
- 0.5 teaspoon black pepper
- 2.5 cups all-purpose flour
- 0.5 cup cornstarch , This is what makes the crust genuinely crunchy. Do not leave it out.
- 2 teaspoons paprika
- 1.5 teaspoons garlic powder
- 1 teaspoon onion powder
- 0.5 teaspoon cayenne pepper , Increase to 1 teaspoon if you want noticeable heat.
- 1 teaspoon dried oregano
- 0.5 teaspoon dried thyme
- 1.5 teaspoons salt
- 1 teaspoon black pepper
- 4 cups peanut oil or vegetable oil , Peanut oil has a higher smoke point and a cleaner flavor. Vegetable or canola oil both work.
- Large mixing bowl for the brine
- Large shallow dish or rimmed tray for dredging
- Dutch oven or heavy-bottomed deep pot
- Instant-read meat thermometer
- Deep-fry or candy thermometer
- Wire cooling rack set over a rimmed baking sheet
- Tongs
- Paper towels for pre-fry pat down only
- Brine chicken in seasoned buttermilk for at least 4 hours or overnight.
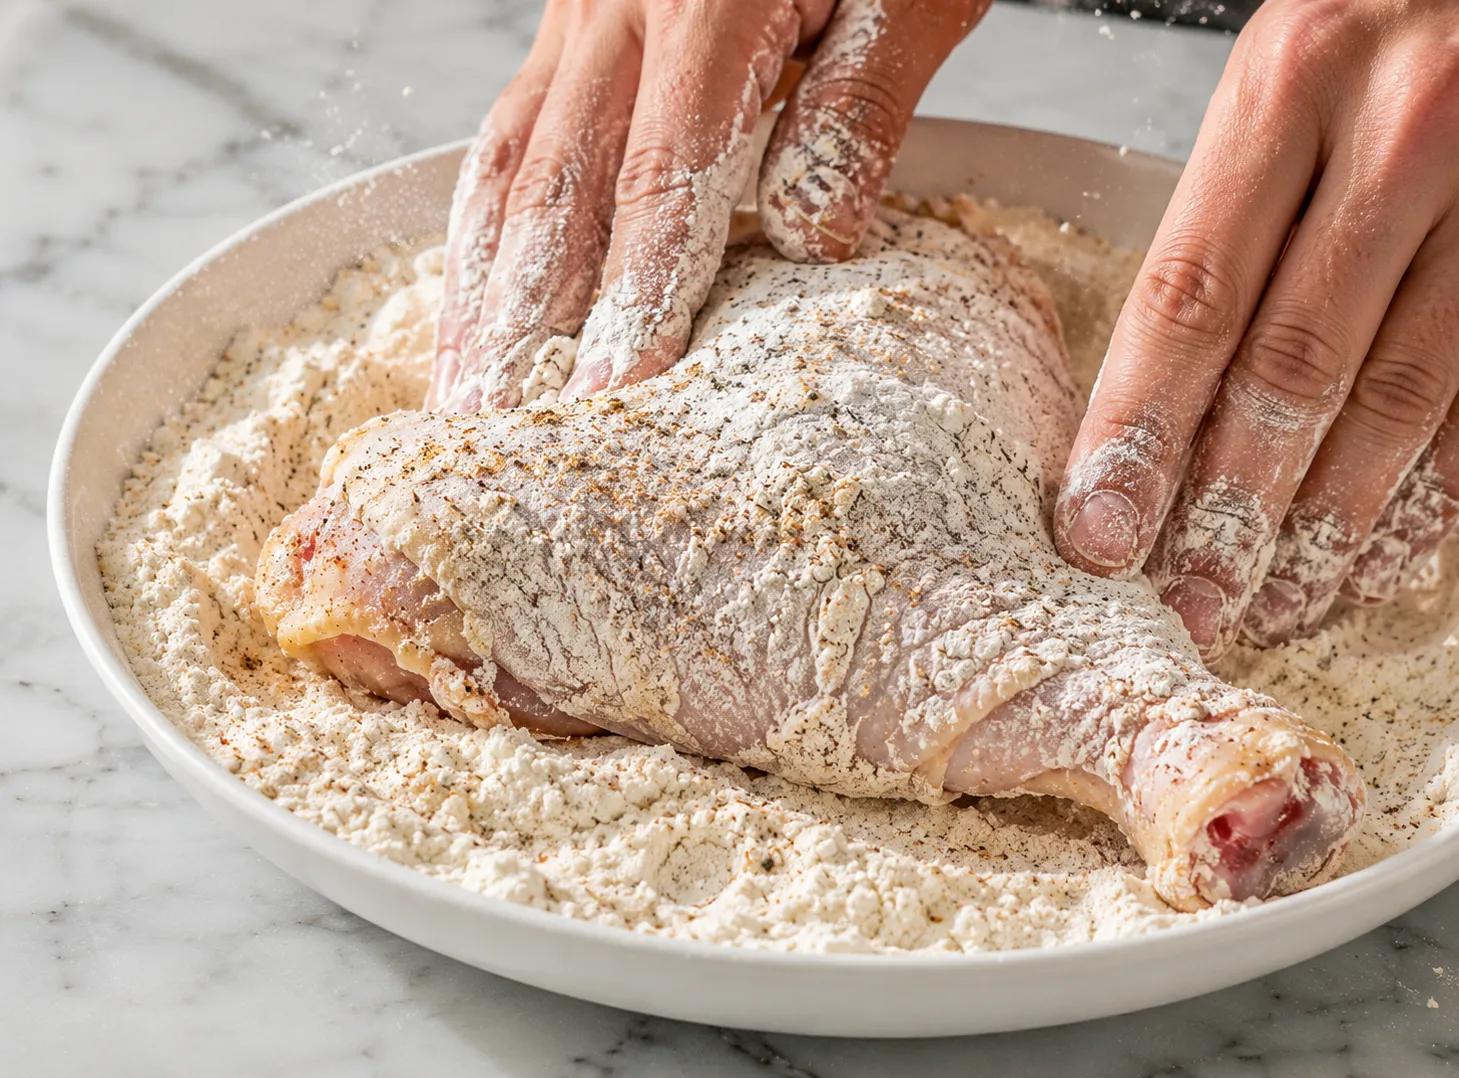
- Mix flour, cornstarch, and spices together in a shallow dish.
- Coat each piece firmly in the dredge and rest on a wire rack for 10 to 15 minutes.
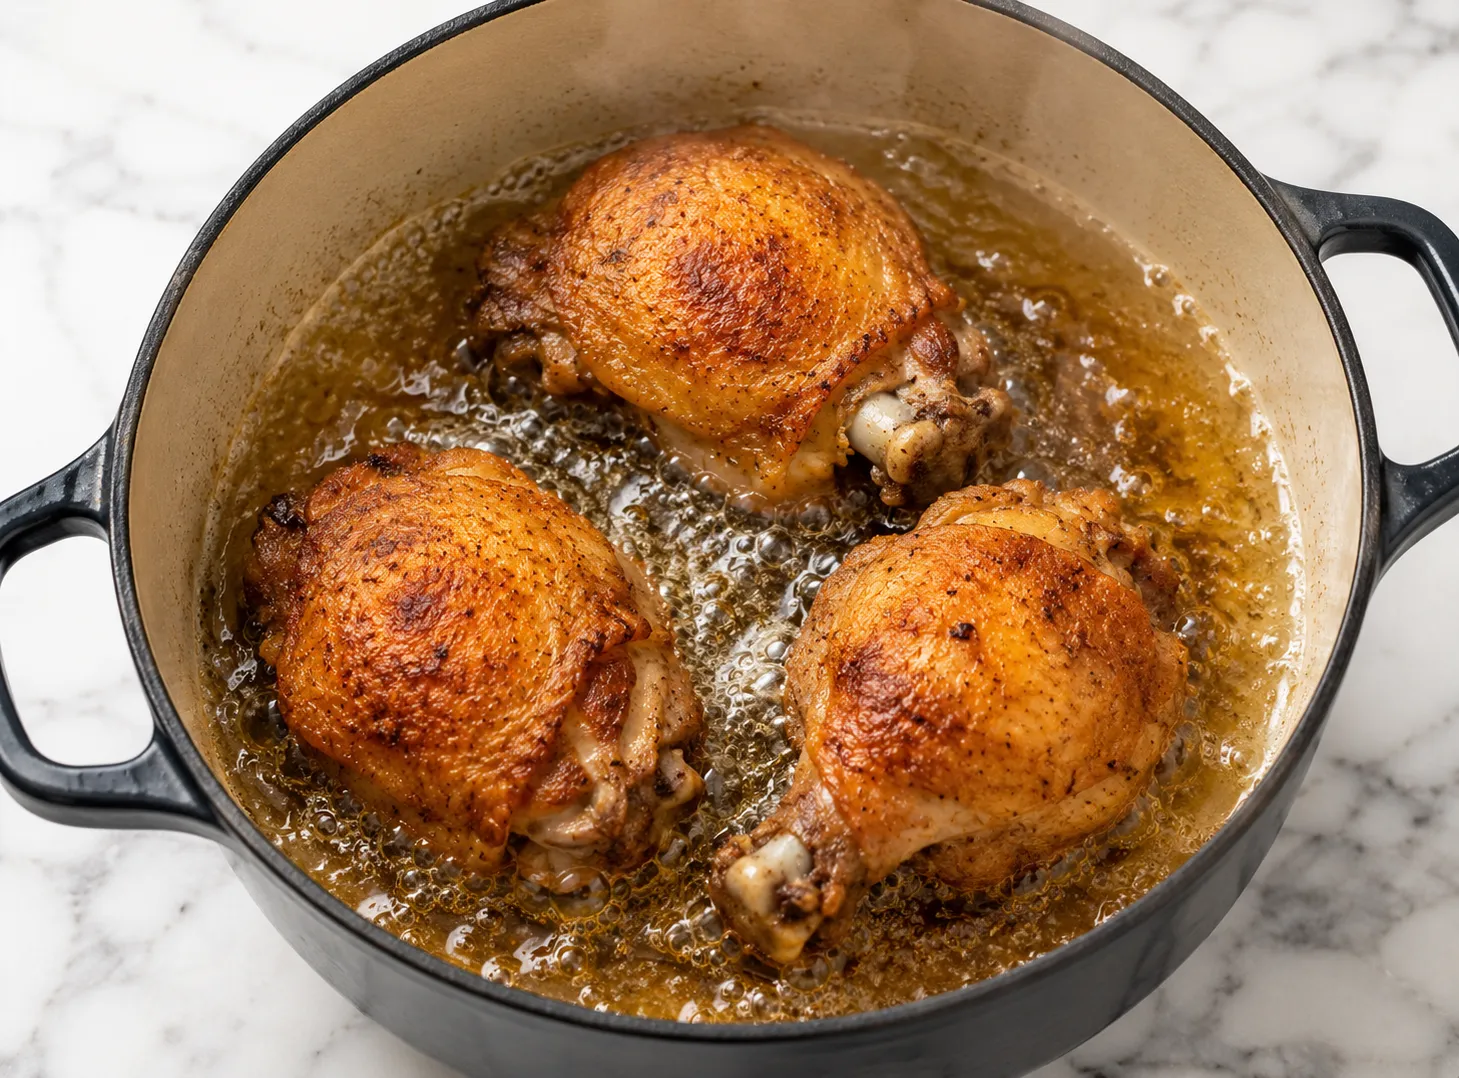
- Heat oil in a Dutch oven to 325 to 350 degrees F.
- Fry in small batches, check internal temperature at 165 F, and rest on a wire rack before serving.
- Combine buttermilk, hot sauce, salt, and black pepper in a large bowl. Stir until mixed.
- Add chicken pieces to the brine. Press each piece down so it is fully coated.
- Cover the bowl and refrigerate for at least 4 hours. Overnight is better.
- In a large shallow dish, whisk together flour, cornstarch, paprika, garlic powder, onion powder, cayenne, oregano, thyme, salt, and black pepper until evenly combined.
- Remove one piece of chicken from the brine. Let the excess drip off for a few seconds.
- Press the chicken firmly into the flour mixture on both sides. Apply real pressure so the coating sticks.
- Shake off any loose flour and set the coated piece on a wire rack.
- Repeat with all remaining pieces.
- Let the dredged chicken rest uncovered on the rack for 10 to 15 minutes. This step keeps the crust from peeling off in the oil.
- Pour oil into a Dutch oven or heavy pot. Clip a thermometer to the side.
- Heat oil over medium-high heat until it reaches 325 to 350 degrees F.
- Add 2 to 3 pieces of chicken to the oil. Do not crowd the pot.
- Fry legs and thighs for 14 to 16 minutes, turning once at the halfway point.
- Fry breast pieces for 16 to 18 minutes, turning once.
- Fry wings for 10 to 12 minutes, turning once.
- Use a meat thermometer to confirm the internal temperature reads 165 F at the thickest point before removing.
- Transfer finished pieces to a clean wire rack over a baking sheet. Do not use paper towels.
- Season lightly with salt while still hot.
- Rest for 5 minutes before serving.
- Use bone-in, skin-on pieces. Boneless chicken dries out faster and the crust does not hold the same way.
- Cornstarch is what separates a genuinely crunchy crust from a tough one. Use it every time.
- After dredging, let the chicken rest on a rack for 10 to 15 minutes before it goes into the oil. The coating sets and grips the meat better.
- Keep the oil between 325 and 350 F the whole time. Too hot and the outside burns before the inside is done. Too cool and the chicken soaks up oil instead of frying.
- A Dutch oven holds oil temperature better than a wide skillet. Use one if you have it.
- Fry in small batches. Adding too many pieces at once drops the oil temperature fast and leads to a soft, greasy crust.
- Pat the chicken dry before adding it to the brine if it is very wet from packaging. Dry meat takes in brine more evenly.
- Skipping the buttermilk brine. Even 4 hours changes the texture and moisture level noticeably.
- Using boneless or skinless pieces. The skin crisps and the bone holds moisture during frying.
- Not resting the dredged chicken before frying. That 10-minute wait is what keeps the crust attached.
- Draining on paper towels. Steam gets trapped underneath and softens the crust. Always use a wire rack.
- Skipping the thermometer for the chicken. Cut into a piece to check and you lose all the juices. Use a probe. 165 F is the target.
- Frying in cold oil. The oil must be fully up to temperature before any chicken goes in.
- No buttermilk: Mix 2 cups of whole milk with 2 tablespoons of white vinegar. Let it sit for 5 minutes before using. It works nearly as well.
- Extra heat: Add 1 teaspoon cayenne to the brine and increase it in the dredge as well.
- Gluten-free: Use a 1-to-1 gluten-free flour blend and increase cornstarch to 3/4 cup.
- Oven-baked version: Place dredged pieces on a greased wire rack over a sheet pan. Spray generously with cooking oil. Bake at 425 F for 45 to 50 minutes, flipping once at the halfway point. Not as crunchy as fried, but solid.
- Nashville hot style: After frying, brush pieces with a mix of 2 tablespoons of hot frying oil, 1 tablespoon cayenne, 1 teaspoon brown sugar, and a pinch of garlic powder.
- Dairy-free brine: Use unsweetened oat milk or coconut milk with 2 tablespoons of apple cider vinegar.
- Classic coleslaw with an apple cider vinegar dressing
- Buttermilk biscuits or cornbread
- Mashed potatoes with gravy
- Mac and cheese
- Pickled jalapenos or bread-and-butter pickles
- Collard greens or braised green beans
- Corn on the cob
- Honey, hot sauce, or a dipping gravy on the side
- Refrigerator: Store cooled chicken in an airtight container for up to 4 days.
- Freezer: Freeze pieces in a single layer on a tray first, then transfer to a zip bag. Keeps up to 3 months.
- Oven reheat (best method): Place on a wire rack at 375 F for 15 to 20 minutes. The crust comes back close to fresh.
- Air fryer reheat: 375 F for 8 to 10 minutes works well for legs and wings.
- Avoid the microwave: It kills the coating and makes the meat rubbery.
- Do not cover chicken with foil while reheating. It traps steam and softens the crust.
Yes, and it is actually the better option. Overnight brining gives deeper flavor and a more tender texture throughout. Do not go past 24 hours or the texture starts to break down.
Two reasons come up most often. Either the dredge did not get pressed on firmly enough, or the resting step after dredging was skipped. Both matter. Press hard when coating and always rest for 10 minutes before the oil.
Peanut oil is the best choice for its high smoke point and clean flavor. Vegetable oil and canola oil both work well as alternatives.
Place finished pieces on a wire rack in a 200 F oven. Do not cover them or the crust softens from steam.
Yes. Let it cool completely, strain it through a fine mesh sieve, and store in a sealed container. Use within 1 to 2 weeks and stick to frying similar foods.
Let it rest for 20 to 30 minutes after dredging. It reduces the temperature difference between the coating and the oil and helps the chicken cook more evenly from the outside in.
- Thighs and legs are the most forgiving cuts for home frying. If you are making this for the first time, start with those pieces.
- The hot sauce in the brine does not come through as spicy in the finished chicken. It adds a background flavor that most people notice but cannot identify.
- Cornstarch is not interchangeable with flour for texture purposes. Use both.
- Always use a thermometer for both the oil and the chicken. It removes all the guesswork and is the single biggest factor in consistent results.
- If your crust comes out very thick or floury looking, shake the dredged pieces more firmly before the resting step.
- This recipe doubles and triples cleanly. Keep the same fry times regardless of batch size.
This fried chicken recipe does not need much selling. Once you get the brine and the oil temperature right, everything else falls into place. The crust stays crunchy because of the cornstarch and the resting step before frying. The meat stays juicy because the buttermilk brine does its job overnight. Neither of those things requires any special skill. They just require not skipping steps. Southern fried chicken has been cooked this way for generations because the method actually works. There is nothing trendy about it and nothing to overthink. Brine the chicken, dredge it properly, fry it in hot oil, and let it rest on a rack. That is the whole process. Make it once with patience and you will understand why this style of fried chicken has never needed to be reinvented. It is already exactly what it needs to be.