
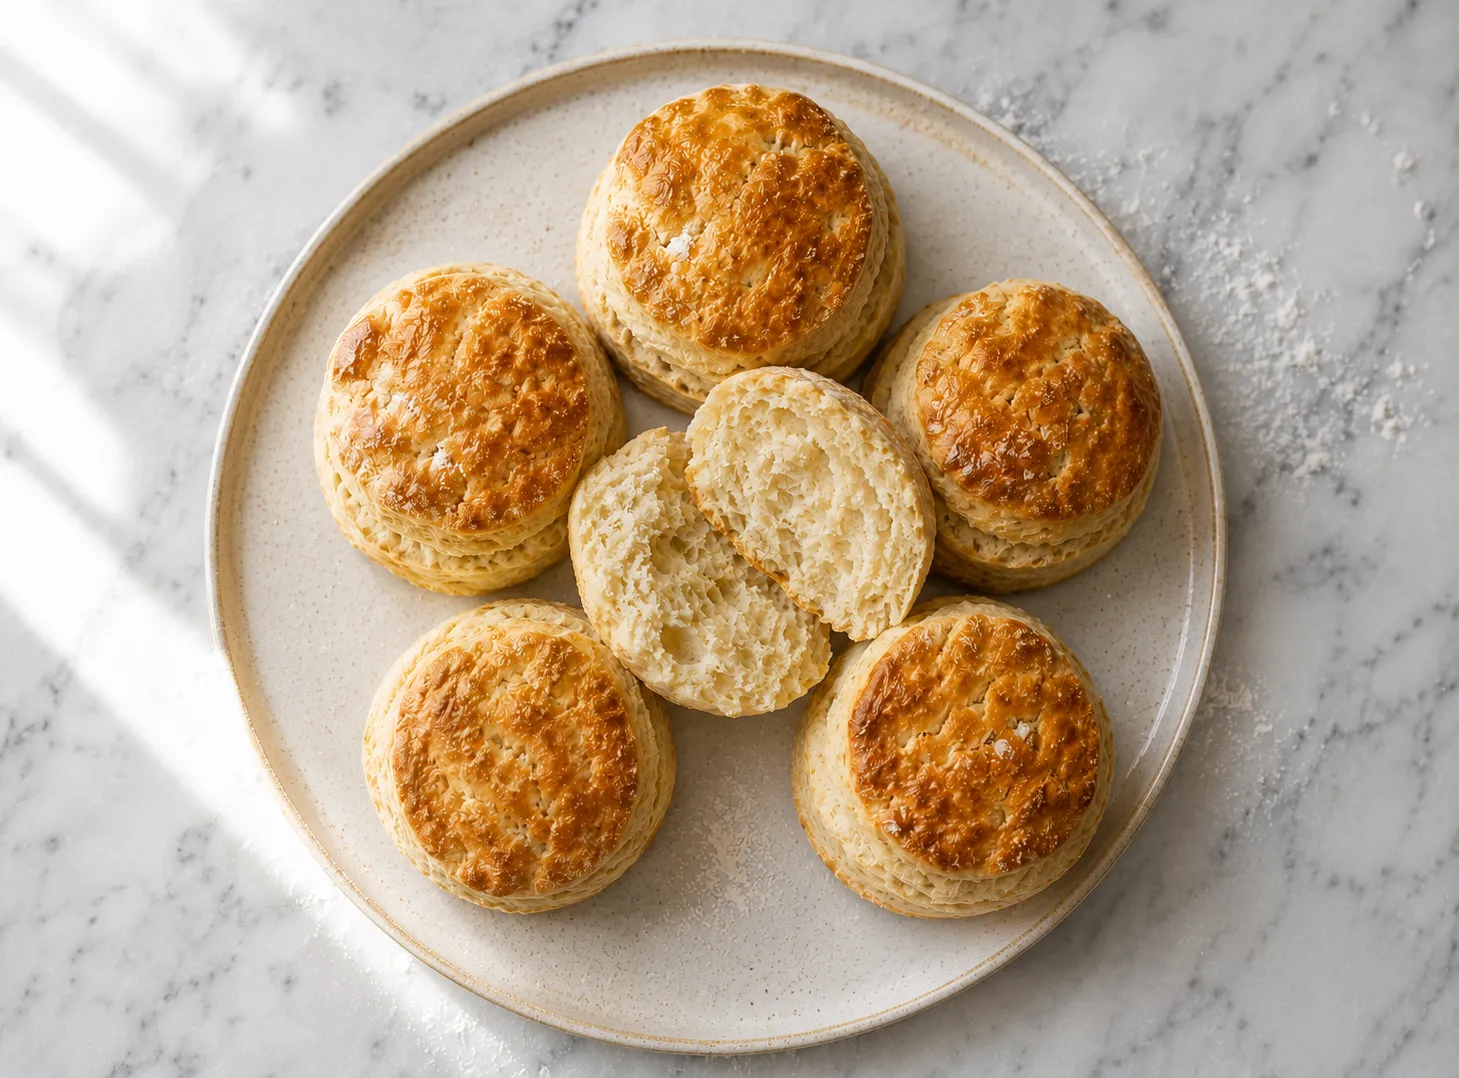

This scones recipe is the kind you come back to again and again. The crumb is soft and open, the crust is golden, and the whole thing comes together in under 35 minutes with pantry staples. No yeast, no special equipment, no tricky timing. You just need cold butter, cold milk, and a light hand. Whether you are serving them at a proper afternoon tea or pulling them out of the oven on a quiet morning, these scones hold up. They are honest, unfussy, and genuinely good.
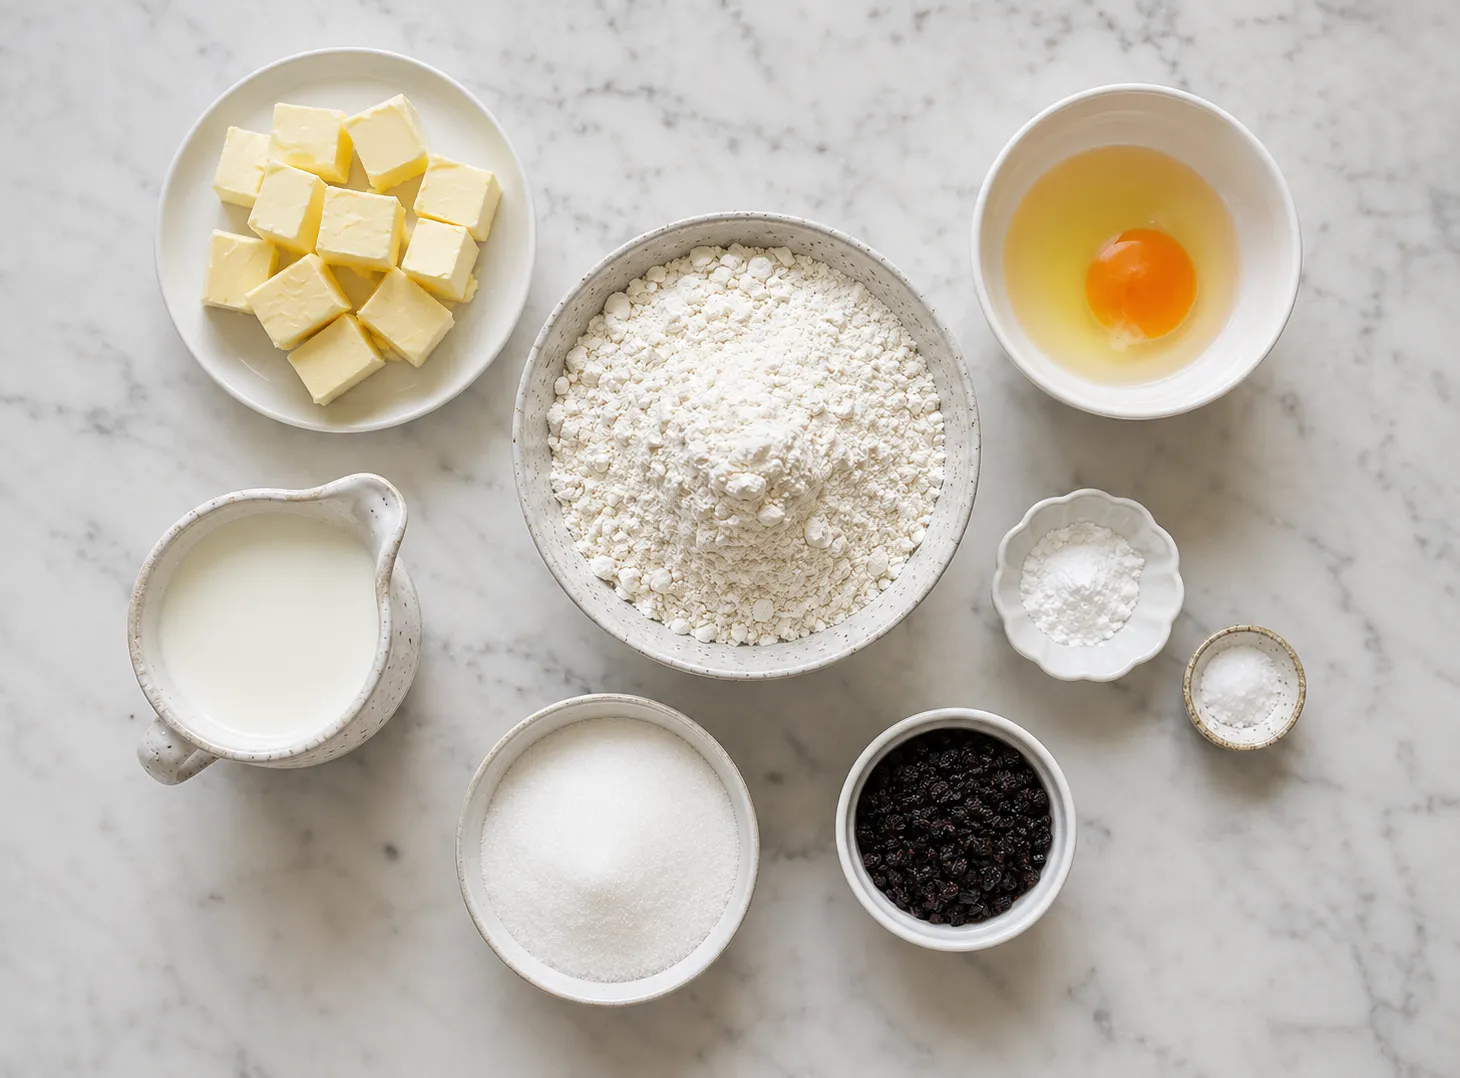
- 2 cups all-purpose flour , About 250g. Plus extra for dusting the surface and cutter.
- 1 tablespoon baking powder , Check the date on your tin. Old baking powder gives poor rise.
- 0.25 teaspoon fine salt
- 2 tablespoons caster sugar
- 85 g cold unsalted butter , Cube it and keep it in the fridge until you need it. Cold butter is the whole game here.
- 150 ml cold whole milk , Plus a little extra for brushing the tops before baking.
- 1 large egg
- 75 g dried currants or sultanas , Optional. Fold in just before shaping.
- 1 lemon, zested , Optional. Adds a clean brightness to the dough.
- Large mixing bowl
- Pastry cutter or two butter knives
- Baking sheet
- Parchment paper
- Rolling pin (for reference only — pat with hands instead)
- Round cutter, 6 to 7 cm
- Pastry brush
- Wire cooling rack
- Mix dry ingredients and rub in cold butter until the mixture looks like rough breadcrumbs.
- Add the beaten egg and cold milk. Bring the dough together quickly — no kneading.
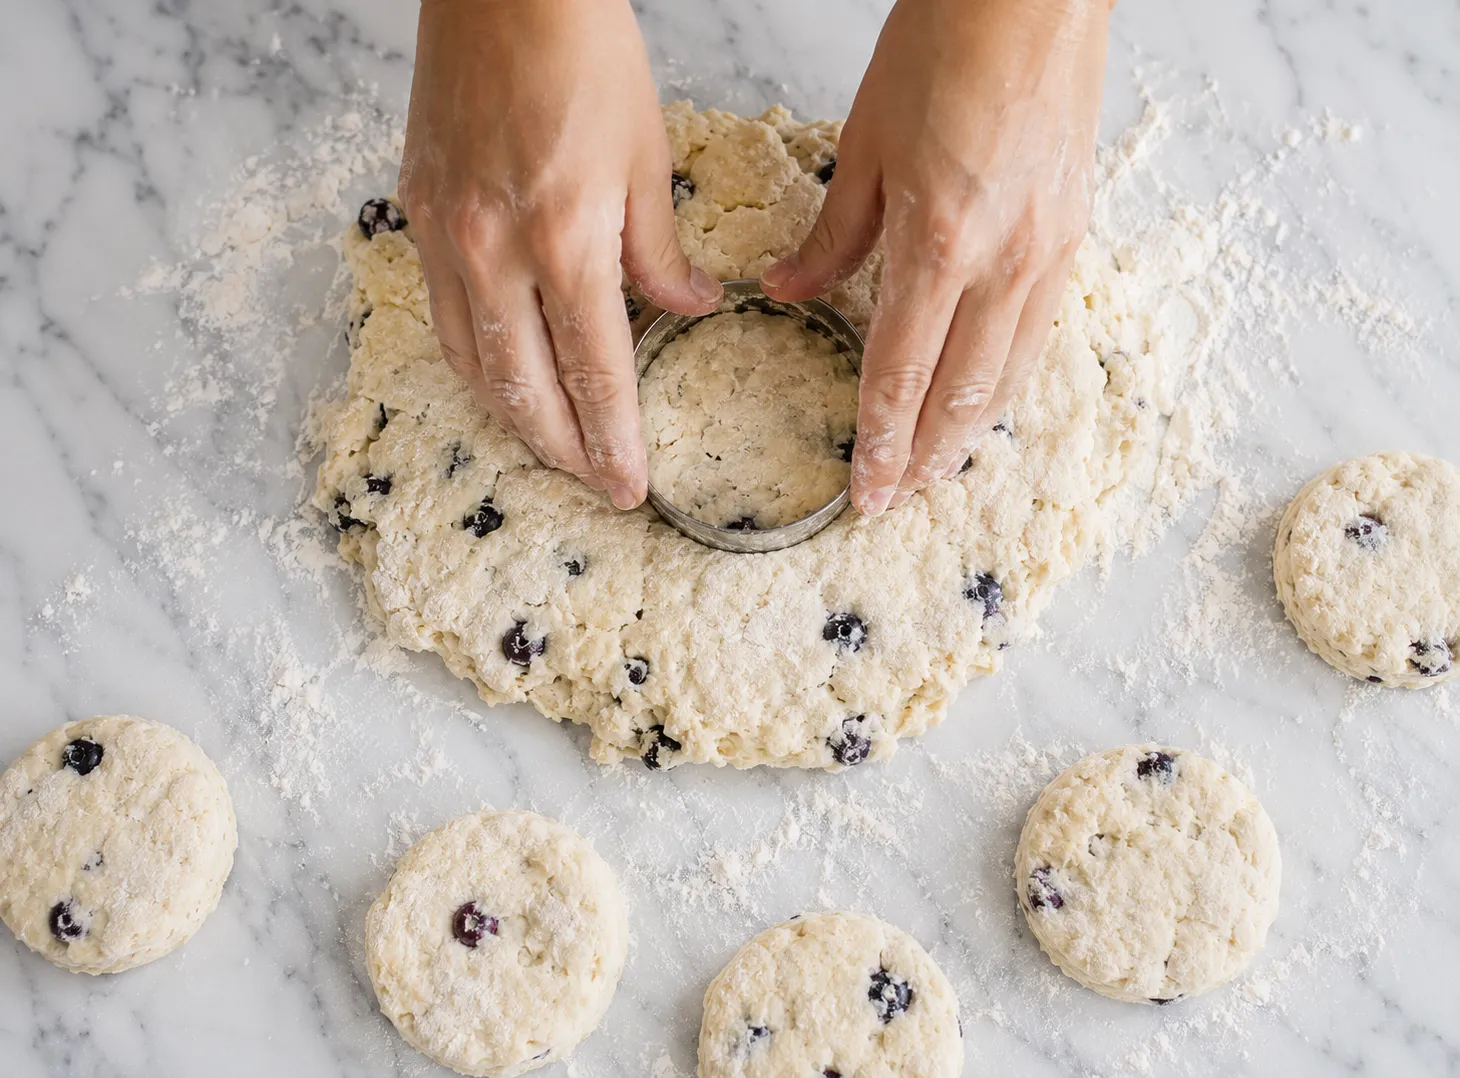
- Pat out to 2.5 cm thick and cut into rounds without twisting the cutter.
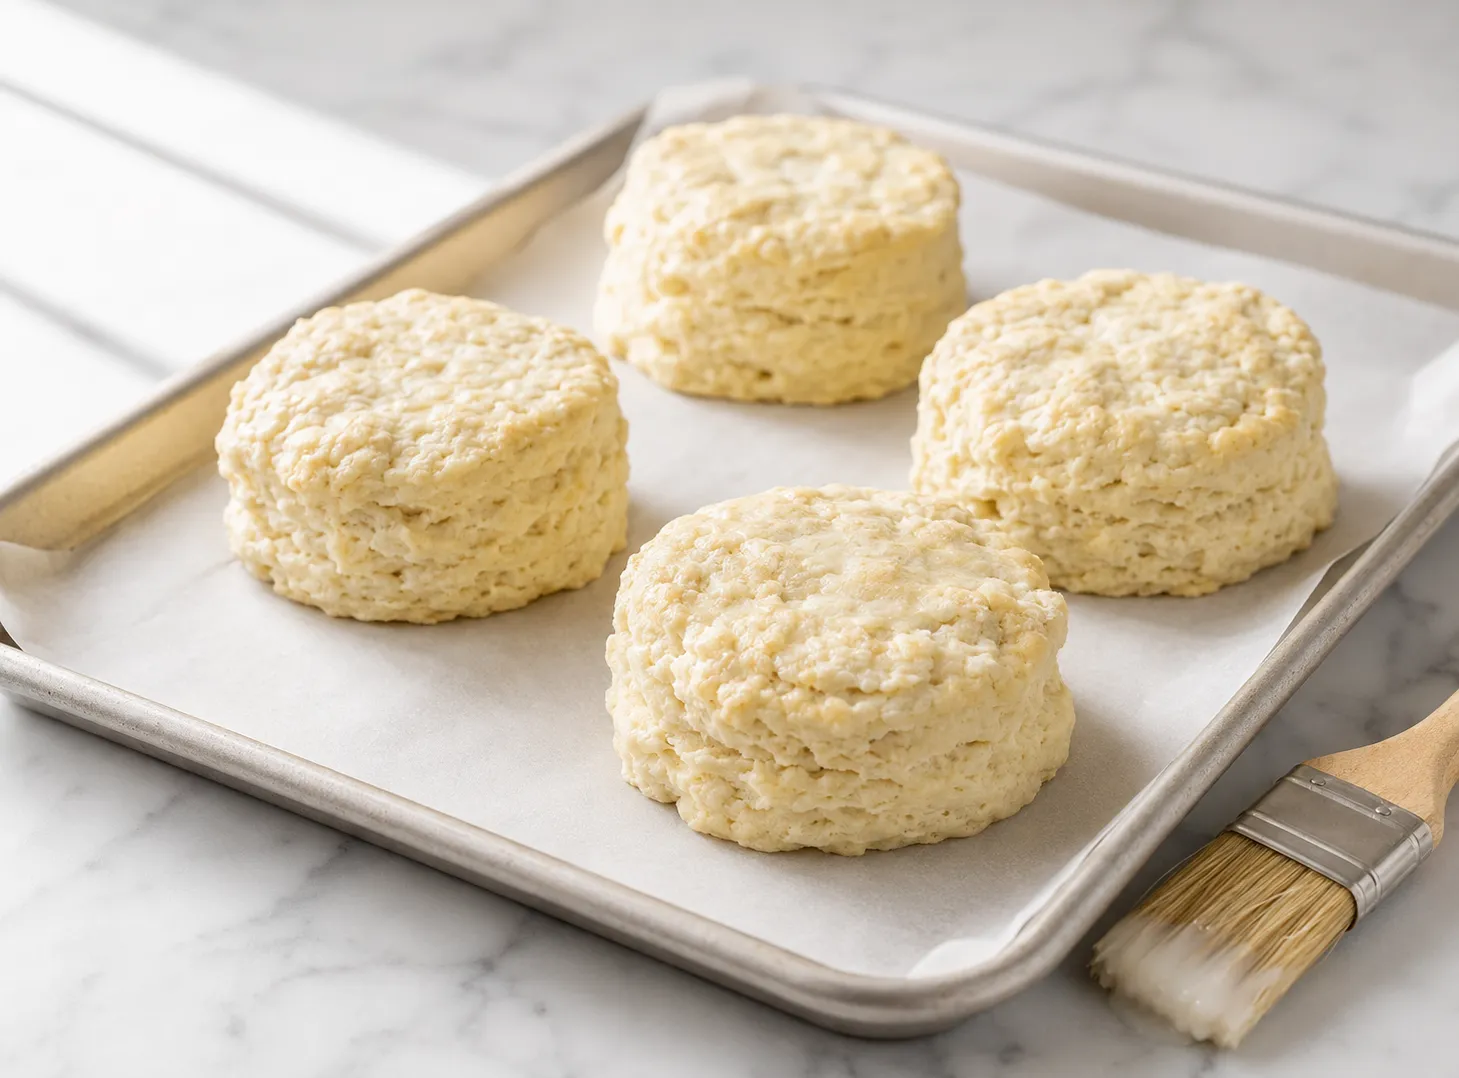
- Brush tops with milk and bake in a hot oven for 12 to 14 minutes.
- Rest on a wire rack for 5 minutes before serving.
- Preheat your oven to 220 degrees C (200 degrees C fan, 425 degrees F). Line a baking sheet with parchment paper.
- Sift the flour, baking powder, and salt into a large bowl. Stir in the sugar.
- Add the cold cubed butter. Rub it into the flour with your fingertips until the mixture looks like coarse, uneven breadcrumbs. Work quickly so the butter stays cold.
- Make a well in the center. Beat the egg lightly and pour it in along with the cold milk.
- Use a round-bladed knife or fork to bring the dough together with short, quick strokes. Stop the moment it comes together. Do not knead.
- If adding currants or sultanas, fold them in now with two or three folds.
- Turn the dough out onto a lightly floured surface. Pat it gently to about 2.5 cm thick. Keep it rough and handle it as little as possible.
- Dip your cutter in flour and press straight down without twisting. Lift straight up. Twisting seals the edges and stops the scones from rising properly.
- Place the rounds on the prepared tray. Gather the scraps gently, pat out again, and cut more rounds.
- Brush the tops lightly with milk. Do not let the milk drip down the sides.
- Bake for 12 to 14 minutes until well risen and deep golden on top.
- Transfer to a wire rack and rest for 5 minutes before splitting and serving.
- Cold butter is the most important variable. Keep it in the fridge until the exact moment you need it.
- Cold milk matters too. Warm liquid softens the butter too early and makes scones greasy.
- Work the dough as little as possible. Every extra fold develops gluten and toughens the crumb.
- Pat the dough, do not roll it. A rolling pin compresses the layers and reduces rise.
- Flour your cutter before every press so the dough does not stick or tear at the edges.
- A hot oven creates the steam burst that lifts scones quickly. Do not reduce the temperature.
- Bake on the upper third of your oven for an even, deep-gold top.
- Let them cool for a few minutes before splitting. Cutting into a too-hot scone crushes the inside.
- Using soft or room-temperature butter. It coats the flour instead of creating flaky pockets.
- Overworking the dough. More than a few folds and your scones will be dense.
- Twisting the cutter. Always press straight down and lift straight up.
- Rolling the dough thinner than 2 cm. Flat scones that barely rise are the result.
- Opening the oven too early. Wait until at least the 10-minute mark before checking.
- Letting the milk brush drip down the sides. This seals the layers together and blocks the rise.
- Using low-fat milk. The fat content matters for both tenderness and colour.
- Skipping the 5-minute rest after baking. The inside is still setting during that window.
- Cheese scones: Drop the sugar and add 100g of grated sharp cheddar plus a pinch of mustard powder.
- Fruit scones: Fold in 75g of dried currants or mixed dried fruit before shaping.
- Lemon cream scones: Replace half the milk with cold clotted cream and add the zest of one lemon.
- Wholemeal scones: Swap half the flour for wholemeal flour and add one extra tablespoon of milk, since wholemeal absorbs more liquid.
- Gluten-free: Use a 1:1 gluten-free flour blend that contains xanthan gum. The texture will be slightly more crumbly.
- Dairy-free: Use cold block-style plant-based butter and unsweetened oat milk. Results are close, though not identical.
- Buttermilk scones: Replace the milk and egg with 175ml of cold buttermilk. This gives a slightly tangy flavour and a very tender crumb.
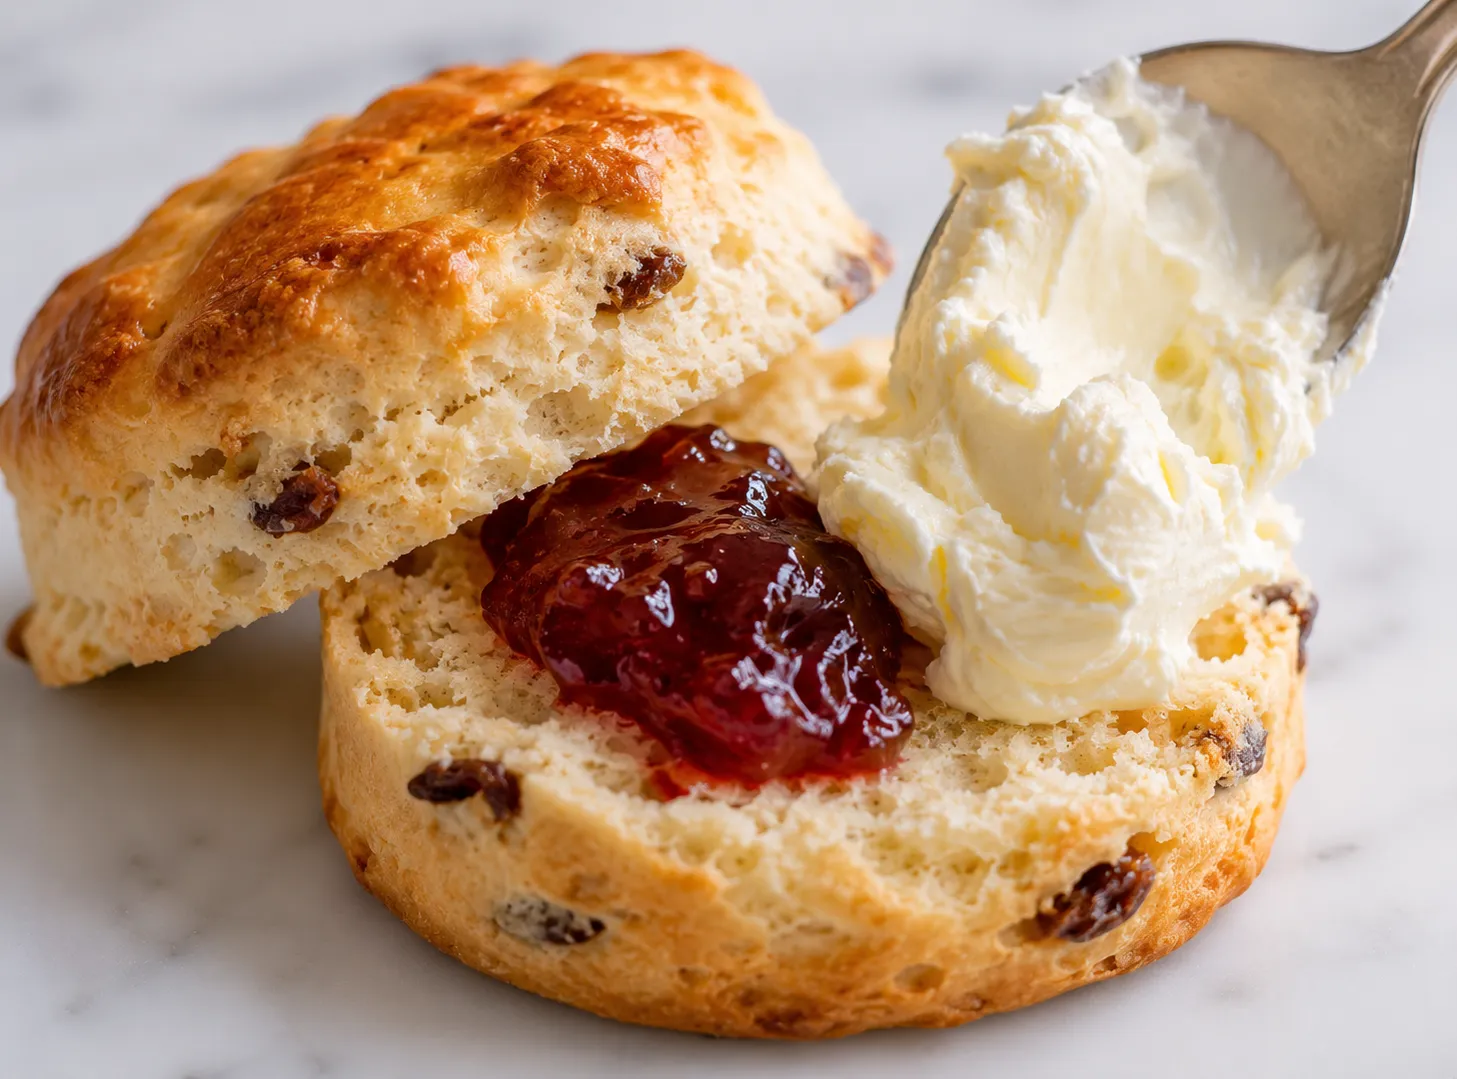
- Clotted cream and strawberry jam (Cornish style: cream first, then jam)
- Jam first, then clotted cream (Devonshire style)
- Lemon curd for a sharper, brighter contrast
- Whipped double cream as a lighter alternative to clotted cream
- Salted butter, which is simple and genuinely good
- A pot of strong breakfast tea or Earl Grey
- Smoked salmon and cream cheese for a savoury take
- At room temperature: Store in an airtight container for up to 2 days. After that, texture starts to decline.
- To refresh: Place on a baking sheet in a 180 degrees C oven for 5 to 8 minutes.
- Do not microwave scones. They turn tough.
- Freezing baked scones: Freeze in a single layer, then transfer to a freezer bag. Keeps for up to 3 months. Bake from frozen at 190 degrees C for 12 to 15 minutes.
- Freezing unbaked rounds: Place cut rounds on a tray, freeze solid, then bag. Bake from frozen at 220 degrees C for 16 to 18 minutes.
The three most common causes are overworked dough, twisting the cutter, and butter that was too soft. Check all three before your next attempt.
Yes. Cut the rounds, place them on a tray, cover tightly, and refrigerate overnight. Brush with milk and bake straight from the fridge the next morning.
British scones are smaller, rounder, less sweet, and meant to be topped after baking. American scones are larger, often triangular, denser, and usually have mix-ins baked into the dough.
Yes. If you do, leave out the baking powder. Some bakers still add a small extra amount for more lift, but it is not required.
Usually too much flour worked in during shaping, or the dough was overhandled. Weigh your ingredients rather than using cups, and stop touching the dough as soon as it holds together.
No. The egg adds richness and helps with colour and rise, but you can leave it out. Replace it with two extra tablespoons of cold milk. The scone will be a little plainer.
- Weighing ingredients gives far more consistent results than cup measurements for this recipe.
- The dough should feel slightly sticky when it first comes together. Smooth and easy to handle usually means it has been overworked.
- Real clotted cream has a fat content of around 55 percent. Whipped cream is lighter but not the same thing.
- If your kitchen is warm, chill your mixing bowl in the fridge for 10 minutes before starting.
- The scones are done when the sides look fully set and the tops are a deep, even gold. Pale tops need another minute or two.
- Baking powder loses strength over time. If yours is older than six months, test it by dropping a teaspoon into hot water. Active bubbling means it is still good.
- This recipe doubles easily. Freeze the second batch unbaked for a future morning.
Once you understand how this scones recipe works, it becomes one of the easiest things you can bake. The ingredients are simple, the process is short, and the results are consistent when you respect two things: keep everything cold and handle the dough as little as possible. There is no secret technique, no hard-to-find ingredient, and no step that requires experience to get right. What makes a great scone is restraint, cold butter, and a hot oven. Get those right and you will not need to look up another scones recipe. These hold up as well on a relaxed weekend morning as they do on a properly set afternoon tea table. Make them once and the method will stick with you.