
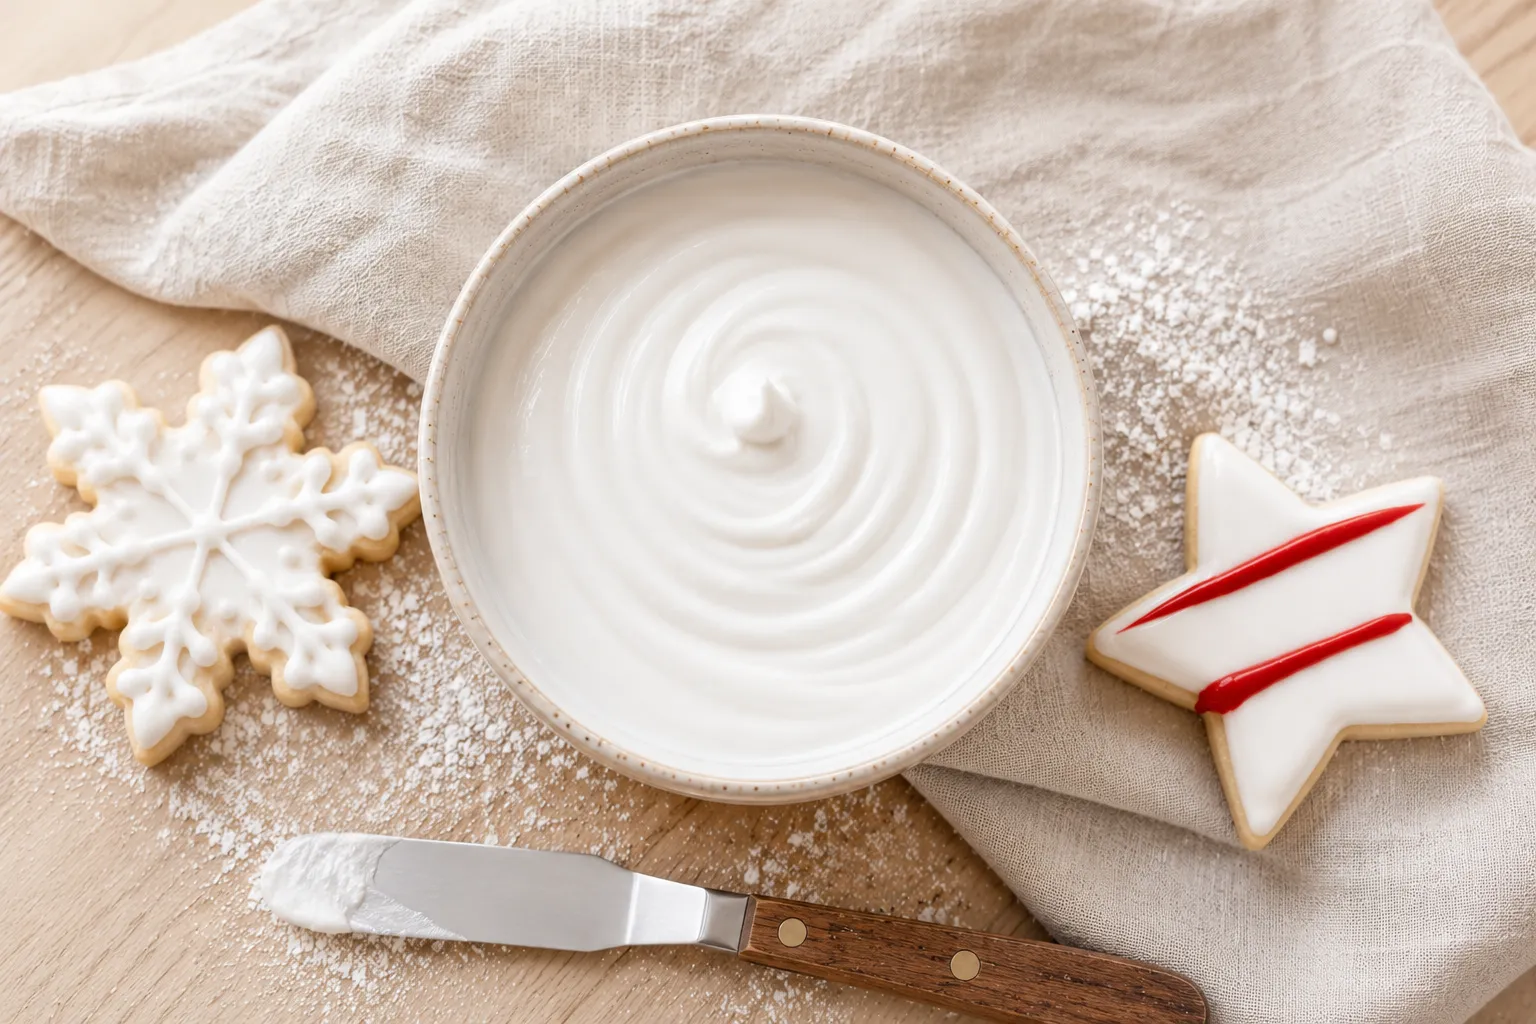

Royal icing is the one recipe every cookie decorator needs to get right. This version uses meringue powder instead of raw egg whites, which means it is safe for everyone, stays stable at room temperature, and keeps well in the fridge for up to two weeks. It pipes cleanly, floods without spreading past your outline, and dries to a firm, glossy finish that holds up for days. Whether you are outlining fine details or flooding large shapes, this recipe gives you consistent results with ingredients you can find at any grocery or baking supply store. No guesswork, no complicated technique.
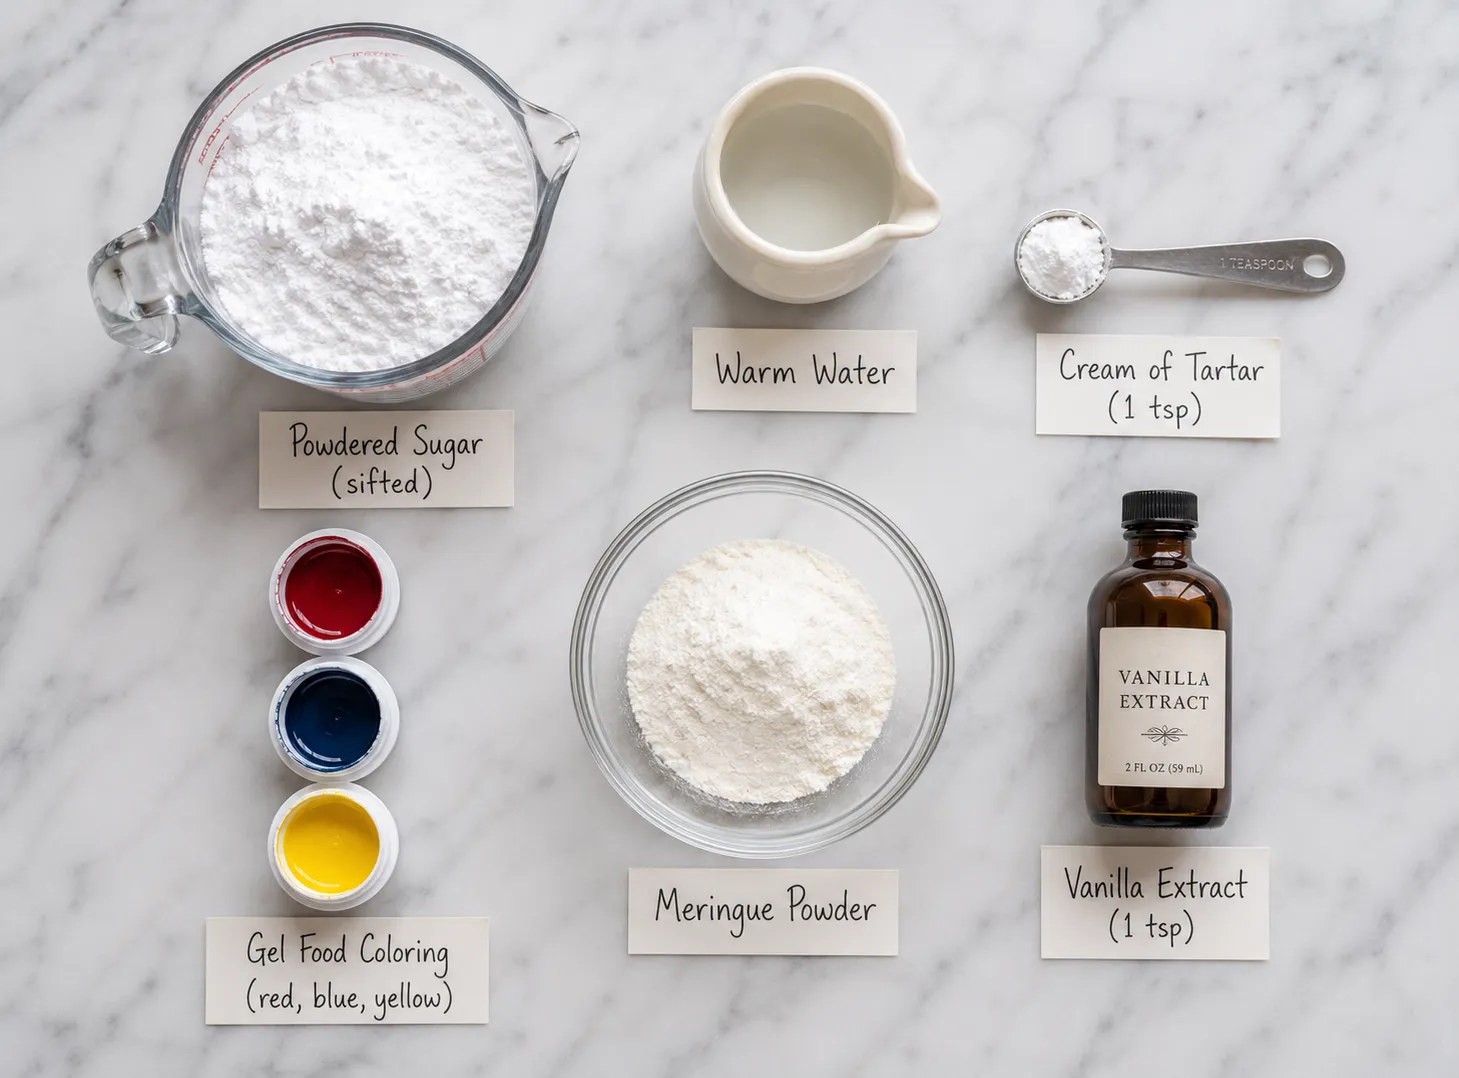
- 3 tablespoons meringue powder
- 6 tablespoons warm water , Warm, not cold. Warm water dissolves the meringue powder properly.
- 4 cups powdered sugar , Sifted before adding. Do not skip the sift.
- 1 teaspoon pure vanilla extract , Optional. Almond, lemon, or clear mint extract also work.
- 0.5 teaspoon cream of tartar , Optional. Adds stability in humid conditions.
- gel food coloring , As needed. Amount depends on desired color depth. Use gel only, not liquid.
- Stand mixer with whisk attachment, or a hand mixer
- Large mixing bowl
- Fine mesh sieve or sifter
- Rubber spatula
- Small bowls for dividing colors
- Piping bags
- Piping tips (size 1, 2, or 3 for most cookie work)
- Toothpick or scribe tool for smoothing flood icing
- Plastic wrap
- Dissolve meringue powder in warm water.
- Add sifted powdered sugar and beat until stiff peaks form.
- Adjust water content based on whether you need outline or flood consistency.
- Divide into bowls and add gel color.
- Cover and use right away, or refrigerate for later.
- Pour meringue powder and warm water into a large mixing bowl.
- Whisk by hand for about 30 seconds until the powder is fully dissolved and the mixture looks slightly foamy.
- Sift the powdered sugar directly into the bowl.
- Add vanilla extract if using.
- Turn the mixer to low speed.
- Mix on low for 30 seconds to bring everything together without sending powdered sugar into the air.
- Raise the speed to medium high.
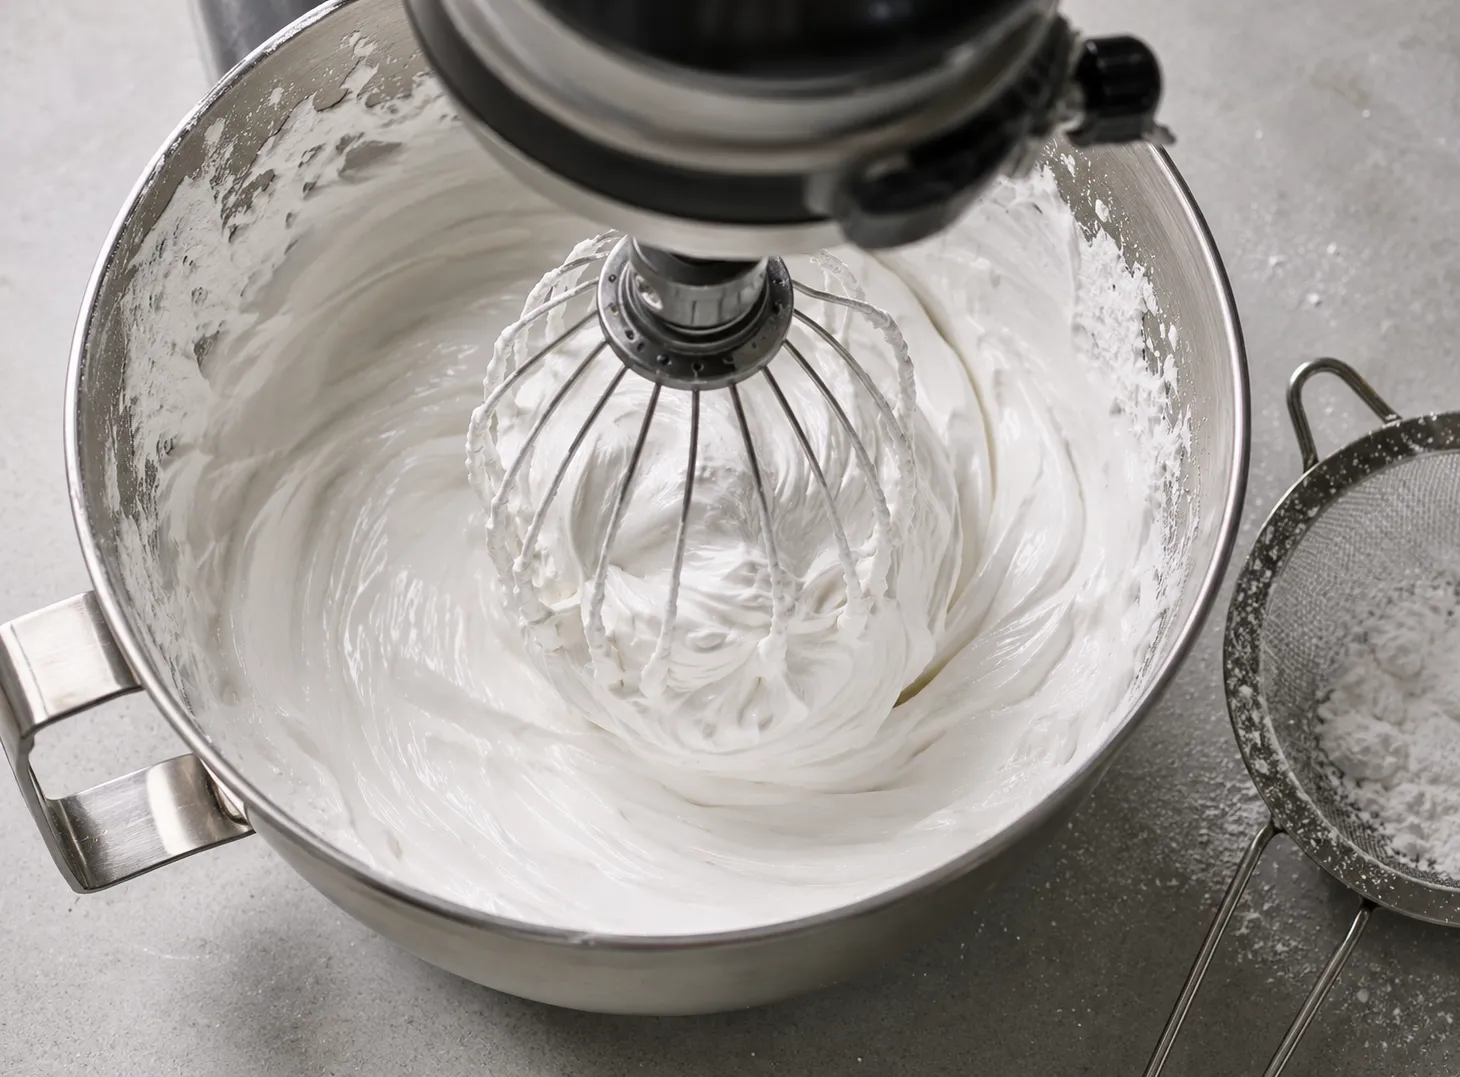
- Beat for 5 to 7 minutes until the icing is thick, glossy, and holding stiff peaks.
- Lift the beater to check. The icing should stand up straight without drooping. That is your stiff base.
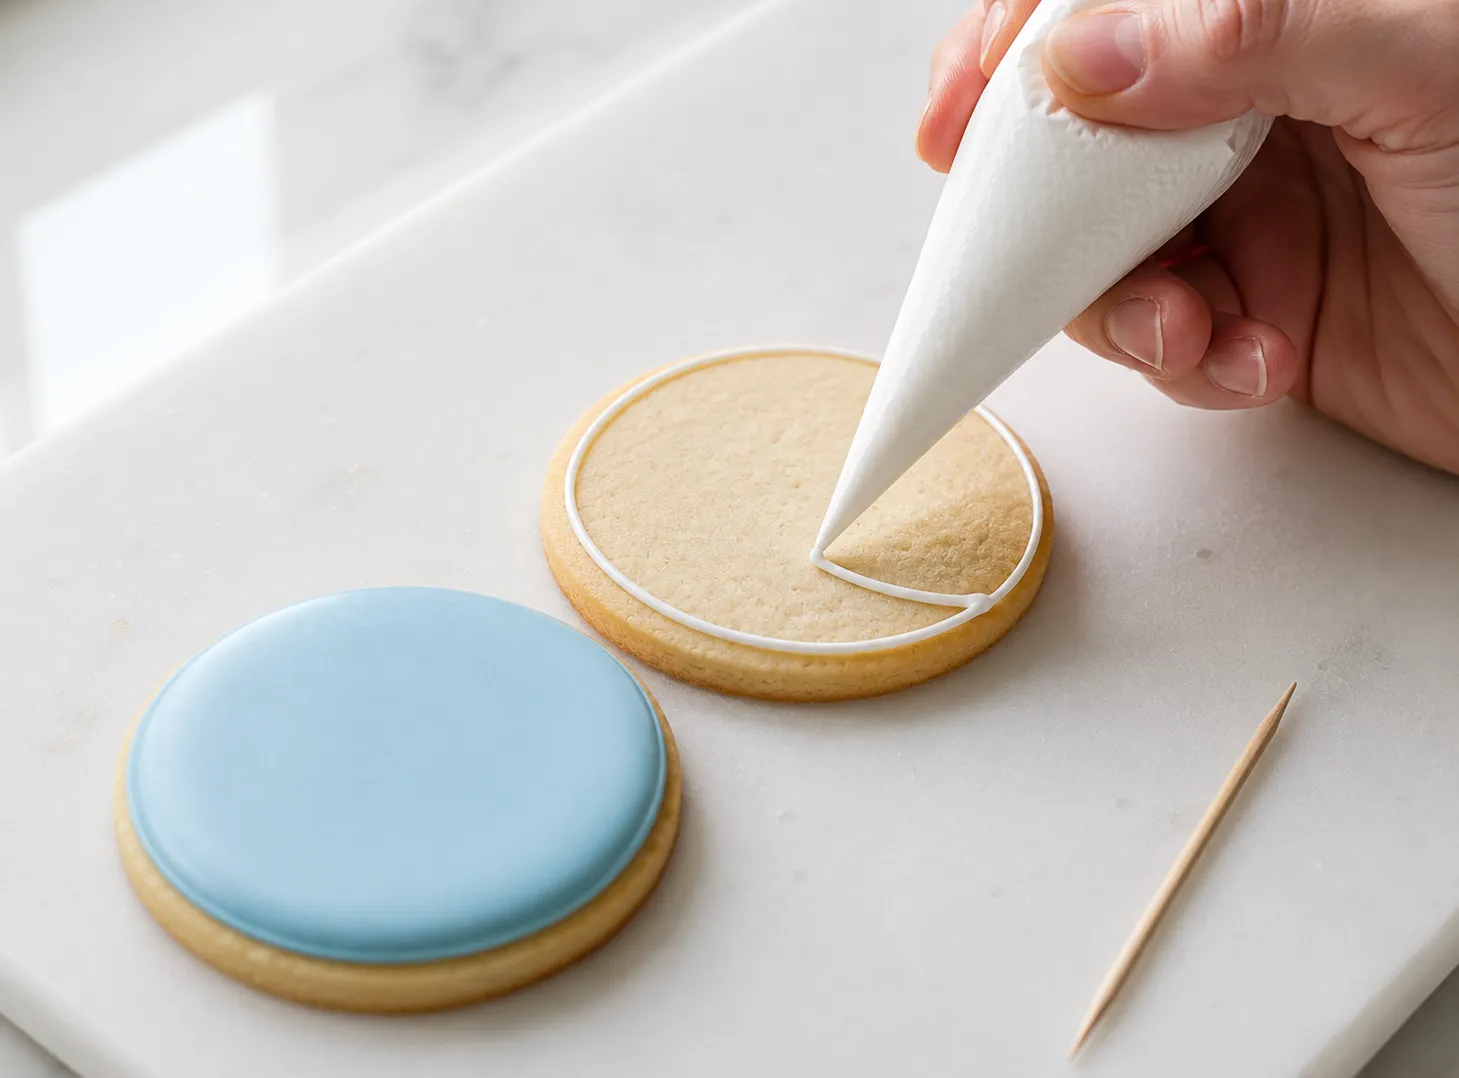
- For outlining: use the icing at this consistency. It holds lines and edges cleanly.
- For flooding: add warm water one teaspoon at a time. Stir gently between each addition.
- Run a toothpick through the surface. If the line fills back in within 10 to 15 seconds, the consistency is right.
- Add cream of tartar now if you are working in a humid kitchen. Stir it in gently.
- Split the icing into separate bowls, one for each color you need.
- Add gel food coloring to each bowl. Stir slowly to avoid working in air bubbles.
- Press plastic wrap directly onto the surface of every bowl before setting them aside.
- Use within 2 to 3 hours at room temperature. For longer storage, transfer to airtight containers and refrigerate.
- Sift the powdered sugar every time. Lumps do not beat out, they just stay lumps.
- Use gel food coloring only. Liquid coloring adds water to the mix and throws off your consistency.
- Do not cut the beating time short. Five to seven minutes at medium high speed is what gets you that thick, glossy finish. Under-beating gives you a flat, weak icing.
- Keep all bowls covered with pressed plastic wrap while you work. Royal icing starts crusting faster than you expect.
- When thinning for flood, add water by the teaspoon. The difference between one teaspoon and two can take you from flood consistency to icing that runs off the cookie.
- Use the 10-second rule every time before loading a piping bag. Drag a toothpick through the surface and count. If the line disappears in 10 to 15 seconds, you are ready to flood.
- For very dark colors like red or black, mix the color in and then let the icing sit for 30 minutes. The color deepens on its own, so wait before adding more.
- Skipping the sift. This is the single most common cause of lumpy icing.
- Starting with cold water. Warm water dissolves the meringue powder properly. Cold water leaves bits behind.
- Stirring too hard after adding color. Gentle stirring keeps the surface smooth and air-bubble free.
- Leaving bowls uncovered. Even a few minutes of air exposure can crust the top layer.
- Adding water in large amounts when thinning. You cannot reverse an icing that has gone too thin without rebuilding it from scratch with more powdered sugar.
- Using liquid extract in quantity. A small amount is fine. Too much shifts the consistency in ways that are hard to correct.
- No meringue powder on hand: Use 2 large egg whites in place of the meringue powder and water. The results are similar, but the icing is not shelf-stable and should not be served to young children or anyone who avoids raw egg.
- Different flavors: Almond extract, lemon extract, and clear mint extract all work well in place of vanilla.
- Vegan version: Aquafaba, the liquid from a can of chickpeas, works as a substitute. Use 3 tablespoons in place of one egg white. Beat it the same way.
- Need stiffer icing: Add sifted powdered sugar one tablespoon at a time until you reach the right texture.
- Need thinner icing: Add warm water one teaspoon at a time and test after each addition.
- Rolled sugar cookies
- Gingerbread cutouts
- Shortbread rounds
- Chocolate cut-out cookies
- Fondant-covered cakes where fine piping detail is needed
- Graham cracker houses
- At room temperature: Press plastic wrap directly against the icing surface. Good for 2 to 3 hours.
- In the refrigerator: Transfer to an airtight container with plastic wrap pressed to the surface. Keeps for up to 2 weeks.
- In the freezer: Freeze for up to 2 months. Thaw in the refrigerator overnight before using.
- Reviving stored icing: Stir well first. If it is too thick, add warm water one teaspoon at a time. If too thin, mix in sifted powdered sugar a little at a time.
- Never microwave royal icing to thin it. Water at room temperature is the right tool.

Yes. When made correctly and left to dry uncovered at room temperature, royal icing sets completely firm. Decorated cookies can be stacked and packaged once fully dry, which typically takes 6 to 8 hours.
Yes. Substitute 2 large fresh egg whites for the meringue powder and water. The icing works well, but it is not shelf-stable and is not recommended for young children or pregnant individuals.
Most of the time it comes down to not beating long enough. Make sure your mixer is at medium high speed and you are running it for the full 5 to 7 minutes. Also confirm your powdered sugar was sifted before adding.
Add warm water one teaspoon at a time and test with the 10-second rule. Stir gently so you do not create air bubbles. Once flooded onto the cookie, use a toothpick to pop any bubbles that appear on the surface.
Yes, gel food coloring works best. Add it gradually, stir gently, and give deep shades like red or black 20 to 30 minutes to develop before adjusting further.
Up to one week at room temperature in an airtight container. Royal icing seals the cookie surface and actually helps slow the cookies from going stale.
- This batch covers approximately 24 to 36 medium cookies depending on how detailed your designs are.
- Stiff icing is right for outlines, flowers, and raised detail work. Flood icing is right for filling flat areas smoothly.
- Always let decorated cookies dry uncovered at room temperature for at least 6 to 8 hours before stacking or packaging. Overnight is safer.
- Humidity slows down drying. In a warm, humid kitchen, plan for up to 24 hours of drying time.
- For deep colors, mix in more gel than you think you need, then wait. The color will deepen as the icing sits.
- A size 2 or size 3 tip works for most outlines. Drop to a size 1 for writing or very fine line work.
Royal icing is one of those foundational recipes that is worth spending a little time to understand properly. Once you know how to control the consistency, how to read the 10-second rule, and how humidity affects drying, you have everything you need to decorate cookies at any level of complexity. The recipe itself is simple. The technique is what matters. Get comfortable with adjusting between stiff and flood consistency, keep your bowls covered, and always sift your sugar. Follow those basics and your results will be consistent every single time you make this royal icing recipe. Decorated cookies that dry hard, look sharp, and hold up for days are completely within reach with this method.