
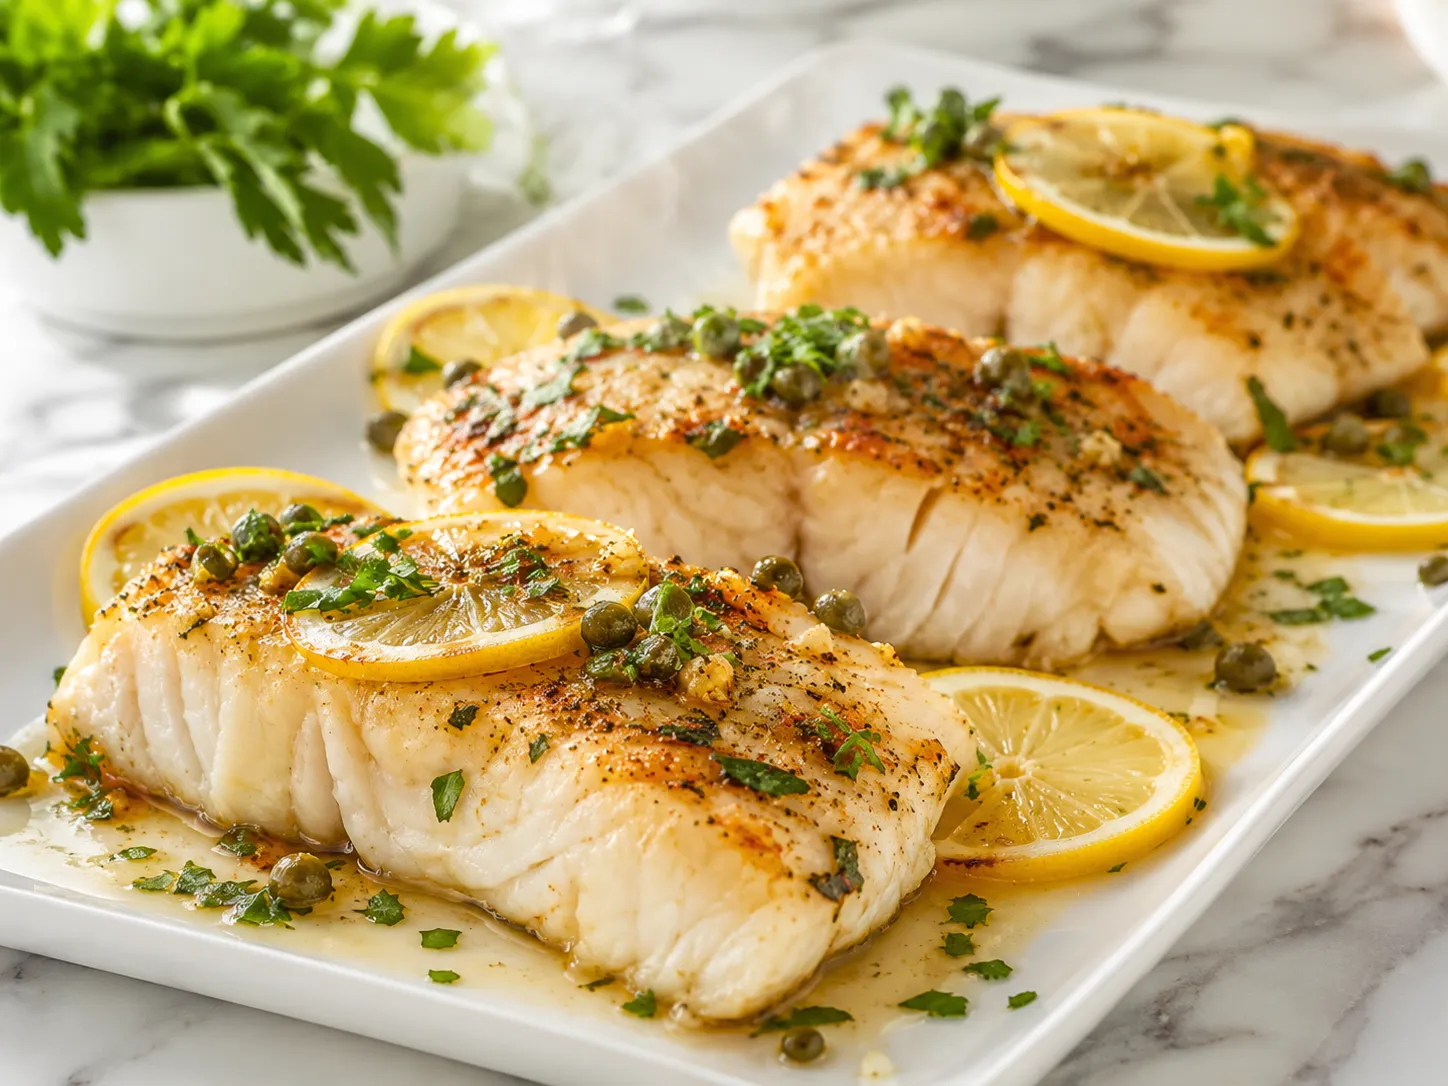
Halibut has no business being this easy to cook well. It is a firm, mild white fish that bakes beautifully in a hot oven without needing brines, marinades, or complicated prep. A little olive oil, butter, garlic, lemon, and the right oven temperature are genuinely all you need. This baked halibut recipe is built for weeknights when you want something that feels like a real dinner without spending an hour in the kitchen. The fish comes out tender and flaky every time as long as you watch the temperature and do not skip the rest time.
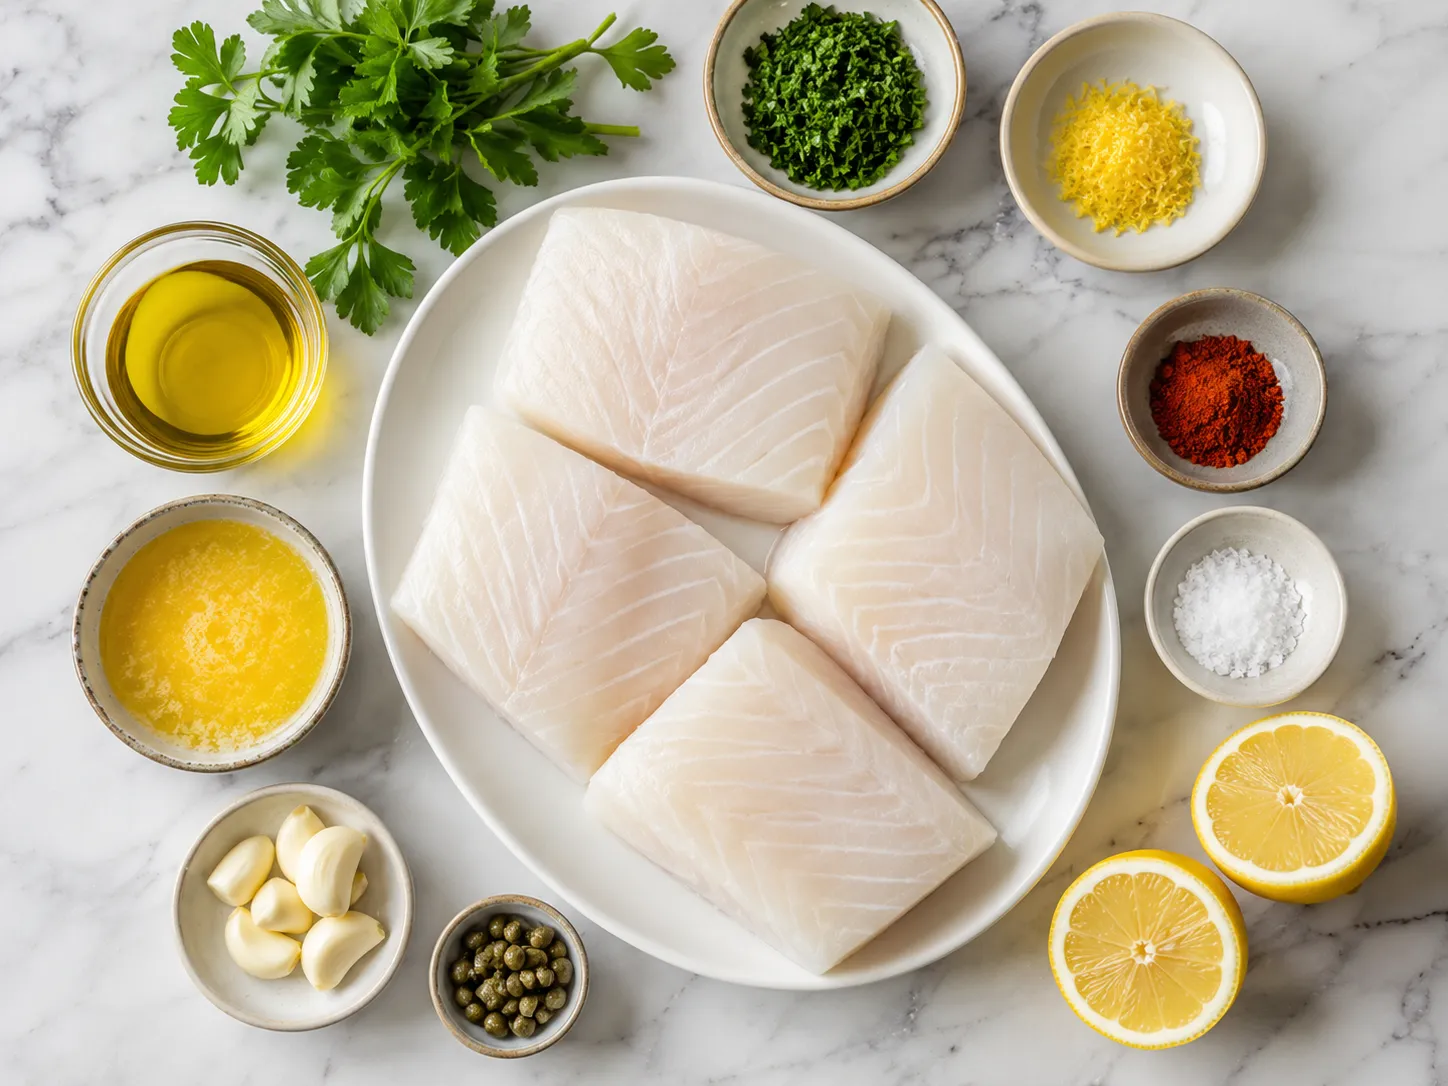
- 4 halibut fillets, about 6 oz each , Skin-on or skinless both work. Pat them completely dry before seasoning.
- 2 tablespoons olive oil
- 1 tablespoon unsalted butter, melted , Adds richness without raising the olive oil smoke point too much.
- 3 garlic cloves, minced
- 1 teaspoon kosher salt , Distributes more evenly than table salt.
- 0.5 teaspoon black pepper, freshly ground
- 0.5 teaspoon smoked paprika
- 0.25 teaspoon onion powder
- 1 lemon, zested , Zest before juicing. Once juiced, zesting is nearly impossible.
- 0.5 lemon, juiced
- 2 tablespoons fresh parsley, finely chopped
- thin lemon slices , For serving.
- 1 tablespoon capers , Optional. Scatter around the fish before baking.
- flaky sea salt , For finishing. Add just before serving.
- Preheat oven to 400 degrees F and lightly grease the baking dish.
- Pat fillets dry and mix the oil, butter, garlic, and seasoning.
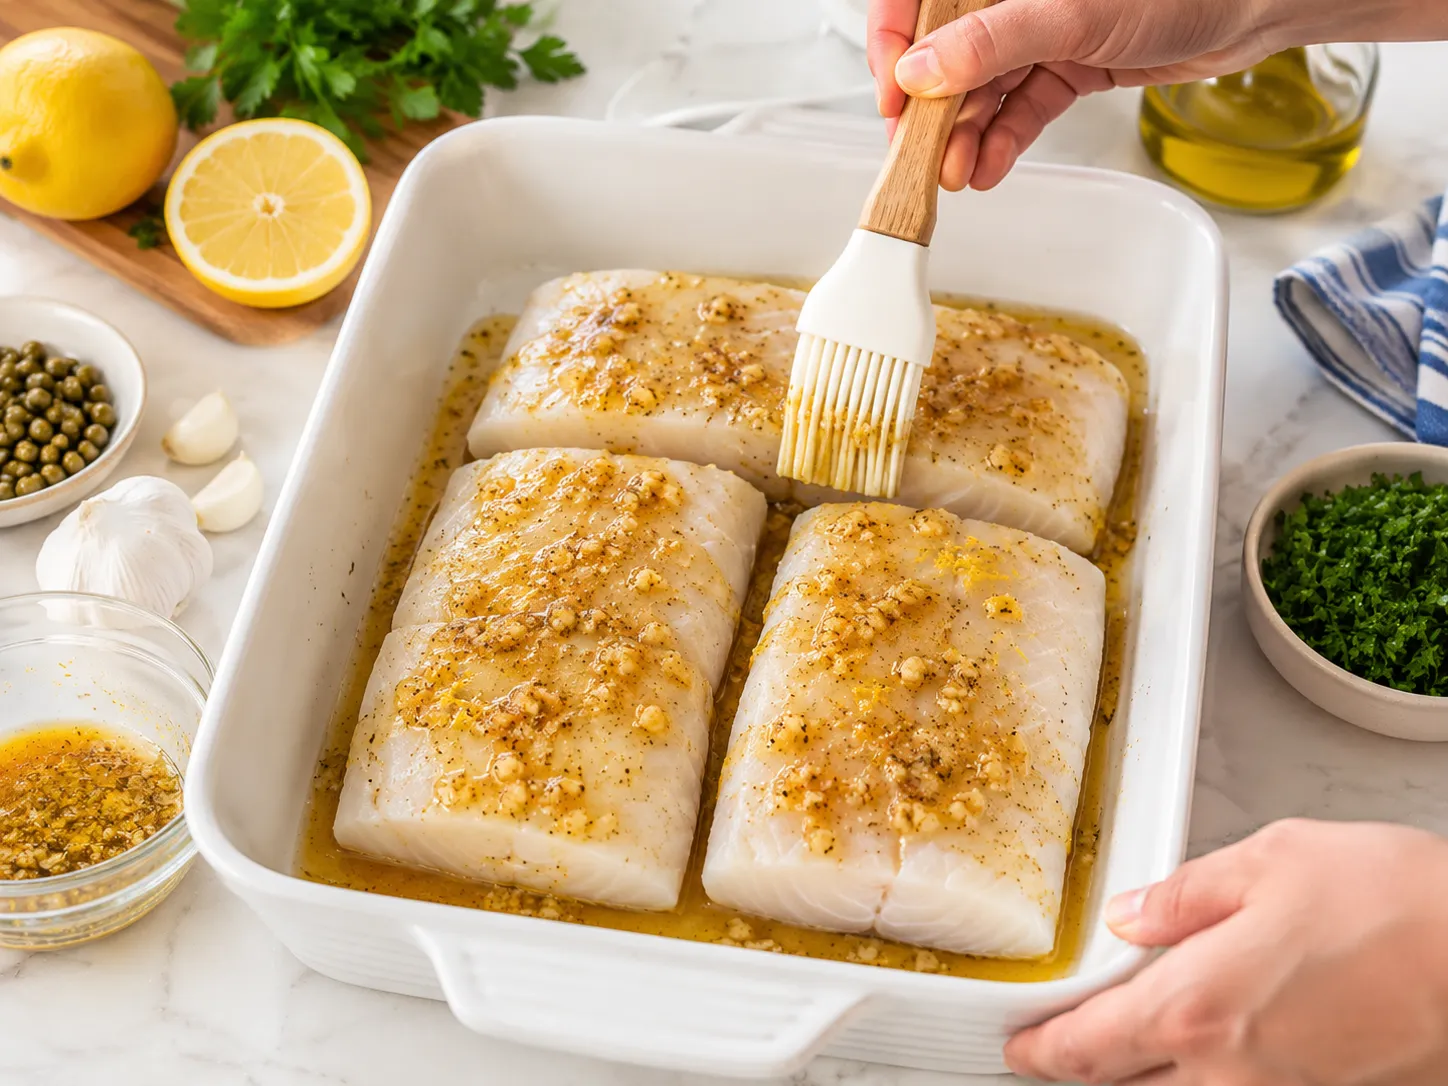
- Coat the fillets completely and arrange them in the dish with space between each piece.
- Squeeze lemon juice over the fish and add lemon slices on top.
- Bake uncovered for 12 to 15 minutes until the fish reads 130 to 145 degrees F and flakes cleanly.
- Rest for 3 minutes, then finish with parsley and flaky salt.
- Preheat your oven to 400 degrees F (200 degrees C). Lightly coat a 9x13 inch baking dish with olive oil or cooking spray.
- Take the halibut fillets out of the refrigerator 15 minutes before cooking. Letting them sit at room temperature helps them cook more evenly.
- Pat each fillet completely dry with paper towels on both sides. This is not optional. Moisture on the surface creates steam in the oven and prevents the coating from sticking.
- In a small bowl, combine the olive oil, melted butter, minced garlic, salt, black pepper, smoked paprika, onion powder, and lemon zest. Stir until everything is mixed.
- Brush or spoon the coating generously over the top and sides of each fillet. Get full coverage.
- Arrange the fillets in the baking dish. Leave a small gap between each piece so heat can move around them.
- Squeeze fresh lemon juice over the fillets. If you are using capers, scatter them around the fish now.
- Lay thin lemon slices on top of or beside the fillets.
- Bake uncovered in the center of the oven for 12 to 15 minutes. Start checking at the 12-minute mark, especially if your fillets are on the thinner side.
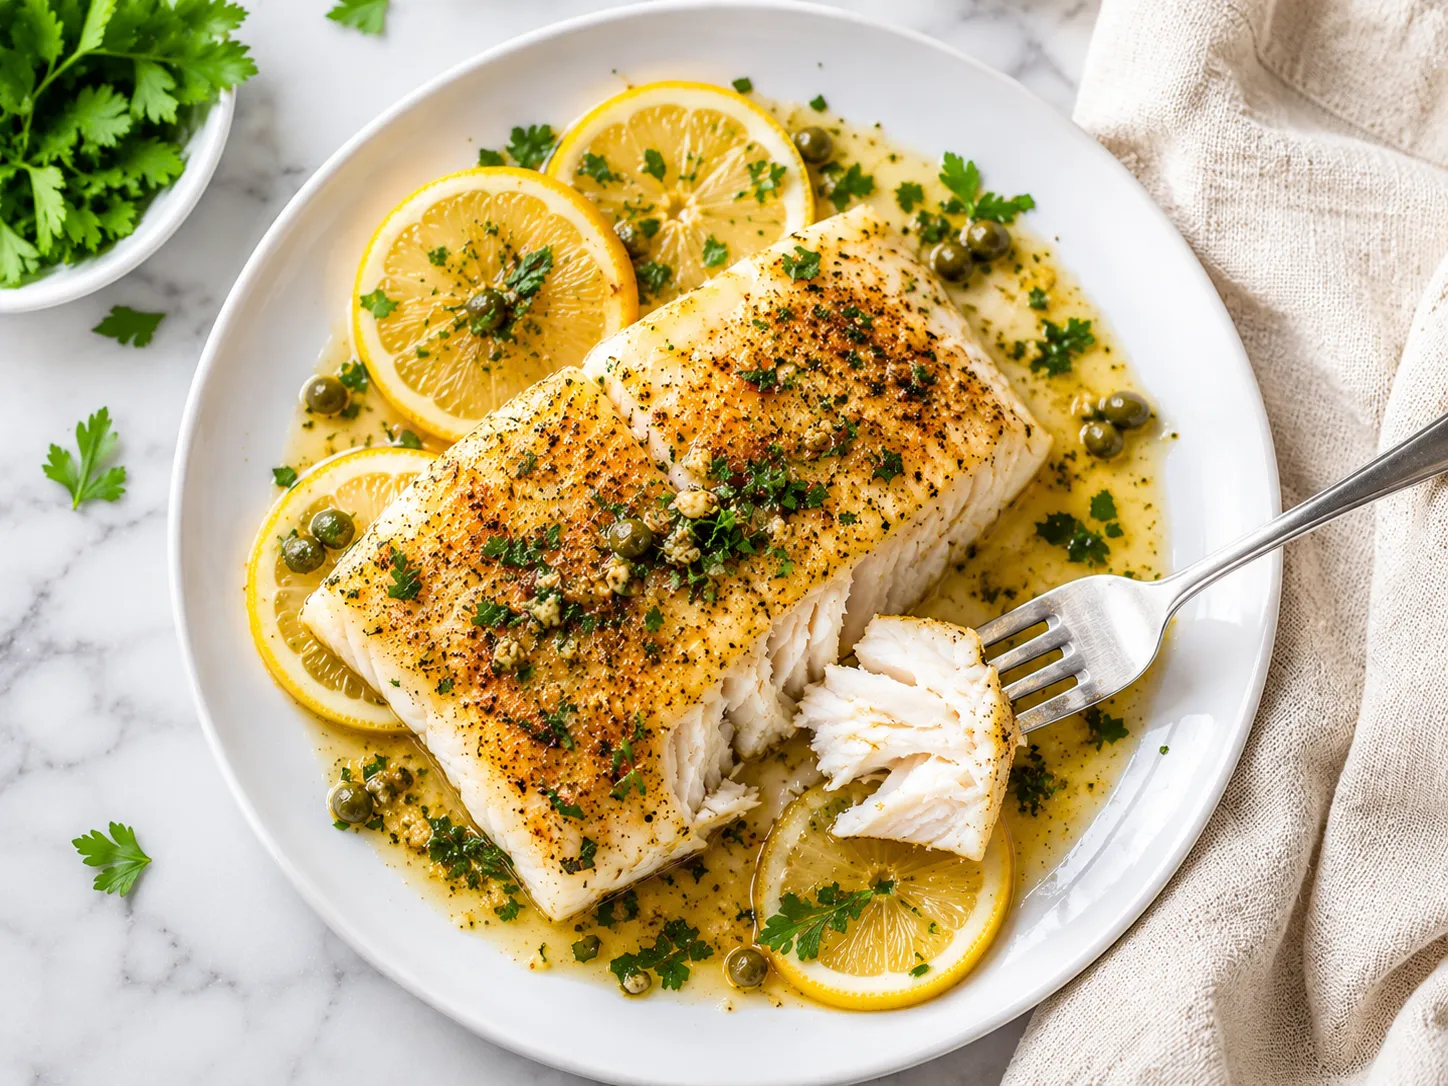
- Test for doneness. The fish should be fully opaque, flake easily when pressed with a fork, and read between 130 and 145 degrees F on an instant-read thermometer. At 130 degrees F the texture will be moist and just set. At 145 degrees F it is fully cooked by USDA standards.
- Remove the dish from the oven and let the fish sit for 3 minutes before serving. The juices settle back into the flesh during this time.
- Scatter chopped fresh parsley over the top, add a pinch of flaky sea salt, and serve with lemon wedges on the side.
- Always dry the fish before seasoning. Wet fillets do not hold the coating well and steam instead of bake.
- Use a thermometer rather than relying only on time. Fillet thickness varies, and a 130 to 135 degree F reading gives you a moist, clean result without the dryness that comes from going too far.
- Let the fish come to near room temperature before it goes in the oven. 15 minutes on the counter makes a difference for even cooking throughout.
- Butter and olive oil together is not accidental. The butter adds richness and the olive oil keeps the coating from scorching.
- Zest the lemon before you juice it. Once the juice is gone, the zest is almost impossible to get out.
- If your fillets are uneven in thickness, tuck the thin end underneath slightly to give each piece a more consistent profile.
- Any leftover coating in the bowl can be poured around the fish in the dish. It forms a light pan sauce as it bakes.
- Skipping the pat-dry step. Moisture on the fish is the most common reason the coating does not adhere and the texture ends up steamed instead of baked.
- Overbaking. Halibut has very little fat, which means it dries out faster than salmon or tuna. Two extra minutes can take it from good to tough. Use a thermometer.
- Crowding the baking dish. Overlapping fillets trap steam and prevent even cooking. Leave space.
- Using too much lemon juice directly on the raw fish. Acid starts to break down the protein before it even hits the oven. A light squeeze is enough at this stage.
- Cooking from frozen. Frozen halibut needs to be fully thawed and dried before baking. Straight from frozen, the outside overcooks before the center catches up.
- Opening the oven repeatedly. Each time the door opens the temperature drops. Check once near the end of the cook time.
- Skipping the rest. Even 3 minutes makes a real difference in how the fish holds together on the plate.
- No halibut available: Cod, mahi mahi, sea bass, and grouper all bake well using the same method and timing.
- Mediterranean style: Add sliced cherry tomatoes, black olives, and an extra drizzle of olive oil on top before baking.
- Parmesan herb crust: Mix 2 tablespoons grated Parmesan with fine breadcrumbs and press gently onto the top of each fillet. Add 2 to 3 extra minutes to the bake time.
- No butter: Use only olive oil, or swap butter for ghee or avocado oil.
- Herb forward: Add fresh thyme and dill to the seasoning and leave out the paprika for a lighter, brighter result.
- Spicier version: Add a pinch of cayenne or a few shakes of hot sauce to the coating.
- Dairy free: Skip the butter and use 2.5 tablespoons of olive oil in its place.
- Steamed or roasted asparagus
- Garlic mashed potatoes or roasted baby potatoes
- Lemon rice or herbed couscous
- Simple green salad with a light vinaigrette
- Sauteed spinach or wilted greens with garlic
- Roasted cherry tomatoes
- Crusty bread to soak up the pan drippings
- Cauliflower rice for a lower carb plate
- Refrigerator: Store in an airtight container for up to 2 days.
- Freezer: Wrap each piece tightly in plastic wrap and place in a freezer-safe bag. Keeps for up to 1 month, though the texture will change slightly after thawing.
- Reheating in the oven: Place in a baking dish with a small splash of water or broth, cover with foil, and heat at 275 degrees F for 10 to 12 minutes. Low heat keeps it from drying out further.
- Reheating on the stovetop: Warm in a nonstick pan over low heat with a small amount of butter or oil, covered, for 3 to 4 minutes.
- Avoid the microwave if possible. It tends to make the texture rubbery.
- Leftover halibut works well flaked into fish tacos, stirred into pasta, or served cold over a grain salad.
Most fillets that are about 1 inch thick take 12 to 15 minutes at 400 degrees F. Thicker pieces may need a couple of extra minutes. Check with a thermometer rather than going strictly by time.
The fish will be fully opaque, flake easily when pressed with a fork, and read between 130 and 145 degrees F on an instant-read thermometer. At 130 degrees F the texture is moist and just set. At 145 degrees F it meets the USDA fully cooked standard.
No. Baking uncovered gives you a better surface texture. Covering the dish traps steam and can make the fish watery. If the top starts to look too brown before the center is done, a loose tent of foil in the last couple of minutes is fine.
Yes, but thaw it fully in the refrigerator overnight first. Then dry it very thoroughly before adding any seasoning. Baking from frozen does not work well because the outside overcooks before the center reaches temperature.
Halibut has a mild, slightly sweet flavor and a firm, flaky texture. It does not taste strongly of fish, which makes it a solid starting point for anyone who is newer to cooking or eating seafood.
You can coat the fillets and refrigerate them covered for up to a few hours before baking. Bake them right before you plan to eat for the best texture and flavor.
- Fresh halibut is most widely available from March through November. Wild-caught Pacific halibut tends to have a firmer texture than Atlantic halibut.
- If you can find MSC-certified halibut, it is worth choosing for both flavor and sustainability.
- Uneven fillets are common. If one end is much thinner than the other, fold or tuck it under slightly so the piece has a more consistent thickness.
- Kosher salt works better here than table salt. It sticks to the surface without drawing out too much moisture.
- Any leftover coating in the bowl can be poured directly into the baking dish around the fish. As it bakes it creates a simple pan sauce you can spoon over the fish at the table.
- Zest the lemon first, then juice it. Once juiced, there is almost nothing left to zest.
Halibut is one of those fish that rewards you for keeping it simple. The less you do to it, the more it delivers. A well-seasoned coating, a hot oven, and a thermometer get you a dinner that tastes far more involved than the effort required. Once you have made this baked halibut recipe a couple of times, the timing starts to feel instinctive. You will stop second-guessing whether it is done and start trusting the cues. That is when weeknight fish dinners stop feeling like a gamble and start being something you actually look forward to making. If you are new to cooking fish, halibut is an ideal place to begin. If you already cook fish regularly, this will likely become the version you come back to most.